Leaderboard


Popular Content
Showing content with the highest reputation since 10/22/2009 in Posts
-
Adrian is finalising the case design, hopefully he doesn't mind me teasing a few pics. Note that these are not final and will probably change. Concept, shown as the left-handed design. The PCBs will work both ways, but you have to choose a left- or right-handed front panel. This one has too-high caps around the wheel. Originally the wheel PCB was mounted at a different height, but now everything mounts on a (very clever) interior shelf. Only one sort of round cap required. Many things will change: circular holes for the MIDI DINs, different knob choice, maybe coloured windows. The IO can be mounted either at the back or bottom. This means the unit can be either desktop or 19" mount :). More info as I receive it.9 points
-
We're just about ready for launch of the new SEQ v4+. This thread serves as a proper introduction, you can also ask questions on hardware etc. I first became aware of the SEQ around 2008. This was about the time of the migration point of V3 to V4 and the Wilba design. I finally got my hands on a Wilba front panel in 2012 and I was rocking the hardware soon after. Around the end of 2016 I felt there was room for improvement. a number of my TL1100 buttons were failing on my unit there was still no "standard" case available, also the rear panel was not well defined the PCB supply situation was (IMO) non-transparent and confusing for new users I had ideas about hardware changes What started as a simple question morphed into a multi-page idea thread. It was clear that the idea of incorporating a 16x4 matrix was not feasible from a software perspective, but it at least catalysed the idea towards a flexible "selection row" and other handy features. i liked the idea of mechanical keyswitches for their quality and very reasonable price. I then worked on a concept of illuminating these, finally settling on a misused superflux LED through a Matias switch. It became clear that a "complete solution" would require redesign of all of the boards, so I spent the winter of '16/'17 doing that. This entailed sourcing hardware items such as high-quality OLED displays, Matias switches and keycaps, a new Core breakout board etc. I periodically checked in with @TK. to confirm the right direction for the hardware (matrix routing and button features). Without saying, the SEQ platform is an incredible piece of work and TK. deserves a lot of credit and praise. From the start, I was in contact with @AdrianH about potential case designs. He has taken all board outlines and done the CAD work himself. I think you will find the case an excellent solution to cramming a lot of hardware inside while keeping the panels clean. Peter @Hawkeye is the co-partner of MIDIphy. He handles the business side and also webdev. Perhaps more importantly, he is a very enthusiastic builder and documenter of all the designs. Normally I will do a test version, but the product photos and demos are usually his. I have spent endless hours discussing and debating/reasoning with him and there is always a positive and fruitful outcome. Hats off to you! So: thanks for all of your interest so far. The aim is to provide you the best opportunity to build your very own SEQ. Andy --- Video Build Tutorials --- --- MIDIbox NG Downloads (for testing) --- SEQ_L.NGC fluxtest.ngr8 points
-
The MBSEQv4 beginner's guide is now up on the wiki with some images. I've used EsotericLabs' eps files (based on Wilba's design) for frontpanel overview images, I hope it's ok. In principle the guide is exportable as pdf and printable (there's a button on the right), though at the moment certain "table like things" don't get rendered correctly. I might replace the "tables" with images to take care of the problem. If you want to add sections and correct stuff, go ahead, that's the wiki way :-) The path to the guide from the wiki front page: MIDIbox Projects -> MIDIbox SEQ V4 -> MBSEQv4 Beginner's Guide http://wiki.midibox.org/doku.php?id=mididocs:seq:beginners_guide:start8 points
-
The second chapter of the user manual draft. The relevant section of the table of contents is: 2. Basic settings 2.1. Track EVENT 2.1.1. Track types 2.1.1.1. Note tracks 2.1.1.2. Chord tracks 2.1.1.3. CC tracks 2.1.2. Port 2.1.3. MIDI Channel 2.1.4. Track Event and Track Instrument 2.1.5. Setting parameter layer functions 2.2. Track LENGTH 2.3. Track DIVIDER and tempo 2.3.1. Tempo 2.3.2. Divider Drum tracks are left out of the Track types because they have their own separate section later. The information on predefined chords for the chord layer is probably going to change before this manual is finished, but I'll change them at some point before that and when it's official. It can be argued whether messing around with the divider is "basic" settings or whether it should rather be included in the advanced features section, but at the moment it's included here as it was originally one of the more difficult concepts that I first started writing about. As before, the "Example" paragraphs are unchecked at the moment, and have to be rewritten for consistency later. The feedback I'm interested in at the moment is whether the text is 1) accurate, and 2) understandable. A question for TK (or others with the information). Below, I write about importing presets: "On the left LCD, you can recall saved presets. Selecting one of them brings up a menu where you can delimit which track data you want to import. Name and Chn. are self-explainatory, Maps means mixer maps (see section 6.5.), Cfg. means ***check, and finally Steps means trigger layer and parameter layer data." What exactly are the configurations that can be imported this way? And does importing Steps mean trigger layer and parameter layer data, and nothing else? -----------------------------8<-------------------------- ----------------- 2. Basic settings ----------------- 2.1. Track EVENT ---------------- The track EVENT page is the central page for track settings. In a new session, each track will have some default settings, but it's likely that you will have to change them to match your setup. Changing the track type settings on the EVENT page require you to *initialise* the track for the changes to take effect. The sequencer will tell you when this is needed by displaying a message in the right LCD. A track is initialised by pressing GPB16 ('INIT') on the EVENT page for a few seconds. Initialising the track erases all data in the track's parameter and trigger layers and replaces them with default initialisation values for the chosen track type. Initialisation won't affect Port, MIDI channel, and Program Change command (on the Track Instrument page), but all other settings such as length, divider value, name etc. are reset to default values. By default, initialisation switches the gates 'on' for each fourth step. On the options menu (UTILITY -> Opt. -> Option #11) you can disable the gates, so that initialisation inserts no notes in the track. Initialisation works for only one track at a time, even if you have several tracks selected. Only the track that's being displayed on the LCDs will get initialised. Example: Let's suppose for the moment that you're only interested in the first two tracks in group 1 (i.e. G1T1 and G1T2). At the very least you need to set their type, length, port and MIDI channel. These settings are made on the EVENT page (MENU + EVENT). The following settings should be made for G1T1 and G1T2: – Track type should be "Note" – Maximum length should be 128 steps – Port should be "Def." (or "OUT1") – the MIDI channel should be whatever your synth is listening to (you must know the right channel yourself) The port (that's where your synth is physically connected to) is going to be the same for both tracks in this example, but it still has to be set separately for each track. As to the MIDI channel, the simplest solution is that you set both tracks to the same channel, so they're both playing the same (polyphonic) synth, and this is what is going to be done here. If you have a multitimbral synth, you could use G1T1 to play a lead sound on one synth and G1T2 to play a bass sound on another, but it's ok if both tracks are playing the same sound (as long as your synth is polyphonic). If your synth is monophonic, you will have to apply the following according to your best judgement, because it's written for, and has been tested with, a polyphonic synthesizer. For the tutorial, you need a track that is of the type "Note" and 128 steps long, so on the EVENT page, turn GPK2–4 until the type is "Note" and "Steps" is 128. This will automatically set the correct layer numbers as well. Initialise the track by pressing GPB16 for a few seconds. Next, select the correct port and MIDI channel. Use the GP knobs to set Port to "Def." and Chn. to whatever channel your synth is listening to (you will have to know yourself what the right channel for your equipment is). Then push track selection button #2 to select G1T2. You will notice that you stay in the same menu page (the EVENT page), but the information you see now pertains to track G1T2. Make the same Type, Steps/Layers, Port and MIDI channel selections for G1T2 as you did for G1T1, and initialise the track. 2.1.1. Track types On the MBSEQv4, track selection possibilities are organised into several predefined options based on track type, length (number of steps), number of parameter layers, and number of trigger layers (the options are listed below). Changing the track type allows you to select different kinds of track presets that best suit your purposes. The track types are Note, Chord, CC and Drum, and each of these types has subtypes based on a combination of maximum track length, number of parameter layers and number of trigger layers. (For the difference between parameter layers and trigger layers, see sections 3.1. and 3.2.) Because of memory limitations it's not possible to have the longest possible track (256 steps) with the maximum number of parameter and trigger layers (16 and 8 respectively), so each subtype is a compromise within the overall limitations. Note, Chord and CC tracks always have 8 trigger layers, so in effect the track has to be balanced between maximum length and the number of parameter layers. Drum tracks are somewhat different from the other types, so they are dealt with separately. (See section 3.3.). [chart of track types and lengths] When changing track type, the track needs to be *initialised* for the changes to take effect. Press GPB16 for a few seconds to initialise the track. Initialisation erases all data on the track's layers! Note that even though initialising a track to the selected preset fixes the number of parameter layers, you can freely change what *kind* of parameter layers you have. The difference between Note, Chord and CC type tracks is just in what the *default* parameter layer functions are; a CC type track contains only CC parameter layers, while Note type tracks contain none of them, but nothing stops you from from changing the parameter layer functions to whatever you like after initialisation (naturally within the maximum overall number set at initialisation). Only drum type tracks are different in this respect. (See section 3.3.) Indeed, you will have access to many parameter layer functions (like Pitch, Delay and Probability) only this way, as they won't be available in any of the presets. On the EVENT page, use GPK9 to choose which parameter layer you want to edit (from A to H), then turn GPK10 to set which function you want to control with that parameter layer. You need to confirm the change of function by pressing GPB10. 2.1.1.1. Note tracks In a default session, all tracks are of the same type: they are Note tracks that are 256 steps long and have four parameter layers. This kind of Note type tracks have one velocity layer (parameter layer B), one length layer (parameter layer C, for note length, not track length!), one roll layer (parameter layer D), and at least one note layer (parameter layer A). If you initialise a shorter Note track, you just get more note layers (parameter layer E and onwards); if you want other kinds of parameter layers, you have to set them manually on the EVENT page (see section 2.1.1.). Maximum length of 128 steps gives you four extra note parameter layers compared to the default, allowing you to enter up to five note chords, and should already be enough for most purposes. The setting Sustain on the MODE page is good to keep in mind when setting up a track to play chords or long single notes. Sustain holds each note/chord until another one is played, and this spares you the trouble of having to set the length of each individual note/chord. 2.1.1.2. Chord tracks Chord tracks are set up length and layer wise just like note tracks. However, in a chord track parameter layer A is a chord layer instead of a note layer. The chord layer doesn't take normal notes as input, but instead a value from A-P to a-p (plus octave value from 0 to 3), each of which represents a pre-defined chord. The list of the predefined chords is found below. The advantage of this to using several note layers on a note type track to play chords is that you can have the chord data on a single layer, even if the chords are made up of 4 notes. Because you only need a single parameter layer for chords, you can increase your track's maximum length to 256 steps. A disadvantage is that the value names don't make musical sense, though the names of the chords do appear on the right LCD (top row). A bigger disadvantage is that in order to play chords with different root notes (and not just different chords of the same root note, like C major, Cm, Csus4 etc.), you need to set up a loopback track to transpose each chord. (See section 6.1.) List of predefined chords A-C: Major I, Major II, Major III (transposed variants) D-F: Root note, 3rd note, 5th note (single notes) G,H: Root+3rd, Root+5th I-N: Maj6, Maj7, Maj8, Maj9, Maj10, Maj12 (4-note chords) O,P: Sus4 and Maj+ a-c: Minor I, Minor II, Minor III (transposed variants) d-f: Root note, 3rdMin note, 5th note (single notes) g,h: Root+3ndMin, Root+5th i-n: Min6, Min7, Min8, Min9, Min10, Min12 (4-note chords) o-p: Co7 and Min+ If the length of a chord track allows for more than 4 parameter layers, by default all the extra ones will be note layers. However, it is not really possible to play chords and melodies simultaneously on the same track, because each parameter layer shares the one and only gate trigger for that track. Thus you cannot trigger individual gates for the notes of the melody in a note layer, while leaving the gate untriggered for the chord layer at the same time. If you go to Layer View (press & hold EDIT + GPB3), you can insert notes in the note layers by turning a knob, but it's only feasible in the same steps where there is already a chord and where the gate is already on. The setting Sustain on the MODE page is good to keep in mind when setting up a track to play chords (whether transposed or not). Sustain holds each note/chord until another one is played, and this spares you the trouble of having to set the length of each individual note/chord. Given the disadvantages of the chord track, for the beginner it is easier to just initialise a note type track with four or more note layers (maximum length 128 steps or less), and record the required chords there as several simultaneous notes. (For recording, see section 4.) 2.1.1.3. CC tracks CC tracks allow you to send Control Change messages to your MIDI equipment. By default, all parameter layers of a CC type track are CC layers that do the same thing, i.e. send a CC message. By default, each newly initialised CC layer is off. On the EVENT page you can switch them 'on' and set which CC number each layer is sending. Use GPK9 to choose a CC layer and GPK11–13 to choose which CC number that layer sends. Confirm your selection by pressing GPB10. Example: For example, if you want the first CC parameter layer (layer A) of your newly initialised CC track to send modulation wheel messages, select layer A with GPK9. Then turn GPK11–13 all the way to the left to choose CC number 001, and then confirm the selection with GPB11–13. Then go back to the EDIT page and choose the CC layer you just set up (press parameter layer selection button A). You can see your CC number selection on the top row of both LCDs: "PA:#001" (instead of PA:COff) on the left, and "CC# 1" (instead of "CC#off") on the right. Now you can use the knobs to enter a CC value for each step, simulating the position of the modulation wheel at that step. Note that you don't necessarily have to have an independent CC track to send CC messages. Instead you can change one of the note layers on a "normal" note type track into a CC parameter layer on the EVENT page. 2.1.2. Port Port value on the EVENT page defines which physical port the track's data is sent to when the sequencer is running. The default value is "Def.", which means the track gets its port value from another page. To get to that page, press MENU + MIDI and select Midi Router on the left LCD. The right display will now show the default port on the right edge. Example: For the examples in this manual, the default port on the MIDI Router page should be OUT1. Back on the EVENT page, in addition to the Def. (or OUT1) port options, there are several others, the (real) availability of which depends on the hardware choices made when your sequencer was put together. However, if you scroll to the end of the value list, you will find values Bus1–4. These are *virtual* outputs that can be routed *inside* the sequencer, so that one track of the sequencer sends its data on, say, Bus2, which is listened to by another track. (See section 6.1. for details.) 2.1.3. MIDI Channel MIDI Channel (Chn.) defines the MIDI channel on which the track's data is sent. Naturally you want to match this with the MIDI channel(s) of your synth(s). The options are straightforward: channels 1–16. If Port is set to one of the Buses, MIDI channel setting has no effect. 2.1.4 Track Event and Track Instrument While on the EVENT page, you can switch between two pages by pressing GPB8: Track Event, which is the default when entering the EVENT page, and Track Instrument. On the Track Instrument page, the port and channel settings will be the same as on the Track Event page (and will be automatically copied between the pages), but in addition you can set a Program Change command and name for the track so that you remember better which synth and what kind of line the track is playing, for example. Example: When you've reached a point where you have many songs saved on the sequencer, it would be awkward to dial in the right synth patches by hand on every synth whenever you change to another session, so it's super handy that you can use this page to set program change messages to switch to those patches automatically, when you press PLAY and start the sequencer. The Program Change command is saved with the track when you save a pattern, so when you chain patterns into a song, the Program Change command can be used to change the patch on the synthesizer that is listening to that track at the same time as the pattern is changed. Note that smooth live functioning of this feature depends on how quickly your synths can load new patches. If you press GPB9 on the Track Instrument page, you go to the Edit Name page. Naming the track has two components. The first component of the name is a *category* like lead, bass, pad, FX, drums, keys, synth, or whatever you can fit into 5 letters. The second component is a more detailed name for the actual sound/patch/whatever that is played on that track. Example: For example, the tracks could be named with the categories Lead (tracks 1–4), Keys (tracks 5–8), Bass (9–12) and Drums (13–16). As to the second component, they could be named them after the synths that are played by that channel, including the MIDI channel that track is sending on, and let the Program Change messages take care of the patch change (many synths snow the patch names on their diplays). Punching in the letters works the same way as writing an SMS on a mobile phone. For example, one of the tracks could be called "Lead – Synth So-and-so ch6", and this information would be visible when you're on the EDIT page (left LCD, top row). It is handy to have the MIDI channel there too, because the track numbers don't necessary match the MIDI channels they are sending on (it depends on your setup). It's not necessary to name the tracks at all, though. If you don't, you will just see "[Port] [MIDI channel]" as the name, and "NoCat" as the category. Back on the Track Event page there is finally 'PRESETS', which can be used to save and load content and settings for tracks. Presets are not session dependent, so this is a way to move tracks and track settings between sessions. (This is especially useful for drum tracks, if you've changed the default name and note settings for all 16 drum instruments.) Another way is to prepare and save a "basic" session with common/standardised settings, and then every time you want to start a new session, you can open the basic session and save it under a new name. Presets can be saved on the right LCD by pressing GPB14–15 ('PRESETS'), then GPB11-12 ('SAVE AS NEW PRESET') and then giving it a descriptive 8-character name. On the left LCD, you can recall saved presets. Selecting one of them brings up a menu where you can delimit which track data you want to import. Name and Chn. are self-explainatory, Maps means mixer maps (see section 6.5.), Cfg. means ***check, and finally Steps means trigger layer and parameter layer data. 2.1.5. Setting parameter layer functions Finally, the EVENT page allows you to customise your parameter layers. Use GPK9 to select the layer and GPK10 to select the function for this layer. The default sessions has four parameter layers, and by default parameter layer A controls notes, layer B controls note velocity, layer C controls gate length, and layer D controls roll. (For parameter layer functions, see section 3.2.) You can set these functions to any of the available options, if you don't like the defaults. 2.2. Track LENGTH ----------------- The maximum length of a track is determined when the track is initialised, and cannot be changed unless you reinitialise the track. However, it is possible to make the track play *shorter* than the maximum length. This can be done on the LENGTH page. Turn GPK2–3 to set the length, or alternatively you can press GPB9-16 to quick-select a common length. Unless otherwise specified, all 16 tracks in the four active patterns will run independently of each other, sharing only the tempo. Different track lengths mean thus that eventually the tracks will end and restart at different times, and the effect is cumulative: a track that is four steps shorter than the others will restart four steps before the others, and on the next round, 8 steps before the others etc. For more on this topic, see sections 2.3. (Track DIVIDER and Tempo), 5.2. (Phrase mode and song mode), and 5.4. (Measure) with its subsections. Example: Select G1T1 and go to the LENGTH page. Set the length of the track to 16 (so the display will show 16/128), then select G1T2, and set the length to 8 (so that the display will show 8/128). Now you have two tracks that are of different length. Select G1T1 and press EDIT. Track initialisation has entered some notes in the track which are not wanted, so press CLEAR to get rid of them. Punch in some notes with the GP buttons under the displays. I propose that for the first track you punch in every other button, i.e. steps 1, 3, 5, 7, 9, 11, 13 and 15. Each GP button press will produce the note C-3, and if you press again, you can delete it. Let's leave the notes there for now, though, so press a GP button for another time if you deleted any notes. Next, select G1T2, CLEAR the track and punch in the notes as with the first track, but then use the GP knobs under the notes to adjust the value of each note so that the first two become E-3, the next two become G-3, and the four last ones become G-2. Remember that the second track is only 8 steps long. If you punched in the notes on the right LCD as well (like you did with G1T1), it does no harm, but they will not get played unless the track length is set to 16 steps. However, let's keep the track length at 8 for the purposes of this demonstration, and despite the shortened length, let's keep the notes on the right LCD. Everything should now be ready. Press PLAY on the front panel to start the sequencer. If you still have G1T2 selected, you will see a red indicator LED running from left to right. It will go up to the eighth step and then start again from the first. Now select G1T1 (while the sequencer is still running), and you will see how the red cursor is running all the way up to step 16, and then starts from the beginning. Try turning one of the GP knobs to change one note one up or down on each track. You can also press MENU + LENGTH while the sequencer is playing and use the quick select buttons on the right display to change the length of a track live. You can change the length with the knobs as well, but there you'll run a higher risk of making the tracks go out of sync. If this happens, you can always stop the sequencer and hit PLAY again. The idea of this was to demonstrate in a concrete way that the tracks are running independently of each other, even if they are within the same pattern. You could press STOP, change G1T1's length to some strange value like 11, press PLAY again, and each track would run its length and then wrap back to the start, regardless of where the other track is going. 2.3. Track DIVIDER and tempo ----------------------------- 2.3.1. Tempo Even though by default the tracks are running independently of each other, they share the same tempo for reference. This can be set by pressing MENU + BPM. The BPM (beats per minute) setting can be adjusted with GPK3 and GPK4, or alternatively with Tap Tempo by pressing GPB16 five times in a row. Alternatively, pressing & holding MENU and pressing PLAY five time can be used for the same purpose. In both cases, the fifth press will also start the sequencer. Toggling on FAST (left side, bottom row on the frontpanel) you can change how the GP knobs for adjusting BPM behave. An LED on the front panel, above the datawheel, will flash every quarter note. 2.3.2. Divider You can make your track(s) run faster or slower in relation to the others by changing the divider/timebase value. If you want *all* of your tracks to run faster or slower, it makes better sense to just change the tempo (MENU + BPM), but if you need only a few individual tracks to run faster or slower than the rest, then changing the divider/timebase value for those tracks is a good idea. The DIVIDER page offers two ways to change the divider value: either by changing it directly with GPK2 (and GPK3 for normal/triplet), or by quick-selecting a common timebase value with GP button. The former allows for great precision, but the latter makes more human sense and is probably the more useful option for most situations. Normally you would use timebase 16 (divider value 16), which in simple terms means that when you're on the EDIT page, every step on the two displays (8 steps per display = 16 steps altogether) represents a 16th note, allowing for four note events per quarter note. If, on the DIVIDER page, you select timebase 8 (divider value 32), each of the 16 steps on the EDIT page now represents an 8th note, allowing for two note events per quarter note. Timewise, the track lasts twice as many seconds as before, but what is gained in duration is lost in resolution (possible events per quarter note). In the same vein, quick-selecting timebase 4 (divider value 64) means that each step represents a quarter note, and so on. The divider value can be set to normal or triplet (in the quick select menu triplet is denoted with a T). Triplet option can be used to effect "triplet timing" for that track, but in that case you might want to have the track set to "sync to measure". (See section 5.4.) Of course, you can realise triplet timing with the "normal" divider setting as well and without "sync to measure", provided that the resolution of the track is enough to allow the adequate placement of notes. If you change the timebase value while the sequencer is running, you risk the track becoming out of sync with the others unless you're right on the beat. This is even more true of changing the divider value *directly* with GPK2, as by default the tracks won't sync automatically when you've reached the right divider value. For ways to fix this asynchrony, apart from simply stopping the sequencer and then pressing PLAY again, see section 5.4. on Measure. It is probably a good idea to limit divider/timebase changes to a limited number of tracks, otherwise you won't remember which ones were playing a custom timebase (and which custom one). Example: Two cases where changing the divider/timebase value is useful are 1) fast melody tracks and 2) slow chord tracks. You might have a lead track where the default 16th notes are not enough for the melodies you want. If the other tracks are 64 steps long and their timebase is the default 16 (divider value 16), you could set the lead track to 128 steps, running at timebase 32 (divider value 8). This way the longer track would reach its end at the same time as the other tracks, but you could effectively write your melody with 32th notes. If you need 64th notes, quick select options have run out and you have to use GPK2 to change the divider value to 4. You'd get 128th notes with divider value 2, and 256th notes with value 1. Slow divider settings, on the other hand, are useful e.g. for tracks which play chords that don't change very often. For example, if your "chord track" is 64 steps long, you could set its timebase to 4, i.e. four times as slow, and fit all your chord changes in the two displays on the EDIT page. This way you can see the relevant note information easily, without the need to scroll back and forth around the track. Example: Set G1T1 and G1T2 dividers to timebase 16, and press PLAY. If you switch between G1T1 and G1T2 with the track selection buttons, you will see they are running at equal speed. (It's good to be on the EDIT page for the best demonstration of this.) STOP the sequencer and select G1T2, then go to the DIVIDER page and quick-select timebase 32 (divider value 8) by pressing GPB16. Press PLAY. You can see the red cursor running twice as fast as before for G1T2, and playing the notes twice as fast. Each step on the EDIT page for G1T1 now represents a 32th note, and G1T1, which has 16 steps, will now run from start to end as quickly as G1T2, which is only 8 steps that represent 16th notes. If you want the tracks to last equally long and end at the same time, you will have to double G1T2's length (or halve it for G1T2). Now let's make G1T2 run twice as slow compared to the original speed. You can change the timebase when the sequencer is playing, but unless you're right on the beat, the tracks will go off beat (and even more certainly with changing the divider value live with a knob). So, press STOP and change G1T2's timebase to 8 (divider value 32). Press EDIT and PLAY again, and you can see how the cursor is running slower, and the notes are playing slower.7 points
-
I've finally made my first smd following the wilba guide.. after years of stop soldering.. i'm proud :) But how do you clean the no-clean paste flux in excess? G.6 points
-
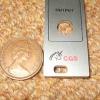
Necro bump, here are some more hi-res pictures, as the ones over at MI forum are just thumbnails.5 points
-
I'm interested,... but the LED window is way to small for me. So I don't think this is an option for me, although I understand the feeling about the shining through the neighbour knobs. Last weekend I did my first gig with the sequencer, There was a lot of smoke, lasers and other flashing lights and I totally loved the big coloured buttons, it felt very sturdy/secure! So obvious what you are doing :)...5 points
-
Ok, like I mentioned in passing over there on the MBSEQ forum, I've been writing a beginner's user manual for the MBSEQv4 (firmware 4.090) since last December. This is the second draft and I'm perhaps halfway through, so it's looking alright. I'm not planning on touching every function and detail in it, as I don't even use all the functions myself that actively, and some – like the button-LED matrix – not at all, so I couldn't write anything about them even if I wanted to. The original idea was to make a pdf layout of all this with a few images thrown in to clarify some of the concepts and functions, i.e. something you can print and keep next to your workbench for reference away from the computer, and I still think I'm going to do that. The layout job is going to be child's play compared to the work of writing the text and trying to check that everything I write is accurate and that I've understood everything myself :-) I'm not going to dump the whole text here at once, so here's just the table of contents, 0. Introduction, and 1. The basics. If someone has the time to read this through, great, and even greater if someone has the time to comment and/or try out whether what I'm written actually holds any water. Or if something should be added, or if something doesn't make sense the way it's written. All I ask at this point is that this not be copied anywhere (like the wiki) yet, as it's not really finished. For example, almost all the paragraphs beginning with "Example:" have to be rewritten completely so that they're consistent all the way through, now I've just left them there as place holders. However, once the whole thing is finished, anybody can do anything they like with it :-) The information here is mostly based on the "official" user manual, the wiki entries (I think they're mostly Borfo's) and my own experiences. Maybe I'll post the next part in a week's time or so. ============================================ | | | Midibox SEQv4 user manual for the basics | | for firmware version 4.090 | | | ============================================ Table of contents ----------------- 0. Introduction 1. The basics 1.1. User interface 1.2. Basic concepts 1.2.1. Groups, tracks and patterns 2. Basic settings 2.1. Track EVENT 2.1.1. Track types 2.1.1.1. Note tracks 2.1.1.2. Chord tracks 2.1.1.3. CC tracks 2.1.2. Port 2.1.3. MIDI Channel 2.1.4. Track Event and Track Instrument 2.1.5. Setting parameter layer functions 2.2. Track LENGTH 2.3. Track DIVIDER and tempo 2.3.1. Tempo 2.3.2. Divider 3. Trigger layers and parameter layers 3.1 Trigger layers 3.1.1. Gate 3.1.2. Accent 3.1.3. Roll 3.1.4. Glide 3.1.6. Random gate (R.G.) 3.1.7. Random value (R.V.) 3.1.8. No FX 3.1.9. Roll gate (RollG)***check 3.2 Parameter layers 3.2.1. Note 3.2.2. Velocity 3.2.3. Length 3.2.4. Roll and Roll2 3.2.5. Chord 3.2.6. Control Change (CC) 3.2.7. Pitch 3.2.8. Probability (Prob) 3.2.9. Delay 3.2.10. Nth1 and Nth2 3.3. Drum tracks 3.3.1. Drum track instrument layers 3.3.2. Drum track trigger layers 3.3.3. Drum track parameter layers 4. Entering notes 4.1. The Jam page 4.1.2. Step recording 4.1.3. Live recording 4.1.4. Edit recording mode 4.2. Working on the EDIT page 4.2.1. Copy, paste, duplicate 4.2.2. Clear, Move, scroll, undo 5. Working with patterns and songs 5.1. Saving a pattern 5.2. Phrase Mode and Song Mode 5.2.1. PATTERN page 5.2.2. Chaining patterns into a song 5.3. Copying Patterns 5.4. Measure 5.4.1. Sync to Measure in phrase mode 5.4.2. Sync to Measure in song mode 5.5. Guide Track 6. Some advanced features 6.1 Using a bus to control a track 6.1.1. Setting up sending and receiving tracks 6.1.2. Receiving track mode: Transposer 6.1.3. Receiving track mode: Arpeggiator 6.2. Force to Scale 6.3. Random generator***completely unwritten 6.4. Euclidean rhythm generator***completely unwritten 6.5. Mixer maps***completely unwritten Appendix 1. Customising function buttons 1–4.***completely unwritten --------------- 0. Introduction --------------- This user manual is intended to cover the basic operation of the MBSEQv4. It does not include instructions on how to make the most out of all the features of the sequencer, or what each of the options on every menu page means, but I believe it does give a good overview for the new user. Most of this manual is based on what can already be found on the ucapps.de website's MBSEQv4 section, and it's not intended to replace that. But I believe this manual will nevertheless be of value for new users who are not looking for information on some particular detail, but instead would prefer to have an *overview* of the basics, organised in the manner of a printed manual which you can take to your synthesizer workbench in the other room – you have a hardware sequencer so that you can get away from the computer, at least for a moment, right? :-) What this manual does *not* cover, however, is building the unit, the control surface, where to get the parts etc. It is intended to be useful when you have a completed and working unit at your disposal, preferably with Wilba's front panel design. Also, this manual is based on the premise that you have a MIDI controller connected to the sequencer's MIDI IN1 and a polyphonic synthesizer (mono- or multitimbral) connected to MIDI OUT1 of the sequencer. If you don't, I believe the manual will still be useful, but you'll have to find out yourself where you need to do things differently. ----------------- 1. The basics ----------------- Before starting with the basics, it's useful to create a new session so that you're be able to explore the sequencer's functions in practice. After switching the sequencer on, press EXIT until you reach the top menu, where you can choose options like Open and New on the right LCD. Choose 'New', and then wait until the sequencer has created the session. The default new session has sixteen tracks that are almost similar. - All tracks are Note tracks - Track length is 16/256 steps - Timebase setting is 16 Only the MIDI channel setting is different, each track having its own MIDI channel (1-16) on which the track is sending data. 1.1. User interface ----------------------- The physical user interface consists of buttons, indicator leds, two LCD displays, and 17 knobs. In this manual the buttons are referred to with their names in ALL CAPS, i.e. MENU means the menu button, STEP VIEW mean the step view button etc. The sixteen numbered buttons immediately below the LCDs and knobs are referred to either with their button names (LENGTH, DIVIDER, FX etc.) if they are used together with the MENU button; or if they are used without the MENU button, they are called general purpose buttons, or GPBs for short (usually with a number, e.g. GPB7 for the 7th GPB). Likewise, the knobs are called general purpose knobs, or GPK for short (also with numbers) with the exception of the big knob in the middle of the panel, which is called the datawheel. The displays are called the left LCD and right LCD. The unit should have at least one physical MIDI IN and one physical MIDI OUT port, and that's taken for granted in this manual. These will be called MIDI IN1 and MIDI OUT1, or just IN1 and OUT1. Any menu can be reached by pressing EXIT (once or a few times, depending on where you are) to get to the top menu, then using the datawheel to browse the options on the left LCD and finally pressing a GPB to select the menu you need. But with Wilba's frontpanel layout most menus are only one or two button presses away. Some menus/functions have their own dedicated button, while many others can be summoned by pressing MENU together with one of the GP buttons. The MENU button, along with several others, can be configured in the HW setup file (see Appendix 1) to be momentary or toggle. You can choose whatever you prefer; the notation in the manual will be of the form MENU + [BUTTON_NAME]. Many buttons have indicator LEDs associated with them. These LEDs will tell you whether something (out of many possible options) is selected, or whether some mode or function is toggled 'on' or 'off'. The 16 LEDs directly below the knobs are step indicator LEDs which will tell you something of the state of the step. In addition, when the sequencer is running you will see a red cursor LED indicating which step is being played and how fast the progression from one step to another will be. Above the datawheel, there is a tempo LED, blinking quarter notes. On the left side of the front panel there's two groups of buttons which deserve special mention. The eight buttons on the top left are the *group and track selection buttons*. The left column selects a group, the right column selects a track within the selected group. (More on groups and tracks in section 1.2.) The LEDs indicate which group and track is currently selected, though the information is often available on the LCDs as well. You can select multiple tracks within a group at once by pressing & holding one track selection button and then pressing the others one by one; press another time to deselect. Below the group and track buttons there are six more buttons for *layer selection*. The left column is used to select *trigger layers* of the selected track, and the right column is used to select *parameter layers* of the selected track. (More on layers in section 3.) In a new session, the trigger layer button A selects the gate trigger layer, button B selects the accent trigger layer and button C summons a menu or all the trigger layers, allowing you to choose the one you need with the GP buttons. You can have a maximum of 8 trigger layers, except on drum tracks, where the maximum is two. In a new session, parameter layer button A selects the note parameter layer, button B selects the velocity parameter layer, and button C alternates between length and roll parameter layers. Each of the default session's tracks has four parameter layers, but if your track has more than four parameter layers, button C summons a menu, allowing you to choose the layer you need with the GP buttons. You can have up to 16 parameter layers, except for drum tracks where the maximum is two. 1.2. Basic concepts ------------------- 1.2.1. Groups, tracks and patterns MBSEQv4 is organised into *groups*, *tracks* and *patterns*. There are four *groups* of tracks, and *each group has four tracks*, so all in all there is 16 tracks. Group 1 always holds the tracks 1–4, group 2 always holds the tracks 5–8 and, group 3 the tracks 9–12 and group 4 the tracks 13–16. In MBSEQv4 shorthand language, groups and tracks are referred to with the formula GxTx. For example, G1T3 means "Group 1, Track 3" (i.e., track 3 out of 16), and G3T4 means "Group 3, track 4" (i.e., track 12 out of 16). [image of patterns divided into tracks] Tracks contain the data – gates, accents, notes, note velocities, CCs etc. – that you've programmed in them and that is sent over to your MIDI equipment. The data is in *trigger layers* and *parameter layers*. (For details, see section 3.) In addition to the musical data, tracks also contain settings data. Defining the settings for each individual track is one of the most complicated operations a new user has to face, because of all the interconnections that are not immediately self-evident. The flipside is that track setup offers a lot of possibilities. Most of the time one track is selected and visible on the screen. This is the *active track*, the track that's ready for editing. You can always tell which track is selected by looking at the group and track selection LEDs (on the left of the frontpanel); most of the time the active track is also named on the left edge of the left LCD (G1T1, G2T4 etc.). By selecting several tracks simultaneously (with the track selection buttons) you can also edit several tracks simultaneously, e.g. to set their length. In this case the selected track on the left LCD will be of the form GxTM, where 'M' stands for 'multiple'. It is not possible to selected multiple groups simultaneously. *A pattern* is a collection of musical and other *data on four tracks*. Each group always has one *active pattern* in it. Because there are four groups, you will always have four simultaneous active patterns. (Whether or not all the active patterns have any practical data in them is another matter.) Groups and patterns overlap in the sense that a pattern in group 1 will always be made up of tracks 1–4, a pattern in group 4 will always be made up of tracks 13–16 etc. But the group is just an organisational concept, a receptacle, and the pattern is the content that fills it. The same pattern can be played in any of the groups, also simultaneously. Patterns can be chained to form *songs*. Songs are several patterns played one after the other. A maximum of four patterns can play in parallel (one in each group). It is not possible to put *individual tracks* one after the other; a pattern is made up of four tracks, and that is the smallest unit that can be chained. A totality of tracks, patterns, songs and settings (and a few other things like groove patterns and mixer maps) is called a *session*. One session can have a maximum of 256 different patterns (64 per group) and 64 different songs (i.e. different sequences of the patterns in the session). Example: It makes sense to organise your groups (and hence the four tracks they contain) around a principle. For example, group 1 could be for lead sounds, group 2 for keys and pads, group 3 for bass, and group 4 for drums. This way it is possible to just switch the pattern in group 1 if you want to have a different lead line while keeping the other groups playing the same patterns. If you had only four tracks in use (say, one for lead melody, one for a pad or arpeggio, one for bassline and one for drums), you could, in principle, put them all in one pattern in group 1. But if you then wanted to change just the lead melody, you couldn't change just the lead melody track, because tracks can be changed only in bundles of four; you would need to have a second pattern where the lead melody would be different and all the other tracks were the same as in the first pattern. However, if the whole group 1 is dedicated to lead melodies, you just need to add one track (the new lead melody) to a new pattern in group 1 (the group I've dedicated for lead melodies), and all the other patterns in the other groups could remain untouched. [kuva: song1: pattern1 – pattern2 – pattern3 tms.] However, this is just one way to organise things, and ultimately it's up to you to decide which setup makes the most sense to you. For example, maybe you will find it easier if everything you need *is* focused in one group.5 points
-
Here is mine :) Only heard about this project last week and now I'm the owner of this beautiful beast. Thanks Peter and Andy for all the help (me spamming you) in the last few days :)4 points
-
Got mine going -- many, many thanks to Michael Menze for building it.4 points
-
Here's another one! What a fun build. The engineering is incredible. Thanks to everyone involved!4 points
-
I finally installed the two OLED which were missed, it's clearly better than regular LCD. I made some wood sides too, in a very hard African wood which has blue veins , I stained in white("lasure" in french not sure of the English word). This is more white in the daylight, outside. Here the DXF file, A CNC is necessary. Yellow is internal cur at 5mm depth. Green is internal cut at 3mm depth. Red is external, depends on the desired thickness. White is holes. Blue is internal, let 2-3mm minimum it depends on your wood hardness, you can also increase it if you can find some longer screws. All is with a 3mm wood tool. https://www.cncfraises.fr/-carbures-2-dents-droites-queue-3-17/69-fc2dd317.html A raw pair, with a view of the internal milling. note: original white side plates must be removed. Best regards Bruno4 points
-
MidiBox 20 years Birthday what a run : ) Happy Birthday !4 points
-
Sorry for the lack of updates in the meantime. The last pieces of the puzzle are being worked on. Adrian has a tentative completion date of the end of April for case prototypes, so after testing these we will endeavour to keep our Spring target. :)4 points
-
Hi all, I'm finally finished my MB SEQ V4L V1 from 2011. Sorry for the poor quality. Next step for me: Learn to play Next step for my children: Raspberry PI Touchcreen extension Best regards Jack4 points
-
The fourth chapter of the draft manual. The relevant section of the table of contents is: 4. Entering notes 4.1. The Jam page 4.1.1. Rec and Fwd 4.1.2. Step recording 4.1.3. Live recording 4.1.4. Edit recording mode 4.2. Working on the EDIT page 4.2.1. Copy, paste, duplicate, quick-export 4.2.2. Clear, move, scroll, undo 4.2.3. Using FAST and ALL buttons This chapter includes recording, which was a complicated topic to get straight. I appreciate if someone has the time to test the step and live recording settings to see if they really hold water 100%. But if not, I'm sure there will be a feedback thread later on where everything fishy will float to the surface when people try to cut their teeth on friendly but mistaken advice :-) Notes for TK and others: In the newest official firmware at the moment of writing this (4.090) the Step/Live recording setting 'AStart' is not functioning correctly, and the draft manual has only some ideal description of how I have imagined it should work. The section will be updated in the final version. I write: "303 View shows a variety of settings". Does "303" refer to TB-303 bassline synth, MC-303 groovebox or something else? I write: "It is not possible to copy and paste individual parameter or trigger layers." Is this so? I write: "Multiple tracks within a single group can be selected with the track selection buttons, or any combination of tracks on the Track Selection page." Where is the track selection page? Can it be selected only with a F1–F4 buttons set for that in the HW setup file, or by setting it as a bookmark? I couldn't find it in the main menu. A possible bug: The Track Selection page demands that one track in Group 1 is always selected. If at any point all the tracks in Group 1 become unselected, it has the effect that all tracks in all groups get unselected, and track 1 gets selected. Option #8 says that it affects the paste and clear functions, but what does clear 'Complete Track' do that clear 'Only steps' doesn't do? In other words, how does Option #8 affect the clear function? Thoughts on the ALL button (press & hold ALL button = change all steps into the same value with just one knob): If ALL mode is 'on', pressing & holding switches it 'off', and pressing & holding works only if you start pressing & holding when the mode is 'off'. In other words, if the mode is 'on', you have to switch it 'off' before you can press & hold it for "all jump to the same value" adjustment. Question: Would it be possible/handy to effect a press & release threshold time for switching from 'on' state to 'off' state? E.g. so that by default pressing & holding the ALL button, while the mode is 'on', enables the ""all jump to same value" mode, and when you release, the ALL mode will stay 'on'; but if you release the button in 200ms (or whatever, i'm not sure what a good value would be) after pressing it down, it will switch to 'off' mode instead? Or maybe there are other ways that I didn't come to think of. It works ok as it is (and I can document it as it is), but it could perhaps be polished a bit :-) ----------------------------8<--------------------------------- ------------------- 4. Entering notes ------------------- There's a few ways to enter notes on the sequencer when you're on the EDIT page. The most simple option is to press a GP button to trigger Gate 'on' or 'off', and turn the knob below the step to adjust the note value. Default note is C-3, default velocity is 100, and default length 75%. This method is good only for single notes, because pressing a GP button only toggles the gate 'on' or 'off', and thus just "enables" the note value (and any other parameters) that happens to be stored in that step. By default there is one C-3 note in a single note layer in each step of a newly initialised note type track, but if you have recorded multiple notes in the step previously, then switching the gate 'on' will enable these multiple notes (and other events you have recorded in the step). For a drum track's instrument layers this method works best. However, this is not really "recording notes", rather it's just pushing a button to toggle the gate 'on' or 'off' for a step. The actual recording options and settings are available on the Jam page. 4.1 The Jam page ---------------- You can enter the Jam page by pressing UTILITY + GPB10 (Jam). However, as the Jam page is likely to be used quite often, it might be useful to set one of the four function buttons (F1-F4, on the right hand side of the frontpanel) to take you directly to the Jam page to make transitioning between EDIT and Jam pages as easy as possible. (For this you need to edit the HW setup file, see Appendix 1.) The Jam page consists of two stand-alone settings (Rec and Fwd) and five groups of settings: Step, Live, Pattern, MIDI, and Miscellaneous. The groups can be selected with GP buttons, the editable settings of the selected group appearing on the right LCD. In addition to Rec and Fwd, this manual deals with only Step and Live settings. 4.1.1. Rec and Fwd Rec (GPB2) sets recording mode 'on' or 'off'. Recording mode needs to be 'on' if you want to record notes with just pressing keys on your MIDI controller, i.e. without need to touch the sequencer's buttons or knobs. You can record notes also by two other ways when Rec is set 'off' (see section 4.1.4. for Edit recording mode), but in all cases recording notes takes its settings from the Jam page. Rec stays 'on' even if you leave the Jam page, and you can record notes regardless of which page you are on. However, you won't see what you record unless you're on the EDIT page or the Jam page. If you start recording while on the Jam page, the display will switch to the EDIT page (where 'STEP RECORDING' will flash on the left LCD) as long as you keep recording notes, but after a few seconds of inactivity you will be returned to the Jam page. A more convenient way is perhaps setting Rec 'on' and then going to the EDIT page (by pressing the EDIT button), where you can now take your time to record the notes you like, and scroll back and forth if needed, without having to worry about getting automatically returned to the Jam page. Recording works regardless of whether the sequencer is running or stopped. Most of the time recording makes practical sense only in Phrase mode, where patterns are not changing (for Phrase and Song mode, see section 5.2.). Fwd (GPB3) sets note forwarding 'on' or 'off'. If Fwd is 'on', it means that while recording notes, the notes are forwarded immediately to the Port and MIDI channel of the track (set in the EVENT page). If it's 'off', you won't hear the notes when you record them. Whether or not to keep Fwd on depends on your equipment and setup. Some MIDI Router settings (MENU + MIDI -> MIDI Router) can cause notes to become triggered twice per key press while recording. For a simple setup, however, setting Fwd 'on' is probably a good idea. 4.1.2. Step recording On the Jam page, press GPB4 to choose Step recording settings for editing. They appear in the right LCD. Mode can be set to either Poly or Mono. Mono allows you to record only one note at a time, and always in the first note layer, overwriting any notes that already were there, while Poly allows you to record as many notes simultaneously as you have note layers on the track you're recording on. (The number of available note layers depends on how you have set up the track; see section 2.1.1.) Both modes overwrite whatever was in the note, velocity and length layers for each recorded step. If a step had several note layers with notes in them (i.e. a chord) and you record a single note in that step (which always goes in the first note layer), all the other note layers are erased as well. In Mono mode you will have access to 'Inc' (increment) setting, which allows you to effect an automatic step increment after recording a note in a step. For example, Inc setting +2 means that after recording the first note (e.g. in step 1), the cursor will jump forward two steps (e.g. into step 3). This way you can spare yourself the trouble of adjusting the cursor position by hand, if you know that you want to record notes in a steady rhythm. Inc setting is not available for Poly mode, which means you have to adjust the cursor by hand. AStart controls whether or not to start the sequencer automatically when you press a key on your MIDI controller to record the first note. If the sequencer is already running, AStart setting makes no difference. Note that if the sequencer is not running and AStart is 'off', recording will always be step recording (and will use step recording settings from the Jam page), even if Live recording is selected on the Jam page. Step recording with AStart or the sequencer already running is not affected by the tempo, but only by the increment setting. ***currently AStart is not functioning correctly. Step setting indicates the cursor position on the EDIT page. The position can be changed on the EDIT page with the datawheel, and the cursor position is copied to the Jam page, but with Step (GPK11) you can change the cursor position while on the Jam page as well. Turning the knob takes you briefly to the EDIT page, and after a few seconds of inactivity you will be returned to the Jam page. Note that if you have AStart 'on', the first note will always be recorded in step 1, regardless of the cursor position, and all subsequent notes will be recorded at the running cursor position. You can step record CC messages the same way you can record notes. There are two alternative conditions: either the incoming CC message number has to have a dedicated CC parameter layer already, or there is a CC layer that is currently 'off'. For example, an incoming CC#001 will be recorded to the first CC layer where there already are CC#001 messages, or if there is no such layer, the CC#001 message will recorded into the first free CC layer. If there are no available CC layers, the incoming messages won't be recorded anywhere. Example: To try recording in practice you need a new pattern. Save what you have, then press PATTERN and choose 1:A3 for the pattern to be edited. Select G1T1, clear it, and use the LENGTH page to set its length to 16 steps. Check on the DIVIDER page that the Timebase is 16 (divider value 16). Also, make sure you are in Phrase mode. Go to the SONG page to check the setting, and if needed, change it so Phrase mode with GPK9***. (For Phrase and Song mode, see section 5.2.) Go to the Jam page and press GPB4 to choose Step Recording settings to be edited. Set Rec 'on', Mode to Mono, AStart 'off', Step to 1 and Inc. to +2. Then use your MIDI controller to enter whatever 8 notes come to mind. Or if you have a hard time making a choice, you can just press GPB16 (Toggle Gate), eight times and the sequencer will use the step recording settings to simply switch the gates of the proper steps to on, enabling the note, velocity and length data that was already there. You can perform this operation from the Jam page, which will show the EDIT page briefly while you're entering notes and switch back to the Jam page after a few seconds of inactivity. Or you can switch to the EDIT page manually, enter the notes there, and then come back to the Jam page manually. 4.1.3. Live recording On the Jam page, press GPB5 to choose Live recording settings for editing. They appear in the right LCD. Mode can be set to either Poly or Mono. Mono allows you to record only one note at a time, and always in the first note layer, overwriting any notes that already were there, while Poly allows you to record as many notes simultaneously as you have note layers on the track you're recording on. (The number of available note layers depends on how you have set up the track; see section 2.1.1.) Both modes overwrite whatever was in the note, velocity and length layers for each recorded step. If a step had several note layers with notes in them (i.e. a chord) and you record a single note in that step (which always goes in the first note layer), all the other note layers are erased as well. AStart controls whether or not to start the sequencer automatically when you press a key on your MIDI controller to record the first note. If the sequencer is already running, AStart setting makes no difference. Note that if the sequencer is not running and AStart is 'off', recording will always be step recording (and will use step recording settings from the Jam page), even if Live recording is selected on the Jam page. ***currently AStart is not functioning correctly. Note that if you have AStart 'on', the first note will always be recorded in step 1, regardless of the cursor position, and all subsequent notes will be recorded at the running cursor position. Quantize can be set from 0% to 99%, and it controls the tolerance with which "early" off-beat notes will be recorded in the *following* step, instead of in the step where they technically were played. The higher the value, the more likely it is that an "early" note will be recorded into the next step. ***image here Note that when note forwarding (Fwd) on the Jam page is 'on' and an "early" note is moved by the quantize function to the next step, the note will be triggered twice. When you press a key on your MIDI controller, the note is immediately forwarded to the port and MIDI channel for that track (because Fwd is 'on'), and sounds for the first time. Because it was a a bit early, it is moved "into the future", i.e. the next step, but the sequencer won't be there for another 0.2 seconds or so. However, when the sequencer does reach the next step, it will play the note that was moved there, the note that had sounded already a fraction of a second before. You can record CC messages live the same way you can record notes. There are two alternative conditions: either the incoming CC message number has to have a dedicated CC parameter layer already, or there is a CC layer that is currently 'off'. For example, an incoming CC#001 will be recorded to the first CC layer where there already are CC#001 messages, or if there is no such layer, the CC#001 message will be recorded into the first free CC layer. If there are no available CC layers, the incoming messages won't be recorded anywhere. Example: Let's say you want to record live a sequence where the notes come down on steps 1, 5, 9 and 13. If Quantize is set to 0% and during live recording you press the keys for the second and third notes just a bit too early, the sequencer shows no mercy and the notes will be recorded in steps 1, 4, 8 and 13, instead of step 1, 5, 9 and 13 like you wanted. (The first note will always be on time if you start live recording with the first key press.) Quantize allows you to "cheat" a bit, and by increasing the setting you can have these "a bit too early" notes recorded into the next step instead. The percentage controls the definition of "a bit too early". Select track G1T2 and press GPB5 to select live recording settings. Set Rec 'on', Mode to Mono, AStart 'off', and Quantize to whatever you prefer (e.g. 20%). Start the sequencer by pressing PLAY. If you now press a MIDI controller key at any time, the display will switch to EDIT view for a few seconds and show what you recorded and where. The sequencer will stay on the EDIT page if you keep pressing keys to record notes, but if you don't, the display will come back to Jam page. Another way to start live recording is switching AStart to 'on'. This way you don't have to press PLAY to start the sequencer, but instead the sequencer will be started automatically when you hit the first key you want to record (naturally Rec has to be 'on' as well). This way the first note will always be recorded into the first step. If you want to take your time, you may first want to set the live recording settings to your liking, switch to the EDIT page manually, and then hit the first key you want to record. This way the sequencer will stay on the EDIT page, which allows you to e.g. use the GP buttons to delete badly timed notes etc. (Naturally Rec and AStart have to be 'on'.) 4.1.4. Edit recording mode Besides Live and Step recording, there is one more way to enter notes while on the EDIT page: the Edit Recording mode. Edit Recording mode can be used in two ways. While on the EDIT page, you can press & hold a GP button, and the > < angle brackets will turn into { } curly brackets, the display will flash 'EDIT RECORDING', and you can enter a note or notes into the step while pressing & holding the GP button. Note that Edit Recording mode takes its settings (notably Mode and AStart) from the Jam page, so e.g. unless you have Poly mode enabled there, you won't be able to record multiple notes simultaneously; if the mode is Mono and you press several keys, they will all be forwared if Fwd is 'on', but only one of them will be recorded. Note also that Rec doesn't have to be 'on' for Edit Recording mode to work; if Rec is on and you're on the EDIT page, you don't need Edit Recording mode to record notes. Alternatively you can press SELECT while on the EDIT page to *toggle* Edit Recording mode 'on' or 'off'. This allows you to play e.g. two-handed chords, as you don't have to use one hand to hold down a GP button. 4.2. Working on the EDIT page ----------------------------- Of all the pages of the MBSEQv4, you will probably spend most your time on the EDIT page. The default view is the Step View, where you can see 16 steps at a time, but only two layers: one parameter layer and one trigger layer. The active parameter layer is displayed in the LCDs, the values can be changed with the GP knobs, and the name of the layer is displayed in the left LCD's top row (e.g. PB: Vel. for "Parameter layer B: Velocity"). The active trigger layer name is displayed in the left LCD's top row (e.g. TB: Roll for "Trigger layer B: Roll"), and the trigger can be switched 'on' or 'off' for each step with the GP buttons. The LEDs below each step will indicate whether the trigger is 'on' or 'off' for each step. If the LED is lit, the active trigger layer for that step is 'on', and if it's unlit, the trigger is 'off'. Pressing & holding EDIT brings up a menu where you can select alternative views. 1. Step View (the default) shows 16 steps at a time, but only one parameter layer (in the LCDs) and one trigger layer (in the states of the LEDs below the LCDs). 2. Trigger View shows only one step at a time, but seven trigger layers and up to 8 parameter layers for the selected step. 3. Layer View shows only one step at a time: the gate trigger layer and up to 14 parameter layers for the selected step. 4. 303 View shows a variety of settings, mimicing the Roland TB-303 bassline synthesizer / Roland MC-303 groovebox / something else??.*** 4.2.1. Copy, paste, duplicate, quick-export Besides just entering/recording notes and other data in a track, you can also copy, paste and duplicate the data in each track. Copy and paste have their dedicated buttons on the frontpanel, while the rest of the editing options can be found by pressing UTILITY. Quick-export uses the MENU + COPY button combination. It is not possible to copy and paste individual parameter or trigger layers.***is this so? Pressing COPY copies the active track into the buffer, and they can then be pasted onto another track; you can change sessions in between copying and pasting if you like. Note that COPY copies the *set length* (from the LENGTH page) of the track. For example, if the set length is 16/128, pressing COPY will copy only the first 16 steps into the buffer. Multiple tracks cannot be copied at once. If several tracks are selected, only the one visible in the LCDs is copied. **possible bug: if track length is 8/xx and you have nothing in steps 1–8, but notes in steps 9+, COPY will copy these notes (including possible empty steps from step 9 onwards), and PASTE will paste them in the beginning of the target track. But if there is even one note in steps 1–8, the notes in steps 9+ won't be copied/pasted. However, if you *press & hold* COPY, you can copy a selected *section* of the active track. GP knobs select the start and end position of the section (indicated by > < angle brackets). A knob at the starting position (or to the left of it) selects the start of the section (">"), and a knob to the right of the starting position selects the end of the section ("<"). The top row of the left LCD shows the steps to be copied (e.g. "COPY S1-12" for copying steps 1–12). Releasing the COPY button copies the selected section into the buffer. Pressing PASTE once pastes the copied track from the buffer into the beginning of the track, overwriting whatever was there. If the copied track was 16/128 steps long and you paste it into a track that is 32/128 steps long, only the first 16 steps will be overwritten. However, if you *press & hold* PASTE, you can offset the beginning point of the operation with the GP knobs. The > < angle brackets indicate the location. If the pasted section is too short to cover all the content in the target track, e.g. pasting a 16 step section into a 24 step track, 8 steps of the target track will not be overwritten. (Which 8 steps won't be overwritten depends on your paste operation's starting point.) In UTILITY -> Opt. (Option #8) you can change whether the paste function pastes the whole track (Complete Track), or just the trigger layer and parameter layer values in the steps (Only Steps). (The same option controls the behaviour the the clear function as well.) 'Only steps' is probably the better setting for normal use. Complete Track copies all steps and all track settings, i.e. MIDI channel, port, length, etc. If the target track is of the same type (Note, Chord, CC, Drum) as the source track, pasting a complete track won't initialise the target track to change its combination of maximum length or the number of parameter and trigger layers. But if the target track is of a different type than the source track, the target track's type will change, and it will become an exact copy of the source track. For example, pasting a 16/128 Note track into a 64/64 CC track will turn the latter into a 16/128 Note track. It is possible to duplicate a track by pressing & holding COPY and then pressing PASTE. If your track is 16/128 steps long, this operation will copy the first 16 steps of the track and paste them immediately after it, starting from step 17. The track length is changed automatically to match the new duplicated length (e.g. from 16/128 to 32/128). The cursor position will jump to the beginning of the newly duplicated sequence (e.g. step 17). You won't be able to duplicate a track that is too long to be duplicated (e.g. a track with a length of 64/128 can be duplicated once, but a track with a length of 128/128 cannot be duplicated.) One or several tracks can also be quick-exported and imported. Multiple tracks within a single group can be selected with the track selection buttons, or any combination of tracks on the Track Selection page***where is it?, and then exported with MENU + COPY. This will copy all data in the track(s), including settings, into the PRESETS folder, i.e. they're not session dependent. This means that you can have a maximum of sixteen tracks exported this way at any given time for all your sessions. The file names are of the form COPYx(.V4T), where x is the relative number of the quick-exported track (1–16). Relative means that if, for example, you have selected tracks G2T2, G2T3 and G2T4 and then quick-export them with MENU + COPY, they will be called COPY1, COPY2 and COPY3, even though their "absolute" track numbers are 6, 7 and 8. ***track selection page demands that one track in group 1 is always selected. if at any point all the tracks in group 1 become unselected, it has the effect that all tracks in all groups get unselected, and track 1 gets selected. One, some or all of the copied tracks can be pasted with MENU + PASTE, which will paste only so many tracks as have been selected with the track selection buttons. The pasting follows the same relative pattern as the copying, so that COPY1 will be pasted to the first selected track, regardless of its "absolute" track number. Note that if you first copy four tracks this way, and later copy two tracks, the first two of the older tracks (COPY1 and COPY2) will be overwritten, but the latter two of the older tracks (COPY3 and COPY4) will remain. If you then paste four tracks, you will get two "new" tracks and two "old" tracks. Tracks exported with MENU + COPY can also be imported one by one from the EVENT page's PRESETS menu (GPB14-15). Currently there is no way to delete files in the presets folder in the sequencer; you have to do delete them manually from the SD card on your computer. 4.2.2. Clear, move, scroll, undo Clear has a dedicated button on the frontpanel, while move, scroll and undo can be found by pressing UTILITY. CLEAR clears all layers of all steps in the selected track, even if they're beyond the track's set length. Thus, if your track is 16/128 steps long, CLEAR will clear also the steps 17–128. In UTILITY -> Opt. (Option #8) you can change whether the clear function clears all track settings (Complete Track) or just the steps (Only steps). 'Only steps' is probably the better setting for normal use.***what does 'clear complete track' do that clear 'only steps' doesn't do? It is not possible to clear individual parameter or trigger layers.***is this so? Move allows you to move *individual steps* to another position with the GP knobs. When you press & hold 'Move', the screen switches to the EDIT page, and you can grab an individual step by turning the knob below it, and then move it to another location if you keep turning the knob. Releasing the GP button will write the moved step into the new location, overwriting whatever was there previously. Scroll allows you to move *sections of steps* with the knobs. When you press & hold 'Scroll', the screen switches to the EDIT page, and you can use a GP knob to grab a section of steps so that the steps to the right of the knob (including the one above the knob) will be moved together, while the ones to the left will stay where they are. Releasing the GP button writes the moved steps into the new location, overwriting whatever was there previously. Undo cancels the latest paste, clear, move and scroll operation. Note that if your MBSEQv4 is using an LPC1769 core, the undo function is disabled since firmware 4.089 because of memory issues! In other words, the undo function works only with STM32F4 based MBSEQv4. 4.2.3. Using FAST and ALL buttons Using the FAST button (left side, bottom row on the frontpanel) allows you to change a value with the knobs faster. The normal setting is useful for narrow value ranges and/or detailed changes, while FAST is useful for fast changes on a wide value range. The LED above the FAST button indicates whether the fast mode is 'on' or 'off'. Note that in some contexts, e.g. when editing velocity values, the FAST function is activated automatically. However, you can always switch it 'on' and 'off', according to your preference. The LED above the ALL button (left side, bottom row on the frontpanel) indicates whether the ALL mode is 'on' or 'off'. Using the ALL button allows you to edit multiple values with just one knob in three ways. First, with the ALL function 'on', turning the knob in the *present cursor position* will cause the values for all steps to change at the same time, so that each step will be adjusted *relative to its original value*. For example, the original velocity value 50 in one step will advance to 70, while the original velocity value 100 in another step will advance to 120. It's irrelevant with knob you turn, as long as it's at the present cursor position. Second, if you move any knob *other than the one in the current cursor position*, the sequencer will generate a descending or ascending *ramp* between the present cursor position and the knob you turn. This way you can generate e.g. velocity ramps easily. ***image on ramp here Third, when you *press & hold* the ALL button and turn the knob in the *present cursor position*, the values for all steps will *jump to the same value* as the step below which you're turning the knob. As you keep turning, the values for all steps will change at the same time, to the same value. Note that this works only if you've set the normal mode of the ALL button to toggle (instead of momentary) in the HW setup file. On how to change the HW setup file, see Appendix 1. By default the ALL function affects all steps, but this can be changed with the GP buttons when the ALL mode is on. When the ALL mode is on, the step LEDs start blinking to indicate a special function in the ALL mode. A blinking LED below a step means that the step will be affected by the ALL function; by pressing a GP button under a step you can turn the ALL mode of for that step, which is indicated by an unlit LED. These changes can be made on the Step Select page as well: press & hold the EDIT button and press GPB8 to enter the page. "*" indicates that the step will be affected by the ALL function, "o" indicates that it will not be affected. Example: If you have recorded a steady rhythm with Step Recording mode and increment setting +2 (i.e. 8th notes, every second step), you can first adjust the length of all the steps with the ALL function on for all steps, then turn half of the steps off for the ALL function so that they're not affected, and then turn a knob to adjust the length of only the "empty" steps so that the notes will not glide into each other. ***function request on pressing ALL button. if ALL mode is 'on', pressing & holding switches it 'off', and pressing & holding works only if you start pressing & holding when the mode is 'off'. in other words, if the mode is 'on', you have to switch it 'off' before you can press & hold it for "all jump to same value" adjustment. would it be possible/handy to effect a press & release threshold time for switching from 'on' state to 'off' state? e.g. so that by default pressing & holding the ALL button, while the mode is 'on', effects ""all jump to same value" mode, and when you release, the ALL mode will stay 'on'; but if you release the button in 200ms or whatever (i'm not sure what a good value would be) after pressing it down, it will switch to 'off' mode instead?4 points
-
Next part of the draft manual. The relevant sections from the table of contents are: 3. Trigger layers and parameter layers 3.1 Trigger layers 3.1.1. Gate 3.1.2. Accent 3.1.3. Roll 3.1.4. Glide 3.1.6. Random gate (R.G.) 3.1.7. Random value (R.V.) 3.1.8. No FX 3.1.9. Roll gate (RollG) 3.2 Parameter layers 3.2.1. Note 3.2.2. Velocity 3.2.3. Length 3.2.4. Roll and Roll2 3.2.4.1. Using the RollG trigger layer 3.2.5. Chord 3.2.6. Control Change (CC) 3.2.7. Pitch 3.2.8. Probability (Prob) 3.2.9. Delay 3.2.10. Nth1 and Nth2 3.3. Drum tracks 3.3.1. Drum track instrument layers 3.3.2. Drum track trigger layers 3.3.3. Drum track parameter layers Questions: 1. Random gate trigger layer: is the chance 50/50 or something else? 2. Random value trigger layer: does this randomise all the values in the parameter layers of the step? 3. "A parameter layer always has a value between 0 and 127. It can be in plain numerical form (0–127) or it may appear as a combination of letters and numbers, like for e.g. for notes and roll values." Is this accurate or am I just pretending to be knowledgeful <:-) ---------------------------------8<---------------------------------------- ----------------------------------------- 3. Trigger layers and parameter layers ----------------------------------------- On the lower left corner of the front panel there are three trigger layer selection buttons (A, B, C) and three parameter layer selection buttons (A, B, C). These allow you to select different layers for editing, either with the GP button under each step (for the active trigger layer) or with the GP knobs under each step (for the active parameter layer). By default trigger layer selection button A selects the gate layer, B selects accent, and C brings up a page where you can select one of the eight trigger layers with a GP button. (Drum tracks have only 1–2 trigger layers, for these see section 3.3.) With parameter layer selection buttons, button A selects the first parameter layer and B selects the second parameter layer. If your track has only four parameter layers, button C alternates between parameter layers C and D. If you have more than four parameter layers, button C brings up a page where you can use a GP button to choose one of the available parameter layers. (Drum tracks have only 1–2 parameter layers, for these see section 3.3.) Trigger and parameter layers hold most of the data that makes up the music, such as gates, notes, note lengths, CC values etc. In order to understand what recording a note actually does, it is necessary to first say something about these two kinds of layers. One trigger layer and one parameter layer are always selected, and thus active, ready to be edited with the GP buttons (triggers) and GP knobs (parameters) below each step. The active layers are named on the EDIT page (left LCD, top row). "Px: Name" gives the active parameter layer, where x is the layer (A-P) and "Name" the name of the layer, such as Vel. (velocity), Len. (length), etc. "Tx: Name" gives the active trigger layer (A-H) and the name of the layer, such as Gate, Roll, etc. 3.1. Trigger layers ------------------ Note, Chord and CC type tracks always have eight trigger layers. Drum type tracks are a special case, and have 1 or 2 trigger layers; they are dealt with in a separate section (see section 3.3.). A trigger layer always has one of two values: on or off. Whether a trigger layer is on or off can be seen by selecting the layer (with the A, B or C buttons) and checking if the LED under the step is lit or not. If it's lit, the trigger of the selected layer is on for that step, and if it's not lit, the trigger is off. The active trigger layer's name is visible on the EDIT page on the left LCD's upper right corner. You can set which trigger layer controls which trigger function on the TRIGGER page (MENU + TRIGGER). The page displays a list of all available trigger functions (nine) and their assignments into the trigger layers (max. eight). Turn a GP knob to change the function for each layer. Note that normally all trigger layers apart from RollG (see section 3.1.9.) are available by default (drum tracks are an exception). Note also that you can control multiple triggers with a single layer. For example, by assigning both Gate and Accent trigger to trigger layer A, every time you trigger a note with Gate, it will also be played at Accent velocity. 3.1.1. Gate Gate is the basic trigger, without which other layers (whether trigger or parameter) cannot express themselves. Gate controls whether the data in the step is going to be played or not. If gate is on, the contents of the step's layers will be played, and if it's off, it will be treated as an empty step, even if there is data in the other layers of the step. Example: You can verify this by pressing & holding EDIT, which brings up a menu where you can choose the type of EDIT view you want. Choose Trigger View. The left display shows eight trigger layers, and the right display shows the first eight parameter layers. (If you need to see the rest of the parameter layers, you can choose layer view, which shows all available parameter layers.) If you select G1T1 and use GPK1 to view Step 1, you can see that Gate is on (*), and all the other triggers are off (o), As to the parameter layers, you can see that note, velocity and length layers have something in them. Now use GPK1 to select Step 2. All the information in the steps stays the same, only the gate flag is turned off (o). If you switch back to step view (press & hold EDIT), you can't see anything on the display for step 2, because gate is off. But if you press GPB2, you will create a C-3. Where did that come from? It was in the step all the time, your button press just turned the gate on, and made the information in the step "visible". 3.1.2. Accent If the Accent trigger is on (*), it simply means that the step will be played at maximum velocity (127), i.e. "as loud as" it can be played. Velocity values simulate the force with which you strike a piano key: the higher the value, the "harder" the note is played. However, synthesizers often allow many other variables to be controlled with the velocity value, so it really depends on your settings what velocity actually does. 3.1.3. Roll If the roll trigger is on, it means the note in the step will be played two times in quick succession within that step (a kind of flam). This allows for only very simple rolls. For more detailed control over the roll in a parameter layer, see section 3.2.4. Note that the Roll trigger won't work if the Sustain setting on MODE page is on. 3.1.4. Glide If the Glide trigger is on, the sequencer will trigger a glide *from the note in the current step* (where the glide trigger should be set 'on') into the note in the following step (also called "fingered portamento"). Note that the operation of this function depends on your synthesizer's settings. Also, not all synthesizers have the capability to trigger slides. Example: Triggering a glide from step 2 into step 3. step1 step2 step3 step4 step5 step6 step7 step8 note param. layer C-3 D-3 E-3 C-3 D-3 E-3 lenght param. layer |||||| ||||||| |||| ||||||||||||||||||| ||||| glide trg. layer * 3.1.5. Skip If the Skip trigger is on, the step in question will be skipped. This is not simply an "empty step", but the step will be jumped over, and the track will effectively become one step shorter than its length set on the LENGTH page. For example, if you set the skip trigger 'on' for step 5, the sequencer plays steps 1, 2, 3, 4, and jumps then directly to step 6. If your track length on the LENGTH page is 16/128, setting the skip trigger 'on' for three steps effectively makes your track three steps shorter, i.e. 13/128. 3.1.6. Random gate (R.G.) If this trigger is set 'on', the step will be played randomly.***50/50 chance or sth else? This is especially useful for drum tracks to increase variation without creating multiple tracks. (See also Probability parameter layer, section 3.2.8.) 3.1.7. Random value (R.V.) If this trigger is set 'on', all the values in the step's parameter layers will be randomized.***is this so? 3.1.8. No FX If this trigger is set 'on', the step won't be forwarded to FX functions like echo, humanizer and limiter. (For effects, see section 6.6.) 3.1.9. Roll gate (RollG) RollG trigger layer is used together with Roll and Roll2 parameter layers. This trigger is not assigned to any trigger layer by default. You can assign it to one of the available trigger layers on the TRIGGER page (MENU + TRIGGER), but normally you don't need it. See section 3.2.4.1. for details on how and when to use RollG. 3.2 Parameter layers -------------------- A parameter layer always has a value between 0 and 127. It can be in plain numerical form (0–127) or it may appear as a combination of letters and numbers, like for e.g. for notes and roll values.***is this so? The values can be adjusted with the GP knobs below each step. The parameter layer to be edited is selected with the parameter layer selection buttons (lower left corner of the front panel). Button A selects the first parameter layer (which is a note layer in a newly initialised note type track), button B selects the second parameter layer, and button C brings up a menu where you can choose any available parameter layer with the GP buttons. (Or, if you have only four parameter layers, button C alternates between the 3rd and the 4th layer.) Note that all steps will have Note, Velocity, CC etc. values in them, but they are effective only if the gate trigger is set 'on'. On the EDIT page, the active parameter layer name can be seen in the left LCD. "PA: Note" means the first (= A) note layer is active, "PB: Vel." means the Velocity layer is active, etc. 3.2.1. Note Note layers contain the notes which the sequencer is going to play. If you have several note layers, you can use them to play several notes at once, e.g. for chords. (See section 4.) Note that the note layers are not independent of each other, because each track has only one gate trigger layer which is shared by all the note layers of the track. Hence, it is not possible to have each note layer play their own line, each layer having its own gate, length etc. Multiple note layers are useful for playing multi-note chords in each step, but e.g. piano-style two-handed play with some notes held down longer on one note layer, while other notes play "broken chord" arpeggios on another note layer is not possible with just one track. You would need to dedicate a separate track (perhaps sending on the same MIDI channel) for each "hand". Example: The following will work: step1 step2 step3 step4 step5 step6 step7 step8 note param.layer 1 C-3 --- --- --- C-3 --- --- --- note param.layer 2 E-3 --- --- --- F-3 --- --- --- note param.layer 3 G-3 --- --- --- A-3 --- --- --- The following will work: step1 step2 step3 step4 step5 step6 step7 step8 note param.layer 1 C-3 E-3 G-3 E-3 C-3 F-3 A-3 F-3 The following will work too, but it will sound exactly the same as the example above, plus it's more work: step1 step2 step3 step4 step5 step6 step7 step8 note param.layer 1 C-3 --- --- --- C-3 --- --- --- note param.layer 2 --- E-3 --- E-3 --- F-3 --- F-3 note param.layer 3 --- --- G-3 --- --- --- A-3 --- 3.2.2. Velocity At its simplest, velocity controls how loud the note in the step is to be played. Velocity values simulate the force with which you strike a piano key: the higher the value, the "harder" the note is played. However, synthesizers allow many other variables to be controlled with the velocity value, so it really depends on your settings what velocity actually does. The velocity layer shows the velocity value as a vertical bar next to the note layer value (from the first note layer). The note layer value is merely displayed, and cannot be edited when the velocity layer is visible, because the GP knob is used to edit the velocity value, not the note value. 3.2.3. Length Gate length per step allows you to adjust how long a note will sound. Length is expressed as a percentage per step, from 1% to Gld. (=100%). Length can be stretched over several steps by adjusting the gate length until the value for that step says "Gld." (for glide), and then adjusting the next step's length until "Gld.", if you want to sustain the note to yet another step, and so on. You can stop at any step when you've reached the length that you like by leaving the length value in that step anywhere below 100% (glide). The "stretched over" steps should have their gates triggers switched 'off'. ***image here Note that "glide" here has a different meaning than in the trigger layer glide (section 3.1.4.). Here glide means simply that *the same note* is extended over several steps, which has no effect on pitch; in trigger layer glide, however, the whole idea is to glide from *one note to another, different note*, i.e. from one pitch to another. The setting Sustain on the MODE page is good to keep in mind when setting up a track to play long notes. Sustain holds each note/chord until another one is played, and this spares you the trouble of having to set the gate length of each individual note/chord. When editing gate length per step, it is also good to keep in mind the ALL button function, which allows you to edit the values several steps with one knob (see section 4.2.3.). 3.2.4. Roll and Roll2 Roll controls the number of hits per step and their intensity curve, whereas Roll2 controls the number or hits per step and the hits' distance from each other. Rolls are most often used for percussion sounds (particularly in drum tracks), but in priciple they work with any type of track or sound. Roll parameter is a more refined version of the roll trigger. With the Roll parameter you can set the number of notes played within the step, their intensity (range 0-15) and whether the intensity is ascending or descending (D for descending, U for ascending). For example, setting 3D03 means the note in the step will be played three times in quick succession, the first hit being played at a higher velocity than the second and third. The Roll speed is relative to tempo. A slow tempo (e.g. 30bpm) is useful in evaluating the effect of different intensity settings. Note that the effect of the intensity parameter depends on the velocity sensitivity settings of your synthesizer and/or your patch. Roll2 parameter can be used to play the step 2–5 times, but instead of velocity, you can control the distance between the played notes. The distance is expressed in microticks. Each step consists of 96 microticks, and the first hit is always played at the first microtick in the beginning of the step. Setting 2x48 would play two notes, one at the beginning and the second at the middle of the step. If the setting is 3x57, the resulting three notes will be longer than one step, i.e. longer than 96 microticks. The first note will be played at the beginning the step, the second note will be played in the step at 57 microticks, and the third one will be played in the second step, at 18 microticks. Note that the Roll parameters won't work if the Sustain setting on MODE page is on. 3.2.4.1. Using the RollG trigger layer You can use the trigger layer RollG together with the Roll and Roll2 parameter layers. Normally it should be enough to just set the trigger layer Gate (=the normal gate trigger, by default in trigger layer A) on for a step and then, for the same step, turn a knob to enter a value in the Roll/Roll2 parameter layer. The sequencer will play a roll in all steps where the Gate trigger is 'on' and where there is a non-zero value in the roll parameter layer. However, if you have one roll value that you would like to use all over your track, normally you'd have to enter the roll values by turning the knob for each step individually, wherever you want to effect a roll. RollG offers another solution. Instead you can push the ALL button, set the cursor to step 1 and then turn GPK1 to enter the same roll value in every step of the track with just one knob. If you have only the Gate trigger layer (typically in trigger layer A), every step with the gate trigger 'on' will now play a roll, and you cannot play any non-roll notes. But if you now assign RollG trigger to trigger layer B on the TRIGGER page, rolls don't get triggered anymore unless you explicitly set them to trigger on the RollG trigger layer. In other words, now the "normal" gate layer can be used to trigger just the "normal" notes, but if Gate and RollG are 'on' *together* for the same step *and* there's a value in the roll parameter layer, a roll note is triggered instead. (Alone, RollG has no effect.) This way you can enable and disable the roll value for each note with a single press of a button, instead of having to turn the knobs to zero with each individual step. Or, instead of the ALL button trick to enter multiple values simultaneously, you can also use the Randomiser function to randomise the values of the roll parameter layer (for details on the randomiser function, see section 6.3.), and then trigger them with the RollG layer. Normally, the gate trigger 'on' state is indicated with a diamond-shaped symbol. However, if both the normal Gate *and* RollG are on for the same step, *both layers* will indicate this state of affairs with a "?". If you have RollG set 'on' for a step, but the normal gate is 'off' for that step, both layers will display an "o". 3.2.5. Chord Chord layers can be used to play chords with up to 4 notes in a single parameter layer. For the details on the chord layer, see section 2.1.1.2. 3.2.6. Control Change (CC) CC layers can be used to send Control Change messages to your MIDI equipment. For the details on the CC layers, see section 2.1.1.3. 3.2.7. Pitch Pitch layer can be used to send pitch wheel events to your MIDI equipment, simulating the pitch wheel position. Value 64 (default) is the middle position, i.e. no effect. 3.2.8. Probability (Prob) Probability layer can be used to set the probability for the step to be played (0–100%). This is especially useful for drum tracks to increase variation without creating multiple tracks. (See also random gate trigger, section 3.1.6.) 3.2.9. Delay Delay layer can be used to delay each step with 1–96 microticks. Regardless of tempo, one step is 96 microticks long, so delaying a step with 96 microticks plays the step at the last possible instance within that step before moving into the next step. 3.2.10. Nth1 and Nth2 Parameter layers Nth1 and Nth2 allow you to create long variant patterns which change based on mathematical rules. Nth1 will trigger the specified action the first time and then each nth bar, while Nth2 will start triggering only after n bars, and then each nth bar. The possible actions are: 1. Pl: Play each nth bar 2. Mu: Mute each nth bar 3. Ac: Accent each nth bar 4. Ro: Roll each nth bar 5. Fx: enable Fx each nth bar 6. Nx: disnable Fx each nth bar The first selectable "operation" (-- 2 etc.), before Pl, is actually a dummy value. It does nothing and can be ignored. The final operation ("?? 1" etc.) is currently empty, and also does nothing. Below is an example sequence and how it will actually sound. The operation for both steps is "mute", and because the parameter is Nth1, muting starts immediately from the first occurrence, and then repeats every second (for step 2) or fourth (for step 4) time. step1 step2 step3 step4 note param. layer C-3 D-3 E-3 F-3 Nth1 param. layer --- Mu2 --- Mu4 This is the actual outcome of the settings above: step1 step2 step3 step4 note param. layer C-3 --- E-3 --- first iteration note param. layer C-3 D-3 E-3 F-3 second iteration note param. layer C-3 --- E-3 F-3 third iteration note param. layer C-3 D-3 E-3 F-3 fourth iteration note param. layer C-3 --- E-3 --- fifth iteration With the same settings but with Nth2 parameter, muting would start only on the second time the note is played (for step 2), and then every second time (for step 2) in the example above. If the Nth layer was Nth2 instead of Nth1 in the example above, the outcome would be: step1 step2 step3 step4 note param. layer C-3 D-3 E-3 F-3 first iteration note param. layer C-3 --- E-3 F-3 second iteration note param. layer C-3 D-3 E-3 F-3 third iteration note param. layer C-3 --- E-3 --- fourth iteration note param. layer C-3 D-3 E-3 F-3 fifth iteration 3.3. Drum tracks ---------------- Drum tracks are suitable for playing up to 16 drum sounds simultaneously, with each drum instrument having its own instrument layer (bass drum, snare drum, hihat, clap etc.). In addition to the instrument layers, a drum track can have either 1 or 2 parameter layers, and 1 or 2 trigger layers. Like with the other track types (see section 2.1.1.), here too it's a zero sum game between track length, instrument number and layer number. Trigger layer length is always the same as track length. However, parameter layer length can be shorter than track length. If, for example, track length is 256 steps, but parameter layer length is 64 steps, the parameter layer will get repeated four times (4 * 64 = 256) while the track plays its 256 steps. The drum track type notation differs somewhat from the other tracks. StepsP/T Drums (64/2*64) 16 Track length is 64 steps, two trigger layers. One parameter layer (length 64 steps). 16 different drum sounds can be played. (2*32/128) 16 Track length is 128 steps, one trigger layer. Two parameter layers that are 32 steps long, which means they will repeat four times while the track goes through its length of 128 steps. 16 different drum sounds can be played. (128/2*128) 8 Track length is 128 steps, two trigger layers. One parameter layer (length 128 steps). 8 different drum sounds can be played. (2*64/256) 8 Track length is 256 steps, one trigger layer. Two parameter layers that are 64 steps long, i.e. they repeat four times while track goes through its length of 256. 8 different drum sounds can be played. (64/64) 16 Track length is 64 steps, one trigger layer. One parameter layer that is 64 steps long; 16 different drum sounds can be played. (128/128) 8 Track length is 128 steps, one trigger layer. One parameter layer that is 128 steps long. 8 different drum sounds can be played. (256/256) 4 Track length is 256 steps, one trigger layer. One parameter layer that is 256 steps long. 4 different drum sounds can be played. 3.3.1. Drum track instrument layers Unlike other track types which can control only one instrument, a drum track can control up to 16 instruments, and this results in somewhat changed controls. Parameter selection button C has no function, because two parameter layers is the maximum, and trigger layer selection button C is used to bring up a submenu of the available *instrument* layers, instead of trigger layers (the maximum number of trigger layers also being two). In order to set up a working drum track, you have to make sure that the note values for each of the instruments match what your drum machine expects for each instrument. This is done on the EVENT page (right LCD). Choose the drum instrument with GPK11 and the matching note with GPK12. For example, by default MBSEQv4 assumes that a bass drum sound is equal to the note C-1, but this may be different from what your drum machine thinks a base drum note is. You have to know the settings of your drum machine to set up the equivalent values on the sequencer (or vice versa). You can also rename the drum instruments, if you don't like the defaults. This too can be done on the EVENT page by pressing GPB8 for 'Track Instrument'. There you can scroll through the available instrument layers (A-P) with GPK10, see the name of each drum instrument on the right, and rename it by pressing GPB9. Maximum name length is five characters. Once you have set up the drum notes and names to your liking, you probably want to save the whole thing as a preset; go back to Track Event page (GPB8) and press GPB15 ('PRESETS'). 3.3.2. Drum track trigger layers A drum track will always have at least one trigger layer, and that is gate. If the gate trigger layer is selected (left LCD top row says "TA:Gate"), the steps in an instrument layer can be toggled 'on' or 'off' by pressing a GP button below the step. A diamond-shaped symbol indicates that the gate is 'on' for that drum instrument layer. If there is more than one trigger layer, the second one is Accent by default. The second trigger layer can be selected by pressing trigger layer selection button B (left LCD top row says e.g. "TB:Acc"); pressing a GP button below the step toggles the trigger 'on' and 'off' for each step. For the accent layer, a diamond shaped symbol means normal velocity (it's on if the gate for that step is on), and "?" means accent velocity. The normal velocity value as well as the accent velocity value for each drum instrument layer can be set on EVENT page with GPK13 and GPK14 (VelN for normal and VelA for accent velocity). Only Accent layer has these extra settings. You can change the second trigger layer by pressing MENU + TRIGGER and assigning trigger layer B to one of the options on the page with the knobs. You can change layer A too, but you really need the gate layer, so in practice changing it isn't so useful. Note that you can assign many functions in a single trigger layer. For example, by assigning both Accent and Roll into trigger layer B, each step where trigger layer B is set 'on' will trigger both Accent and Roll for that step. 3.3.3. Drum track parameter layers Drum track parameter layers can be set to the desired function on the EVENT page with GPK9 and GPK10 (not all functions are useful). By default a single parameter layer is Roll, and if you have two parameter layers, they are Velocity and Roll. Parameter layer functions can be changed on the EVENT page with GPK9 and, if you have two parameter layers, GPK10. The parameter values can be adjusted for each step on the instrument layer by turning a GP knob (you have to be on the EDIT page). Turning the knob will summon the selected parameter layer, which will be visible as long as the value is changed; after a few seconds of inactivity the display will return to the gate on/off view.4 points
-
I apologize for my quietness recently, I've been spending basically all my free time on this synth, and I haven't gotten a chance to do much documentation. The hardware is due in less than a week, so I've been under a lot of pressure! Here is the front panel PCB with all 600+ LEDs on. (Actually, they're not quite all on, due to another part of the software I forgot to disable while running this test--but the other red and green LEDs in the central matrix do work).4 points
-
Today i finished my new 808 Clone!! :D Based on Microlarge and a few more modifications by me. Handclap will have a BA662 chip like the original and is made by me too. Here is an image of my pcb. The size is 20x15cm for Through Hole Version and there will be an SMT version with much more smaller pcb!!4 points
-
This is it! I finished my one. What a great device! Needs some patience, but very satisfying to see, how it grows. Many thanks to all who made this possible! Great job! regards, roland3 points
-
Hi all, I just joined to post the pic of my finished unit. Some comments from my side if someone starts building one and reads this before ;) - Pay good attention to the video instructions about the parts and part numbers. Always double-check the right manufacturer part number in the BOM, as some are very similar, but have totally different functionality. - If you accidently mix up the resistor network ICs and realise it too late, you can also use a chep "non-industrial" heat-gun to unsolder them, one which is not for soldering only, but e.g. for heating up and forming plastic stuff. (i use mine mainly to ignite my charcoal for BBQ ;). I checked my user manual to see what temperature setting on the heatgun (1-9 or something) is approximately which temperature, i set it to about 320-350°C. Worked fine for me, jus make sure not to force the IC off to early, wait until the solder is liquid again. The resistor network itself is not very head sensitive, be sure to disassemble or cover everything else around it that might get damaged (i removed the pushbotton caps again). - Do not forget to set the 3V jumper for the OLEDs in the beginning, you have to disassemble a lot if you are almost finished ;) Test your OLEDs as early as possible. - I mixed up some of the different pinheaders of the mouser BOM, ended up having not the long ones left to connect the two PCBs. Then i used some different ones i had left (i think from Reichelt) and they worked even better as i did not have to push them down again as Peter did in his video. - A little bit longer cable from the JA board (on the left-hand version only?) to the next board would have been helpful, the fitting and assembly was very tight, several times the connector went out of the socket. Ok, now i have to connect all my stuff to get going again. This was a lot of fun, and regarding the complexity of the project the drawbacks were minimal and easy to fix. Thank you all for this awesome work! Have a good time, Enginerd3 points
-
Here is another Midibox in the wild. Lacking both time and skills to really build one myself, i had one of the trusted builder to handle that part for me. This one was built by @Menzman (Michael Menze) here on the forum. Very nice chap and highly recommended if anyone else wanna take this route to get your hands on this wonderful piece of hardware. You can find him via the trusted builders list @ midiphy) edit: if a moderator can move this to the correct thread in the forum (v4+) it would be great, i just saw i accidently put it in the wrong one :) sorry! @Hawkeye ?3 points
-
Hi All, Here you can see all the necessary boards to build the HAARP. Best regards Bruno3 points
-
i pulled them by hand. is there a special tool? the picture does not match the actual impression. one can clearly distinguish which steps are selected.3 points
-
Another successful build. Thanks to all involved for such a great design and realization of this sequencer. I followed the build videos and that kept me on track. The only problem I had was of my own doing, mixing up the resistor networks then getting erratic output on the first seq_l test. Hot air and swapping the resistor networks around fixed this. Thanks to @Antichambre for those great looking keycaps too. Looking forward to more great things from the Midibox team. Edit: I did have the odd inversion of colors on the beat LED, I had red on measure green on beat, a change of values in the config file HWCFG fixed that.3 points
-
Wood Side Story. ;) Tomorrow is sanding time...3 points
-
Number 23, I believe. More about the build soon.3 points
-
Its not perfect, but it certainly makes a big enough difference for me. I'm happy with the result. (and I guess #18 is me then?)3 points
-
Here's the two versions of V2_044 compiled with settings for 4x20 Enjoy :) setup_6581.hex setup_8580.hex3 points
-
Yesss!!! I think I managed to give birth to number 5! It's looking awesome (and I never use this word) My camera completely fails to catch the beauty of this beast. The case is not white, but a bit creamy, it looks so professional, like a medicial/laboratory equipement. I just followed the tutorials, no modifications. Only some tiny drop of superglue on some bolts to secure them. Oh and I ordered a clear beat LED and didn't like the looks so I sanded the top flat and now I like it. Very big thanks to TK, Peter, Andy and Adrian and everyone else involved in this evolution. Looking forward to the LoopA!3 points
-
Thank you, I made the beat led window on the CNC so I made more than one to do not waste this special acrylic. So I've got some for people who wants it, I can make more if necessary... Peter, I can already send to you what I've got, as you can put it as a gift in the next orders and give one to Andy, TK when you meet them. What do you think? Best Bruno3 points
-
A short 3D view of the dipCoreF4 The name is dipCoreF4 now !3 points
-
A query, perhaps for v4+: would it be possible to handle track selection (1-16, not in Groups), trigger layers and parameter layers with 3 encoders rather than button/menus? If I was to design a new SEQ CS (just an idea for the moment) the left-hand buttons could be swapped out, reducing the overall PCB height = cheaper.3 points
-
EDIT - I have asked people to confirm their interest in this project. The following members have confirmed (with their email address) - WilHelm* If your name is not above, and you want it to be, please pm me with your details. I have to order in the rails for these. I will not over order, so, please, if you want a unit, make sure your name is above! Because i make panels for people's Heidenreich cases, I'm aware of the trouble and expense of getting hold of the chassis units. A lot of us also lost money with Marco's issues. Basically, its never been an ideal situation. Below are some photos of something i have been working on to get around the issues above.3 points
-
Zener... with all respect... I start thinking you are just a troll here ... TWO page with ppl gently responding to you, trying to help. You still complaining whatever we say. As others, I'm out of this topic. Hope I'll see you in another one with REAL midibox in your hand. Best Zam3 points
-
Its sad it came to this after 15 years of service and it won't be the same without you as the go to guy. But thanks for being such a huge contributor To MIDIbox over the years and for everything you've done for us. Wish you the best of luck in the future.3 points
-
In the beginning of this year I decided I was going to finally build The Sequencer. I built my first MIDIbox project 4 years ago, a stereo MB SID, and have been hooked since. Next to my kids, this is the greatest thing in my life, I love it. There's so many great tutorials and tips on the forum about building the SEQ V4, so there's not really a need for another one, but I thought I'd share a few things I did in my build. I used the STM32F4 based Core, with the now available PCB. To save some space in the case, I moved and removed some parts. Removed the jack and the button caps. Cut the buttons and some pins. Moved some pins to the underside. I used the Kyocera LCD's, and read a tip by Altitude about the back light. I omitted the transistor and the resistors, put in a bridge and a multiturn trim pot. Like sometimes at Mouser, the part doesn't look like the picture, but it sort of fits ;) I wanted the max MIDI OUT's, so I used 2xMIDI I/O and 2xQuad IIC boards for 12 OUT and 4 IN The PICs on the second Quad IIC board needs a modified firmware. Tim AKA "Not Mike" AKA SmashTV has it now, but if you want to burn it yourself, it's downloadable further down. The rest of the build is pretty standard. Wilba PCB, Schaeffer front panel and common parts. The case is laser cut acrylic done locally. With the mods on the Core, it's only 4 cm. high :smile: While I was at it, I built the BLM 16x4 and TPD as well (FPD file further down) The last piece was the tinted windows on the TPD, and they really look great I think I am very happy with it, and it's so much fun to play. Thank you TK for everything. Thank you Wilba for the PCB ++ Thank you SmashTV for your shop and service ++ Thank you ilmenator for the BLM and TPD, and the "bling" and of course thanks to the rest of you for all the help, support and inspiration. Beers all around edit: I thought I could buy you all beers, but it's only TK that has a working link Wilbas redirects to a Rick Astley video :), and the others don't have one oh well Cheers Hal iic_hack.hex TPD+BLM_19.fpd3 points
-
So I finally got round to finish my MB-6582. Channel 3 is still silent, but I guess I will be able to fix that - didn't have the time to look into that yet. The case is a Formulor/Ponoko case, with flat top LEDs (I do not intend to ever separate the upper PCB from the front...) and a plexi window for which i milled the grooves manually. Happy here! :frantics:3 points
-
Hi Claire. Something like that? Best regards3 points
-
I have a new tune & video out. Sounds are from my MBFM. This time I have released it on VHS cassette http://www.tigernet.no/item/150179--prinztronix--pressing-buttons-vhs-video-single--merchandise For those that don't own a VHS player, it's available on streaming and download too ;) https://www.beatport.com/release/pressing-buttons/18010933 points
-
And panel is in, everything fits!3 points
-
@cube48 @AVLG love the projects! Keeping the volume under 86 all but eliminates the clicking (to my ear it sounds like some DAC wierdness but I'm no expert)... In this video I filter the goom with the new stereo pheonix (shruthi). You'll see user donpachi made me the LPC version in the metal box on the desk...totally awesome. This synth is definitely one of my favorites.3 points
-
MAGFest has come and gone, and the first unit of MIDIbox Quad Genesis has been hand-delivered to Josh Whelchel and featured in our panel at the event. (To be clear, the hardware was finished, the software is only about 10% done.) Here is the video I recorded before leaving:3 points
-
I figured they would be useful for someone STMF4 Core cutout. This requires a 2mm washer to go between the threaded terminal (mouser PN 534-7700) and the panel since the discovery board and core board do not sit in the same plane. This also recesses the SD card somewhat but seeing that it does not get removed often, I opted for a small slot for aesthetics instead of a bigger opening to make it easier to get out For the midi cutouts, you want to use SDS-50J midi connectors (http://www.cui.com/product/resource/sds-xxj.pdf) which have holes in them for M2.5 or 2-56 screws. The holes to the right are for activity LEDs stmf4CoreCutouts.fpd 4xIIC.fpd midiIO.fpd3 points
-
As promised, a video of VGM playback on a MBHP_Genesis module! There is still one issue with the frequency correction, which occasionally leads to wrong notes in certain VGM files, but I understand what the issue is and will fix it when I get a chance. Also, there's an inherent incompatibilty between the noise channel in the SN76489 and the one in the SN76489-clone used in the actual Mega Drive / Genesis (shift register length and therefore pitch, and also what happens with zero frequency). I may be able to have the software correct for it in certain cases, but it's not a huge deal overall.3 points
-
Here it is!3 points
-
Hola, it has been a while, but the bad autumn weather finally did hit southern Germany baaaadly - some time to be spent at the synths :smile: This one is rather SID oriented, using only a single Lead Engine of the MB6582 (and a few other synths, but only as a backfill! :smile:). Hope you like it! Thanks for watching and listening! Peter3 points
-
Dear members, First, I excuse myself to all that I didn't answer individually more early but my life didn't let me lot of time to do so before. I come back to you to indicate I've finished the design of the new layout of the MB-LRE8x2CS (Rev4.6). Thorsten advised me to implement 15 (odd number) leds in the ledring + 1 led below. It will be more usefull for PAN feedback e.g. (cf. Nord Lead). He made also some thorough test showing the efficiency of the ULNs. Using them will be greatly recommended. I have also designed 2 boards that can be stacked one on the other (a "sandwich" concept very famous here): >MB-LR4x2CS_Rev2.1: (DOUTx3 + 8 SMD ledrings). 128X 1206 SMD leds already populated. There is 8 holes to let pass the encoders toward. >MB-E4x2CS_Rev1.1: The encoders board (DINx4 + 8 encoders). The space of the board let me place the footprint for switches (for standalone uses, you can populate it by 16 tact switches instead 8 encoders). I will come back to you after spending some holidays and solving some logistic problems (...SMD) before starting a new bulk order (at least for the 8x2 board). I'm thinking also maybe providing an encoder BO. Best regards, Jerome.3 points
-
I've sent the order to Albs! :yes:3 points
-
Hola ! Proudly presenting another track to spam the songs&sounds section ;-). This one uses a new patch that tries to focus on the more raw sound abilities of the 8580s, trying to emulate more classic C64 sounds. Also, the euclidian rhythm generator was used to generate the "snare track" - it is a great addon to the SEQ V4, an update to the newest firmware is highly recommended! Thanks for that feature, TK.! :sorcerer: Many greets and thanks for watching and listening ;-) Peter3 points


.jpg.be50e340987b4f3feee814022f07387d.thumb.jpg.ac545b5d5a297af16dccfd611867ac30.jpg)