

dwestbury
-
Posts
271 -
Joined
-
Last visited
-
Days Won
25
Content Type
Profiles
Forums
Blogs
Gallery
Image Comments posted by dwestbury
-
-
Uhg. The sloppy mess I made of this step.. They do say practice make perfect, right?
-
Thanks to @Lamouette, I managed to get ahold of an a nice acrylic window, which was milled and beveled for a perfect fit. I think this finishing touch really helps to complete the look. Wish these were easier to come by.
-
Zen moments, calmly testing and placing LEDs... Namaste...
-
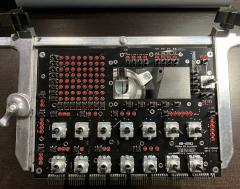
Decided to go with rounded tops on my 3mm LEDs this time. It's MUCH easier to remove and replace the front panel now, to service the control surface. The flat top LEDs give a nice & flush look, but they are SUCH A PAIN to deal with...
-
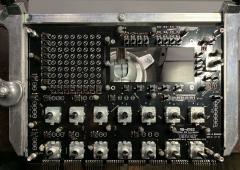
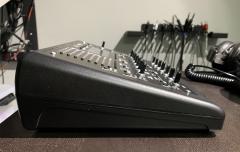
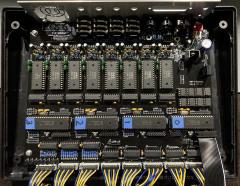
The case closes nicely with the JST-XH PCB connectors tucked neatly in place..
-
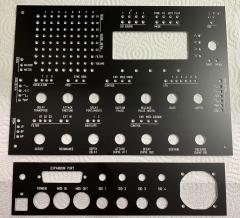
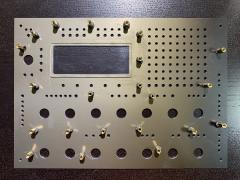
I've also been working on a newer panel design, based on the original art uploaded by @listen202
-
Early on it was tough to find the right C64-style power switches, but after a bit of research I found quite a few reliable sources.
-
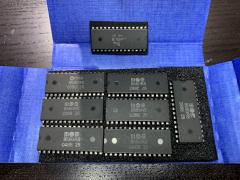
There was no second guessing involved for me. IMHO - Nothing beats the sound and character of the 8580.
As time goes on and supplies run shorter however, I've found myself growing a real appreciation for the ARMSIDs. Dollar-for-Dollar, it's probably the best clone out there (again, my opinion of course).
-
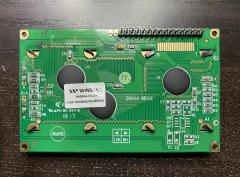
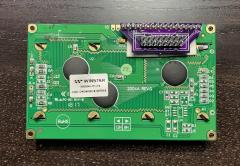
Adafruit sells a nice RGB Character display, which conveniently places power for the RED backlighting on pin 16.. You can wire up pins 17 and 18 as well to mix in multiple color varieties...
-
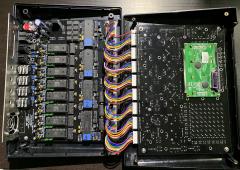
These longer 300mm JST-Xh cables turned out to be too cumbersome to work with. I eventually went with 100mm, which are perfect for the job...
-
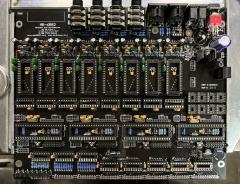
I decided to go with 22nf polyester film capacitors, because these are said to be the best match for 8580 SIDs (e.g., "Wilba's favorites", see the analysis in the forum post below)
-
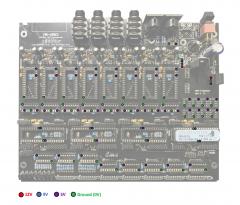
I'm using power supply Option-E, which is brilliantly simple and clean to implement..
-
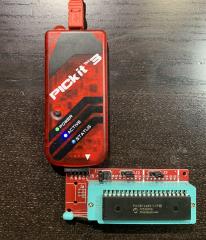
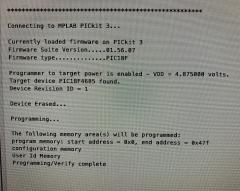
Figuring out how to get my PICs properly flashed was quite a learning experience. If not for the patience and fearless support in these forums, I would surely have many bruises on my head from banging it into the wall ;-)
-
Figuring out how to get my PICs properly flashed was quite a learning experience. If not for the patience and fearless support in these forums, I would surely have many bruises on my head from banging it into the wall ;-)
-
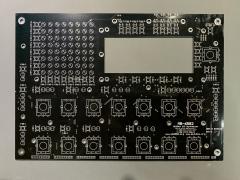
Really happy to see Modular Addict back online, with stock of these PCBs...
https://modularaddict.com/midibox-6582cn-pcb
-
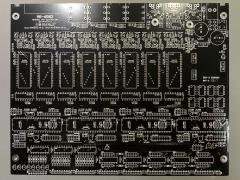
Really happy to see Modular Addict back online, with stock of these PCBs...
https://modularaddict.com/midibox-6582bs-pcb
-
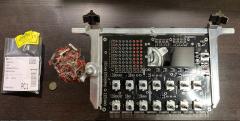
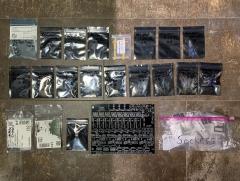
Before buying all of the parts I needed for my MB-6582, I did some rudimentary parts and supplier research and I came up with a simplified BOM containing a couple different options.
-
Stole the design idea for this voltage testing chart from the sammichSID build guide, by @Wilba
-
I love the minimalist look of the panels by @julianf from "The Beast UK" - http://thebeast.co.uk/?product_cat=midibox
Consistent quality and prices that are much better than Front Panel Express / Shaeffer...
-
I'm using power supply Option-E, which is brilliantly simple and clean to implement..
-
This part of the build was admittedly, a bit messy and error prone for me, but I fumbled my way through it, based on some excellent guidance from @Hawkeye
-
JST-XH connectors are half the height of standard duponts!
-
This little pin converter from @Altitudereally cleans up and simplifies the character LCD wiring.
-
 1
1
-
-
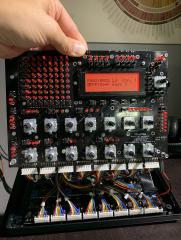
Using 100mm JST-XH cables to connect the control surface and base PCBs has made "all the difference" in terms of simplifying the build process and making it easy to service the individual sections

11b.jpeg
in Finished MIDIboxes
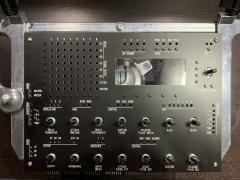
3Posted
Quick update: As much as I love the panels from @julianf I eventually realized that you can have professional looking panels fabricated as a PCB, using Gerber file exports from a KiCAD drawing. The idea occurred to me when I realized that standard 2 layer PCBs are ~1.6mm thick, with rigid copper on the top and bottom layers, which is pretty close to the 1.5mm aluminum panel standard. What's great about this approach is, you can have tons of PCBs manufactured for dirt cheap prices (as in 10 for $35 USD), versus paying $125-$275 to have aluminum machined and inlayed... Some food for thought for the budget conscious...