creatorlars
-
Posts
118 -
Joined
-
Last visited
-
Days Won
1
Content Type
Profiles
Forums
Blogs
Gallery
Everything posted by creatorlars
-
Few quick Q's... 1) For the 8 gate outputs on the core board, where do I connect ground of the jacks? (my SEQ is using 1/4 inch jacks) It's not shown in the SEQ AOUT wiring PDF. 2) What's the difference between the 2 gate outs on the AOUT board and the 8 on the core board? Any advantage to using the ones on the AOUT board? I was just going to leave them unconnected and use the 8 outs on the core board instead. 3) What's the difference between the 8 gate outs on the core, and the 48 drum pulse outputs? Will I still be able to trigger analog drum modules from the 8 gate outs?
-
hey ultra -- I'm definitely still interested in doing screenprinting for panels, but through getting this all set up and spending a couple of whole weekends trying to get things to come out right, I've definitely realized that setting up a screen for a single panel isn't going to be as cost/time effective as I'd originally hoped. If I set up some sort of service, it may be a 2-3 week waiting time type of deal, so that I can put multiple panels onto one screen and do them all at once. I'll be glad to post some higher-res pictures. The lines are super-clean, and detail work comes out very fine (I'm using a 220 mesh screen.) But, as you can see from the pictures, none of the prints come out the same as if you'd printed it on a laser printer... Occasionally some lines are a little thick, or there is a dot of ink in the wrong spot. The "Mastermind" panel is a very messy print caused by too much of the emulsion being rinsed out before I printed it. In this case, I wanted that effect, since it fit the aesthetics of the project. You can see cleaner, more indicative prints, in the module picture (The UD-1 came out perfect, the 8Z8 on the right, you can notice a couple of thick lines caused by the screen slightly moving during printing.) Personally, I much prefer the "natural", old school look of bright screenprinted ink on a black panel to a label design, but if you want a perfect, straight out of Illustrator looking legend for your panel, go with lazertran, decal paper or something like that I guess. Laser etching is great too I'm sure, but I wanted to go 100% DIY on this project. So, yeah I'll be glad to screenprint panels for any Midibox users (as well as buy, drill, paint, coat panels, etc), but just keep in mind the preface that you shouldn't go through me unless that vintage screenprinted effect is really what you're going for, because I won't be able to guarantee that the screenprint is going to come out looking like a laser printer or a CNC machine. I'll post more pictures soon. :)
-
The datawheel is this: http://www.okw.co.uk/products/okw/star-knobs.htm They are expensive, but I got a free sample by filling out their form... now if they'd only sent me free samples of the 16 collet knobs with yellow tops I'd requested, too... I also got two free MAX525s for the AOUT by making two sample requests a few weeks apart from Maxim IC.
-
I have the board etched for the 909 kick, and all the components in, but haven't built it or tested it yet. Kind of building these modules in tandem with the sequencer, so it's taking a while. (Boards are done for the Clangora, UD-1 & 808 kick though.) As far as rare components, no -- I found all transistors and ICs on Mouser very easily. Be sure to read the text at the link above before reviewing the PDF -- it will give you the transistor & diode types. I was really excited when I found this link as well, because the 9090 is too big of a project for me to tackle right now (and I'd rather build it modular-style anyway.) I'll definitely post some soundclips and more pictures when I get it working. It looks like it's going to be a pretty f'n sweet module. I REALLY wish there were PCBs available like this for the remaining 9090 voices as well... someday I'll be adept at protoboarding from schematics I hope.
-
The modules are... microLARGE's 808 clone -- Snare drum and Bass drum. The Snare drum is built with a noise source input jack, so that i can patch in different/tunable noise sources (although I plan to have the standard 808 noise source on a different module as well.) Then the 909 kick PCB based on the 9090 project, found here: http://www.analog-synth.de/synths/tr909/tr909.htm The UD-1 and Clangora are Thomas Henry designs. UD-1 PCBs are available at the Thomas Henry forum over at electro-music. Clangora was in the Nov 2003 issues of Nuts & Volts -- but you can find the article over on that forum as well. The modular cabinet was built using the DIY designs at www.synthesizers.com -- but I used poplar hardwood instead of shelving material. The MB SEQ is tweaked out w/all banksticks, all 4 IIC boards, all the extra LED/Button options (except for Matrix display), and full AOUT & drumpulse outs (8x quarter inch jacks for CVs, 8x quarter inch jacks for Gates, and two 25-pin serial ports to cover the rest of the pulse outputs, although I won't be wiring the second one up until its needed.) There's an internal +/-12v 2A power supply, and this will feed the AOUT board and the core board. This has a standard IEC jack for connection via standard computer cable. (The +12vdc line going into the core board shouldn't overload the 5v regulator, right? It's got a heat sink.) I have lots more modules planned... I've only found one tutorial for screenprinting panels, but can't find it at the moment. At any rate, my methods are different -- and I'm using pro supplies instead of Hobby Lobby stuff. (Expect to spend close to $200 to get setup with ink, emulsion, screens, and everything else.) I'd definitely reccomend it though -- but if you want a quick, easy solution and all you'd be using it for is a couple panels, probably not worth it. I needed to get a screenprinting rig set up anyway, for band merch, tshirts, posters, and so on. Since nobody buys CDs anymore, we're probably going all vinyl & digital with our releases, so we want to hand screenprint all the vinyl sleeves. I'd be glad to post a full tutorial myself, and will if there seems to be enough interest, but I don't feel 100% qualified to do it yet. :) I'm still a beginner. It really is a pain in the ass, but I love the organic/imperfect look of the prints, since they are coming from basic shape/bright color designs I made in Photoshop. Yes, I'm very inspired by 70's gear designs, oldschool sci-fi, and simplified postmodern art in general. 70's synth logos and such work their way into all of my other design, too... so it's weird actually designing for a synth. I have to admit, a lot of the reason I dove into DIY is because I'm so anal about aesthetics, and hated the way most of my gear looked on stage. For now, there are TONS of great screenprinting tutorials out there... everybody does it different so plan to do several tests, read several guides, before getting a good print. For printing on the panels, I reccomend using Plastisol ink, I use a brand called Triangle Inks... it needs a bonding agent that's mixed in with it to bond to hard surfaces (instead of t-shirts.) It's very thick and goopy and messy, so prepare your work area appropriately... You need mineral spirits to clean it off of anything, too. A quick breakdown of my panel-making process was this... 1) Design drilling template & silkscreen, get transparencies made 2) Drill the aluminum panel with step-drill after center-punching (this will be more perfect once I get a drill press) 3) Deburr, sand down, polish really well, wash off really well... 4) Duplikote automobile primer, 1 coat -- let dry an hour, wipe off any dust... 5) Duplikote automobile flat black, 2-3 coats 15 minutes apart... let dry a few hours... this goes on really really smooth compared to Rust-O-Leum I've noticed. 6) Coat new screen with emulsion (I use a basic Diazo textile emulsion) and let dry an hour or two 7) Place panel design on screen, cover with a sheet of glass to hold it flush. 8) Expose to 500W worklight bulb for 10 minutes, bulb suspended 12-16" above screen. 9) Rinse out the design under hot water, use fingers to make sure every part of the design is cleared... let dry. 10) Cover parts of the design you don't want to print w/packaging tape (I did this to get the two-color prints out of one screen) 10) place panel on a flat surface, place screen on top... have buddy hold screen down very firmly on top of panel... 11) place a line of ink mixed w/bonding agent (you want to mix it right before you use it) along the top of the design... use squeegee to pull the ink down over to cover all of the design your printing -- don't push down. 12) Very firmly push down to print the panel, top to bottom, slowly and with lots of pressure, holding squeegee @ 45 degree angle towards you. 13) Remove screen. I read once about a guy suspending the screen 1/8" above the panel... this isn't necessary unless you're using that cheap hobby lobby ink. If you do it with Plastisol ink, you'll get a messier print. If the panel is small, your screen might stick to it... so using doublesided tape to stick the panel to the table/printing area, etc. beforehand is a good idea. 14) Immediately stick panel in an oven @ 200-300ish for 15 minutes or until ink is cured. It won't air-dry, so this is important. The ink will smear even a couple days after printing, unless it is cured. And smeared ink ruins the whole point of a really clean-lined, bi-color screenprint. 15) Clean your screen VERY thoroughly with mineral spirits and hot water, let it dry... if you let ink dry in the screen you've ruined your screen. 16) Do second print, of any other color, repeat curing process... 17) Apply thin coat of satin polyurethane (I used a foam brush and the kind in a can) to panel... stick it in the oven a little longer... repeat doing this in thin layers until you have 3-4, then let it sit for a few hours before going back and polishing/buffing the panel. And you're done. Thanks for all the nice words, I've been itching to show it to you guys. :)
-
SEQ v3 & modular drum machine in progress. Hand silkscreened panels. Kinda dusty and messy right now. Pretty much just lots of mounting and wiring left... LZX Industries is a personal logo I use for DIY projects. I wanted the designs to have a sloppy, "mass manufactured" sort of feel, in ironic contrast to the truth. :)
-
Has anyone made a front panel layout with the neew buttons options?
creatorlars replied to intellijel's topic in MIDIbox SEQ
I just did one -- hand-drilled the panel and silkscreened it this week. Turned out okay. I'll post some pics over the weekend. -
Anyone ordered from OnlineMetals.com before, for frontpanels? They do custom cut pieces of aluminum and steel, in a variety of widths and types. Does anyone know the difference between the types of aluminum they offer?
-
Introductions, and sequencer suggestions for this wicked case?
creatorlars replied to creatorlars's topic in Design Concepts
As promised, here's pictures of my eDrum... just finished recasing it. Not nearly as perfect as I wanted, and I stenciled it instead of screenprinting, but I was really ready to be done with this project. I'll post some pictures of my screenprinted guitar synth & mbseq case soon. Was going for a post-nuclear scifi movie kinda feel.
-
Great! Thanks, TK. I will post my results. I am wrapping up other projects, so I won't begin my SEQ for a couple weeks, but it will happen fast. :)
-
I am having trouble finding precision trimpots for the AOUT module at Mouser or Digikey. This one is +/-10%... will it work? http://www.mouser.com/search/productdetail.aspx?R=3362H-1-501LFvirtualkey65210000virtualkey652-3362H-1-501LF
-
great! thanks for your help. i'll be sure to post my results when i get around to this.
-
Sweet, that's what I thought. How easy of a source code hack would it be to add footswitch functionality such as what I described for play/stop/rewind to beginning? I imagine this would be a piece of cake... just connecting the footswitch jack to an extra DIN pin and writing new function(s) that would call the already-in-place transport functions? But I want to make sure I'm not getting in over my head here. I guess it would be three cases? -when pedal is pressed... --if transport is playing, stop --if not, play --if less than .5 sec since last press, stop and rewind to beginning Maybe this should be in the MIOS forum.
-
As I understand it, it's not really a native control -- but how involved would it be to add footswitch input(s) for the MBSEQ? For my own purposes, having one footswitch for transport (step to play, step to stop, double-step to rewind to beginning) would be all I need -- but, of course, having 2-3 footswitch inputs, assignable to any parameter in the firmware, would be ideal. If it's not too difficult to develop, I'll be glad to help code it. Setting a single footswitch input to a single button (like "Play") would I assume, be easy... just solder the jack to the same leads of the button, right?
-
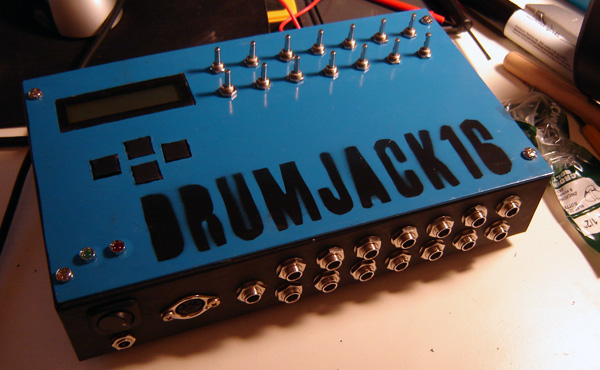
Awesome!! More money for drum circuits. :) How have people wired this up, assuming separate units for drum modular + seq? Serial cable + ports? I'd think 16-ish signals out of the 48 would probably be more than enough for my purposes.
-
gusto -- i like your idea with the analogue circuits + the seq. i am doing something very similar. can you give more information on how you plan to use the Dout boards to trigger the sound modules directly? I was thinking I'd have to make a Midi/CV interface to achieve this, but I know there must be a better way. Can the 48 drum pulses available trigger analogue sound modules? I have an 808 bass drum module built, and want to make several from the 808, 909 and others.
-
SEQ V3 Button/LED toggling for groups/layers/tracks?
creatorlars replied to creatorlars's topic in MIDIbox SEQ
Ahhhh... that makes sense. I was not aware of the capability to select multiple tracks. I guess groups can be selected like this as well? Such as, with Track 1+2, and Groups 1+2 buttons selected, it would be in effect, having tracks 1, 2, 5 & 6 selected? (Out of 16 possible?) You don't have to answer my question, I am sure it is in the manual. Just thinking aloud. Workflow and speed are definitely a primary concern here... I work with a guitarist and bassist, and program all drum sequences during the writing process -- so the faster I can hammer out a sequence and move on, the less frustrated we all get during a long writing session. :) Thank you, Thorsten! I appreciate the work you have done with this project, thank you for inspiring me. -
I'm designing the frontpanel for my MBSEQ V3 and plan to implement a 16x4 LED display in between the LCDs and GP buttons. I would like to lay out Group/Layer/Track/Trigger indicators along the same lines of the 4 LED rows... My question is, can I just use the LEDs as the selection indicators, and have a single button beneath each of these columns, that will toggle through the selections? For example, 4 LEDs and 1 Toggle Button for Track select, instead of 4 LEDs and 4 Buttons? I think this would look clean, and I'd be saving money on 10 buttons. :) In effect, this would give me 4x20 LED rows with 20 buttons beneath each column of 4. The 16 columns on the right would be separated from the 4 "selection" columns on the left, by using different color LEDs and Buttons. (Of course, the 16 right columns would line up underneath the two LCDs. I would probably mount the BPM LED display or the F1-F4 buttons above the four columns on the left.) I'm mounting my datawheel in the bottom right corner, since it is a desktop console and I am right handed.
-
Sorry to bump this -- but I love the knobs and buttons on this unit! I have found the hinged and square tactile switches & caps on Digi-Key (made by OMRON Electronics), but what manufacturer/supplier offers the knobs and jog wheel used? They match the switches so perfectly I have to ask. I don't think OMRON makes any knobs.
-
Introductions, and sequencer suggestions for this wicked case?
creatorlars replied to creatorlars's topic in Design Concepts
There are a gazillion good "basic illustrator" tutorials online. I'd reccomend getting yourself familiar with the basics, then lay on a grid and begin laying out your stuff. You can break apart any shape and adjust points and curves as you like. (Find a font you like, break it up, then tweak it, unless it's tiny descriptive text -- keep that simple and readable.) I like playing with positive and negative space. :) -
Introductions, and sequencer suggestions for this wicked case?
creatorlars replied to creatorlars's topic in Design Concepts
For panel design, I'd prefer to stay in Adobe Illustrator. Although I can do whatever is needed. I have used Frontpanel Designer. -
Introductions, and sequencer suggestions for this wicked case?
creatorlars replied to creatorlars's topic in Design Concepts
awesome, thanks -- i'm sure i'll be full of questions, but it won't be as bad a time as i had building the eDrum! i was a complete newbie when i jumped into that one. so glad it works finally. if you have panel artwork ready, go ahead and e-mail me a file: lars@8cac.net, so I can see what we're lookin' at. :) it'll give me more motivation to get this going. yeah, ellum's pretty much dead. i gig at the doublewide occasionally, but 21+ is a down side for my crowd. cops in dallas are trying to crack down on DJs and electronic music in general. we have a lot going on in denton, though. 6+ currently active DIY venues. a few of us are trying to instigate more of an electronic/experimental scene, which is beginning to flourish. let me know if you're ever on this side of town. where can i hear some of your tracks? -
I'm very interested to see what you come up with. My group uses resolume quite heavily as well, and I also want to build a controller for it in the future. I'll be keeping up with this thread. :)
-
Introductions, and sequencer suggestions for this wicked case?
creatorlars replied to creatorlars's topic in Design Concepts
Awesome -- I will be sure to post pictures as I work on this thing. I've spent my fair share of time in Arlington. I got cussed out and thrown off stage halfway through a set at Dreamworld once. Haha. Do you play out? I'm building a small press for frontpanels right now. Give me a chance to get that done and post some pictures of it and my results with it, then we can work something out. Texas, USA. Texas is kind of its own country, I guess. :) I will ship where ever as long as costs are covered. I can do silver if I've got silver ink. So if you wanna mail me some with your panel, or don't mind paying for it - then sure! I can do any color. I need to find a supplier that will sell in quantities smaller than a quart, or maybe I can find a color-sample pack... quarts are usually $16 and way more ink than you'd need for over a hundred panels. :P Also, I'm a professional graphic designer, so if you wanted a logo graphic or typography done for silkscreening purposes, I can maybe help with that too. I will post some examples of things I have done on my site, whenever I get everything set up. -
Introductions, and sequencer suggestions for this wicked case?
creatorlars replied to creatorlars's topic in Design Concepts
Cool! That's exactly what I needed to know. Thank you for taking the time. :) I'll PM moogah about the MB808 to see what's up. More feature heavy = good thing for me, though -- so long as the core functionality/workflow I need is still there. The BLM extension looks great. I'll brainstorm about implementing it. I could always install it as a rack panel in the same rack with my modular drum unit. Or maybe smaller LEDs would make for a more space-efficient matrix. I will be very interested in building your sequencer as well, once the project is ready.