
Rigo
-
Posts
74 -
Joined
-
Last visited
Never
Content Type
Profiles
Forums
Blogs
Gallery
Posts posted by Rigo
-
-
am also interested, where can we find it?
-
or you can live life on the wild side and connect two midi outputs-jacks to the single output on the core board
i've been using this technique successfully for a while now, but it's not recommended fot all situations and may not work with all midi devices.
Do you think it will work with two laptops each using a 2x2 m-audio usb midi interface?
-
Is it possible to have two midi outs using the LTC module to sync two Laptops to the midiclock box?
-
las fotos estan el la seccion de midibox of the week midi box (live controller made by Rigo)
-
Hello, sound nice, please could you give us more details about that point ?
How did you connect the keyb.pcb to mbhp, and what does it do ?
Then are the joysticks playstations ones ?
I tried to get some (from psone), but they have a spring that center them to the origin, and they look impossible to change :/
Greetz !!
Hi there
well the ps/2 keyboard is not the play station 2 keyboard, if that is what you ment, it is a regular pc keyboard conected to the laptop using the keyboard (ps/2) port
-
I bought the joystics in the link belloe for $8 dlls each.
http://www.phidgetsusa.com/cat/viewsubcategory.asp?category=5000&subcategory=5220
there are more in here for $+/-4dlls
http://www.alltronics.com/cgi-bin/category.cgi?item=22P010
and a few more here
http://www.analoguehaven.com/doepfer/spareparts/joystick/
http://www.bent-tronics.com/categoryNavigationDocument.hg?categoryId=2
-
I'm really interested in both of these topics. I was fortunate enough to obtain a number of rackmount blanking panels, the HP ones with that nice dark grey power coating, and I was thinking that they could make nice face panels if I only knew how to mill and screen them... I've milled timber before but never metal, and I've screenprinted before, but again, never on metal or powder coating, so I'm clueless....
If you guys feel like sharing any advice or links etc, it'd be really appreciated :)
For the milling mine was done using a bridgeford milling machine, using the mount holes the blank pannel was screwed to a sacrifice pice of wood (particle board) clamped down to the milling table, I was tryng to get the box done only with one piece of metal 16 ga. cold rolled steel but it is too hard, and once you are cutting it since it is too thin it starts to vibrate (besides cost, that is why ommercial mixers front pannels are cut by stamping), but with aluminum it is just as a knife cutting butter, if you still want to give it a shot, arm yourself with 3 or more cutters and if you are doning slots bore the path first with as many holes as possible and then try to cut the slot in one slow but constant pass.
one think I would like to add is that I didn't milled my self, I would like to thank my brother's fader in law Chito, for doing the me that favor :) and also my wife and my brother for their support.
I drew it in autocad and passed the drawing to Chito, if you are doing the same think how the piece is going to get milled to make it as easy as possible (no akward mesurements, angles, I know this scrifies "style" but is easier to miill think of $$$$)
once againg thank you all.
-
First of all I will like to thank you all ,for you comments and feed back, thank you very much. :) ;D
I used to work in silkscreen industry, and i know for sure, you don`t need any oven. You must use PVC paint for panel ...you don`t have to "cook" it or fry it ;)
I like your handmade panel, I used to drill holes and file down the fader places once for mixer... never again :) Wood is apsolutly great evry time. Gives those retro look. One thing I dont like at all is buttons. Those buttons are worst buttons I`ve ever tried, and they are wery popular. Probably because they are easy to mount. But, I am slave of easthetics so easiness is not good argument for using them in my aplications.
I have question regarding your faders and screws you use. I also find those 100mm faders but I get alot of jitter with it. I thought it is because of lenght, cose they are acting like antenas and they pick alot of junk waves. Maybe I am wrong. And about fader screws... where did you get them. I cannot find screws with those fine thred.
1 Am glad you are telling me that no "oven" is going to get involved in the silkscreen process. :)
2 the fader slots were not done by filing, those were milled with a 3mm carbide cutter.
3 I think the same for the buttons heheheheh the reasons a) cost arround two or three for a dollar so it compensates for the faders expense b) extreamly easy to mount and very small foot print, I would like to change them but I just can't find a momentary (on) nice looking pushbutton switch that can fit in a 1/4 in. hole. heve you seen any that may fit.
4 am using panasonic 100mm as faders and as far as jitter goes I haven't seen any jitter once or ever, but well I just tried it in the studio not in a live gig.
5 for the screews, i bougt them in a store 3 block away from work, they only sell nuts and bolts, I bought there the screws, the allen key, and the threadner ( I guess thats the name of it, in spanish its called a "machuelo") because my faders did not had the thred in the holes. a few turns with the thredner and it was ready. If you need some screws I can buy them for you, tell me what exactly you need then I ask for a quote, I msg you back and if you want and trust me, just send me the money, I get them and send them using fedex or as a regular letter, the screews are ver very light so weight is not an issue.if I dont find them here in El Paso, Texas I can always cross the border and get them in Juarez, Mexico
once again thank you for all your comments
-
Looks like 6U high to me. Nice job on the milling! What's the plan for the legend, screen print?
silk screen in deed , I just need to find out how hot the oven gets, I don't want the aluminum finish to get "burn" (blue)
-
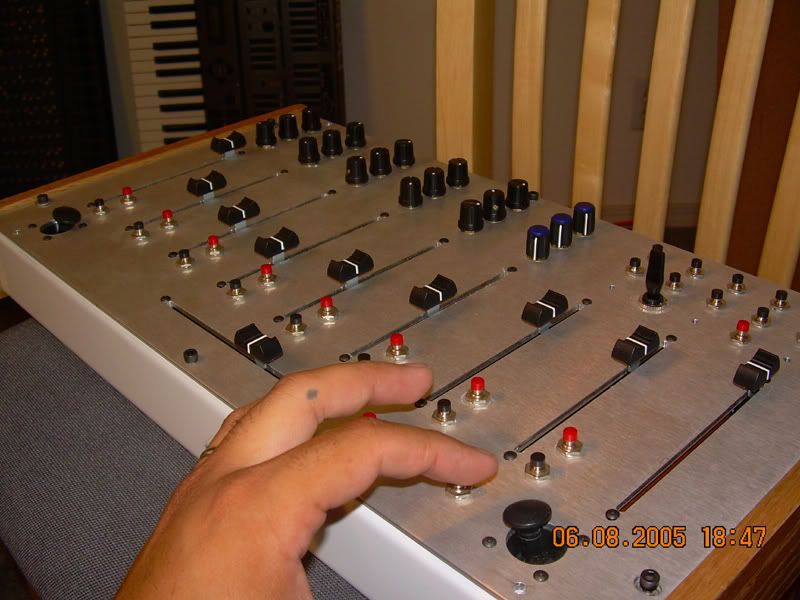
Like the joysticks, small, hard to move them unintentionally.
The faders are (IMHO)to high from the FPannel.
Nice casing, really nice & clean.
I think so too,
am still loking for a way to cut those down.
any suggestion?
-
/Edit TK: moved to MIDIbox of the Week section
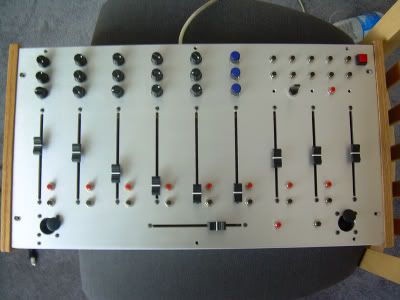
Rigo:
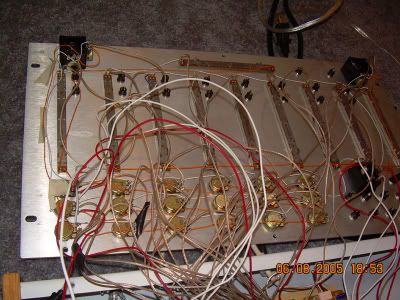
It uses one AIN+CORE+ps/2 keyboard pcb for keystrokes( which eventually is going to get replaced by a DIN)
I use it for LIVE and tracktion.
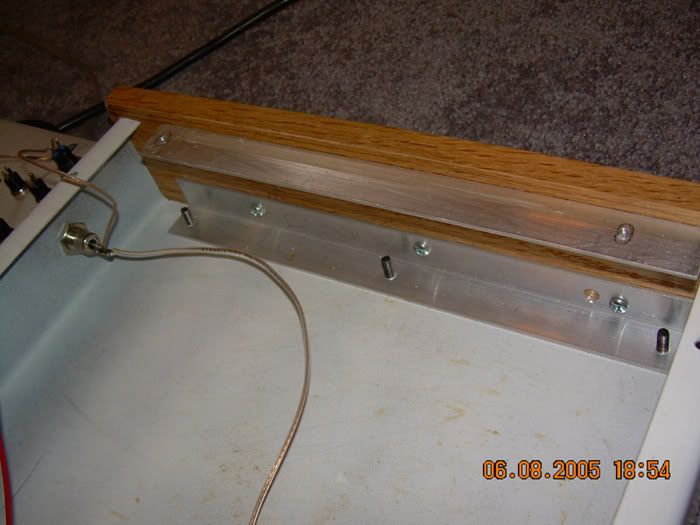
the toggle switch is for going up and down the scenes in LIVE.
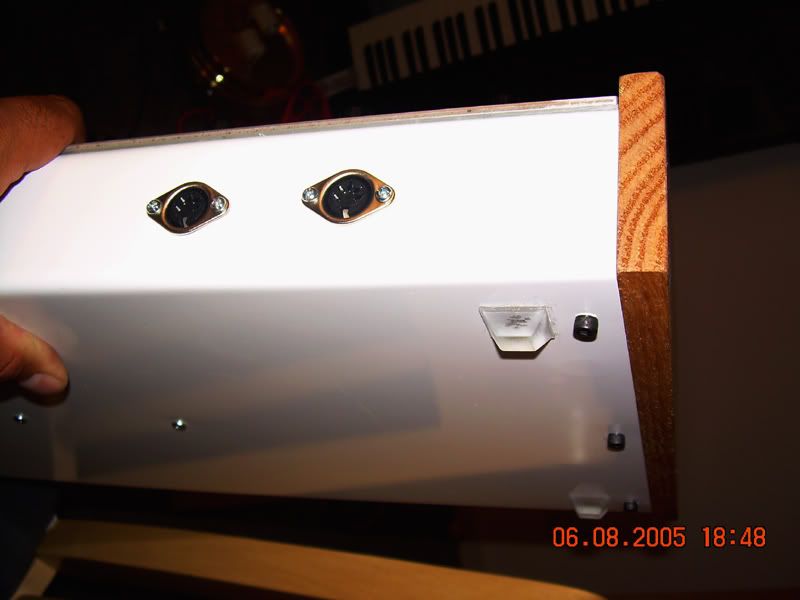
the front panel is a "blank" ionized aluminum rack panel (5 or 6 units wide, don't remember) witch was machined old style with a regular milling machine (no cnc), the back panel is regular cold roll stell 16 ga. bended with a regular hand operated press brake, the sides are red oak + satin minwax.
-
lets do a massive request for service ???? any ideas
-
lets do something about it, am In. who else?
-
Hi there dangel,
well for what I read you are doing the same as I did, as far as an hybrid (midibox + ps2/usb PC Keyboard)
I Just finished my Midibox64, and found one little problem with the keybaord hack, I don't know if this happens with all keyboards, but well, I got my ps2/PC keyboard at computer salvage store for only 1 dollar, I tried it, and it was ok before I opened. well first try to get one keyboard that is not too new because every single one is going to have carbon conctacs to the flexible circuitry (phisical Key matrix) if you get one somewhat old keyboard you should get SIL compatible perforation in the keyboad's pcb., well when I did all connections, it works good for a peridod of time but after a few minutes my laptop starts to beep constanly (as of when you press a key and never let it go) I tried to open notepad to check if something was beeing "typed" , (possible short c., making constant contact) but nothing, am still debuging it but am getting tiered of it, am thinking of a din instead. Also you can only have 26 letters going at the same time, If you have another keyboard with the shift key on, everything you "type" will be in upper case even if you are using the "non-shift" keyboard, but still you can have a shift key and once you hit it you will have another 26 letters to use.
-
Please go to
www.microfx.com.ar
go to productos >> then to 01-midi station mix, it looks like a MBox64, what should we do about it??
-
Saludos a todos, desde CD Juarez // EL Paso, TX
Que estan haciendo en este momento, acabo de terminar un midibox64 con 32 pots al ratillo pongo las pictures, y uds. que cuentan????
:)
-
Creo que es imperativo dejar en claro como armas un midibox.
La plataforma del hardware tiene un MODULO CENTRAL (CORE) que es basicamente el corazon de todo lo que fueses a construir y varios modulos correpondintes a lo que quieras armar.
Por ejemplo:
con un CORE MODULE (CENTRAL) + AIN MODULE (ENTRADA ANALOGA) ----Se pude hacer un controlador tipo el EVOLUTION UC-33e como el que acabo de terminar que consiste de: 18 potenciometros, 10 Faders (como de consola de mescla) y por ultimo 2 joisticks.
-
Saludos desde CD. Juarez//El Paso TX acabo de terminar mi midibox 64? pronto pongo los scans, y uds? que hacen? alguien mas de mexico con projectos en proceso?
-
busca el modulo CORE y el modulo USB y tambien el que se usa para hacer un MERGER talves con esos se pueda
-
Am sorry, I dont get it, did I Check what?
Where else can I look?
-
can the loopback take place even if am just using MIDIBOX(OUT) ->->->->->PC(IN) and nothing else.
-
This is going to be a long one (sorry)
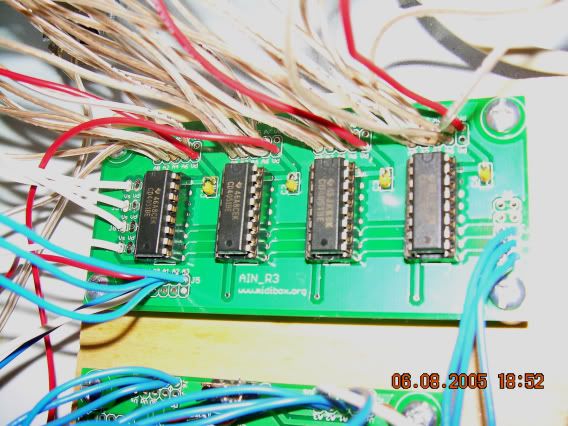
After all work done to fix my jittering problem http://www.midibox.org/forum/index.php?topic=31.15
I finnaly got it to work, I ordered brand new core(R4) and ain (R3) from Smash, well it was good for 2 or 3 day use. Yesterday I was working with my box and live 4 and everything was working perfectly, all the pots and faders assigned where flawless, and suddenly the box died, nothing worked, so I used MIDI-OX to check what happen, nothing was beeing send, I turned off and on the box and nothing was sent. Not even the single upload request that is send every time I turn the box on, I checked voltages and ground everywhere the troubleshooting guide ask to do so, and everything is ok (4.9 v . ).
then I tried to generate a random message to check if my pc midi IN was working
so with a small screw driver I touched the center pin of my cable to the next to the left, and a random midi message was created.
the wierd thing is that:
After unplugging and pluging the midi cable from the my midibox OUT several times I get a single up load request but I have to do the unpluging and pluging procedure several times before I get another upload request, but even if the request is sent, nothing happens after that...........................
What should I do? ??? ??? ??? ???
-
It is finally DONE , I Had to buy a new core and ain module,since I think I fried the pic and regulator nothing worked , yesterday I recived both modules and started the soldering and after six hours everything was soldered, 5 mins to burn and !!!!VUOALA!!!!!! everything works to perfection, thank you all you guys, TK, Raphael, and Tim. Thank you. :) :) :) :) :) :) :) :) :) :) :) :) :) ;D ;D ;D ;D ;D ;D ;D ;D ;D
-
thank you I will get some result for that chekcing tomorrow
=)
MIDIbox of the Week (Traktor Controller made by Sasa Djuric)
in MIDIbox of the Week
Posted
Man your box is superb, very very very nice, am realy impressed, currently am working with your technique for the backlit buttons using round cast acrylic, and now am thinking instead of silkscreen it, I will go your way with that material, I hope you don't mind.