
808Micro - Control Surface

Entry posted by Digineural
2,537 views
In general I don't recommend starting any project with an enclosure that is smaller than what you can fit a proto version of your project in. But my enclosure supply just about gone, so I'll use what I have. The tekbox from TEKO enclosures. (NOTE: If for some insane reason you decide to emulate this work in progress, buy a tekmar case. It's the same but bigger)

Stage 1: Planning (barely) ahead.
Since this isn't a masterpiece by the MB gods, I 'm just going to build the control surface on veroboard (protoboard) and hand wire each component. This gives me that added option of making components sit really close to each other without worrying about PCB traces. My veroboards are from RadioShack. They are pretty standard 0.05" spaced holes and have pads on one side. To make sure the control surface would actually fit in the tekox, I created a new part of the pads in Eagle and then placed each component on the grid. My LCD in this picture is from the SparkFun eagle library. I also placed an optional 4 digit 7 segment display and knobs on the layout. (If you can, always place the knobs on encoder layouts. Even if its just a circle. I have at least 3 old projects that I never use because there isn't enough space for knobs and it looks like crap)
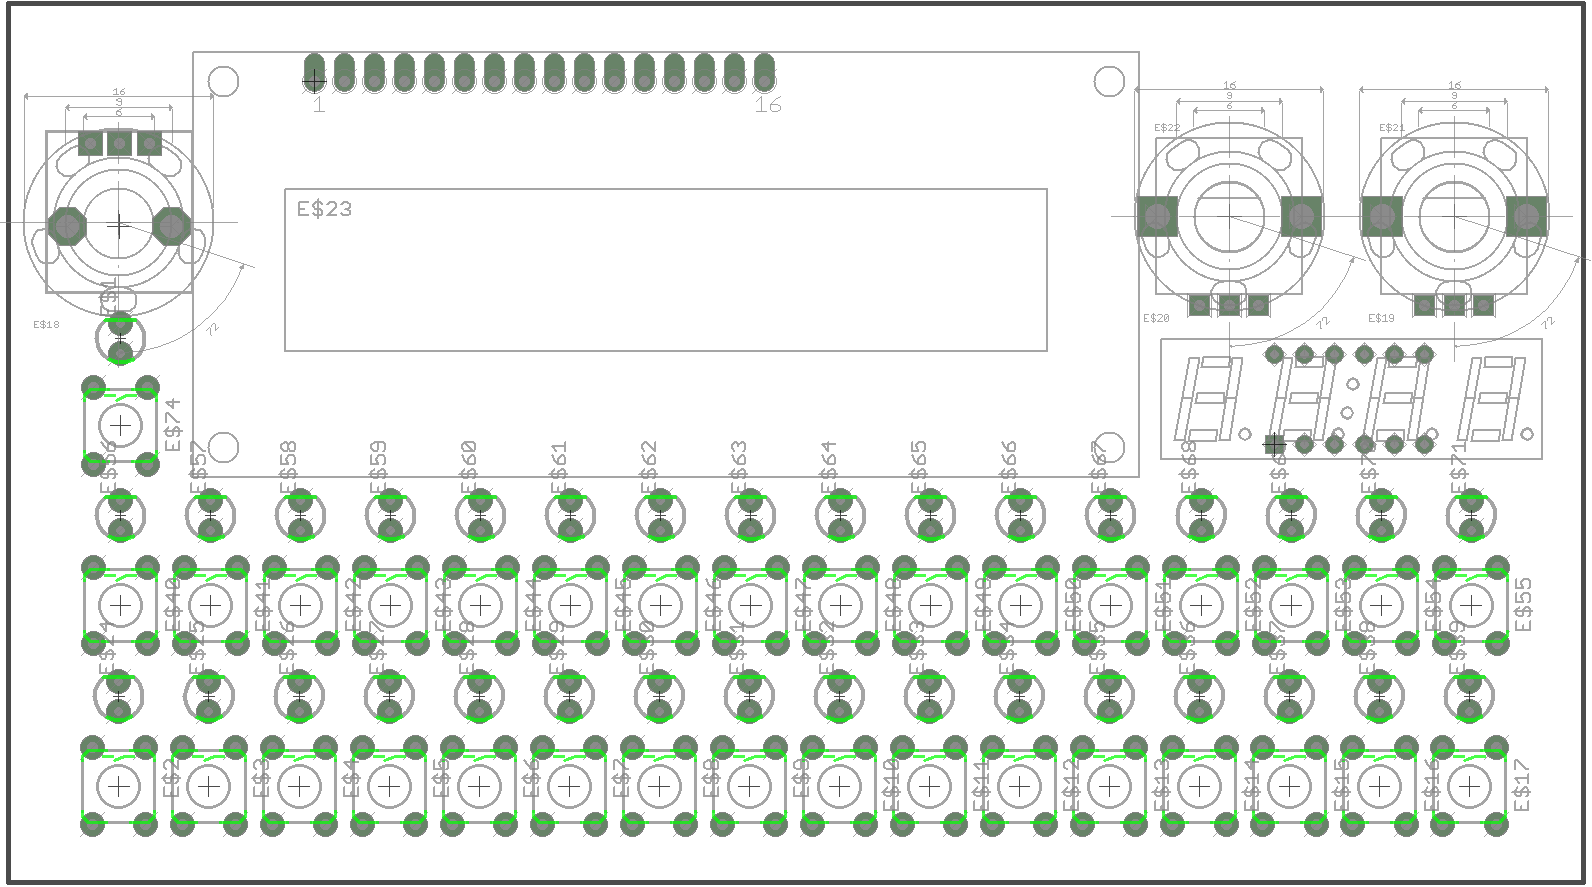
For all intensive purposes the 4 digit 7 segment display will probably not get populated (but its nice to have the option to put one there).
Stage 2: Sizing up the competition
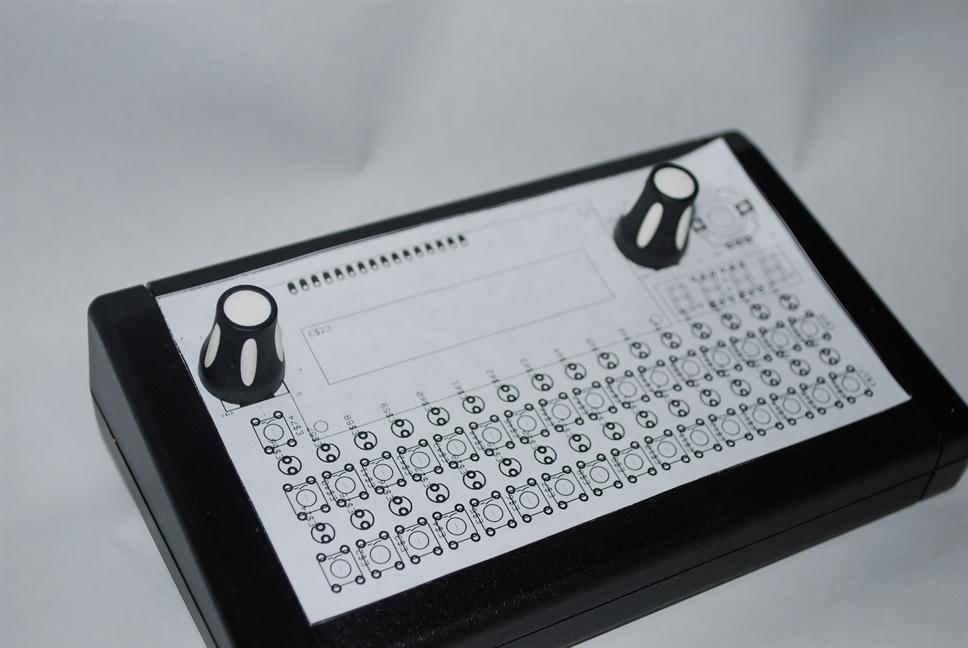
As you can see in the picture below, the 1:1 print layout of the control surface fits perfectly in the recess of the top half of the enclosure. The knobs might protrude on either side of the case recess, but I'll just have to live with that.
Still not done checking though. I've burned myself enough to know that I'll have to test fit some parts on hand to make sure this is all going to work. After testing the LCD, I realized the SparkFun 16x2 LCD pin out is off by 0.05" but the outside dimension is perfect The SparkFun display was perfect. The Displaytech LCD footprint I used wasn't. I'll adjust the part and retest the fit. In the next version, I've also rotated the swing pot 180 degrees so that I can add the record indicator led next to the shift indicator led.
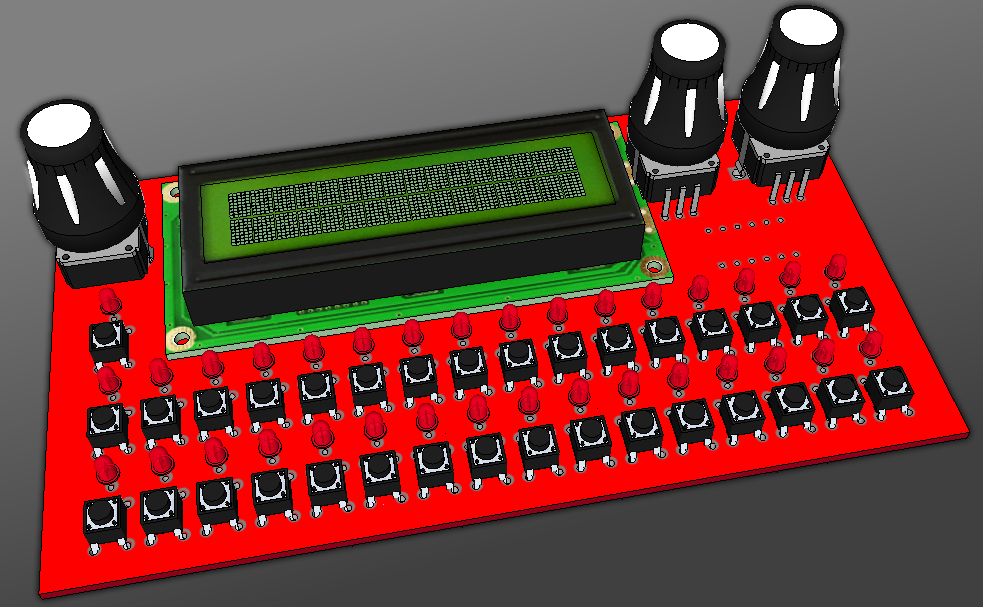
Stage 3: 3D Rendering
This step wasn't even remotely necessary. I'm just playing in sketchup with 3D rendering of eagle layouts. I've modified the EagleUp script and created some new models to generate a 3D rendering of this control surface. I originally had every intention of checking this against the enclosure DXF but OKW (TEKO) didn't have one available, so this is what you get. Still makes me happy to look at it.
This project is still very much a work in progress. At the time of this writing, I'm still planning the base PCB. If for any reason the MidiBox gods see a train wreck coming, let me know.
6 Comments
Recommended Comments
Create an account or sign in to comment
You need to be a member in order to leave a comment
Create an account
Sign up for a new account in our community. It's easy!
Register a new accountSign in
Already have an account? Sign in here.
Sign In Now