

eptheca
-
Posts
373 -
Joined
-
Last visited
-
Days Won
16
Content Type
Profiles
Forums
Blogs
Gallery
Posts posted by eptheca
-
-
You can even have 12 MIDI OUT.
2xI/O
2xQuad IIC
-
I have my MBCV V2 connected to the SEQ V4 in USB MIDI host mode
It runs fine
I haven't connected a keyboard, but it should work the same.
Since a USB hub is not supported, only one thing can be connected at a time
-
thanks guys for the kind words :)
slo,
here's the link to Altitude's tip,
Lamouette,
-Core STM32F4
-MIDI I/O x 2, chained and connected to Core on J11E
-Quad IIC x 2, chained and connected to Core on J4A
-SEQ CS, connected to Core on J8/9
-BLM 16x4, connected to SEQ CS on J2
-TPD, connected to BLM on J1
I just finished it, so I have just scratched the surface on how to use it.
I now have 10 sound chip based synths/sound modules in my setup, and wanted direct MIDI connections for all of them.
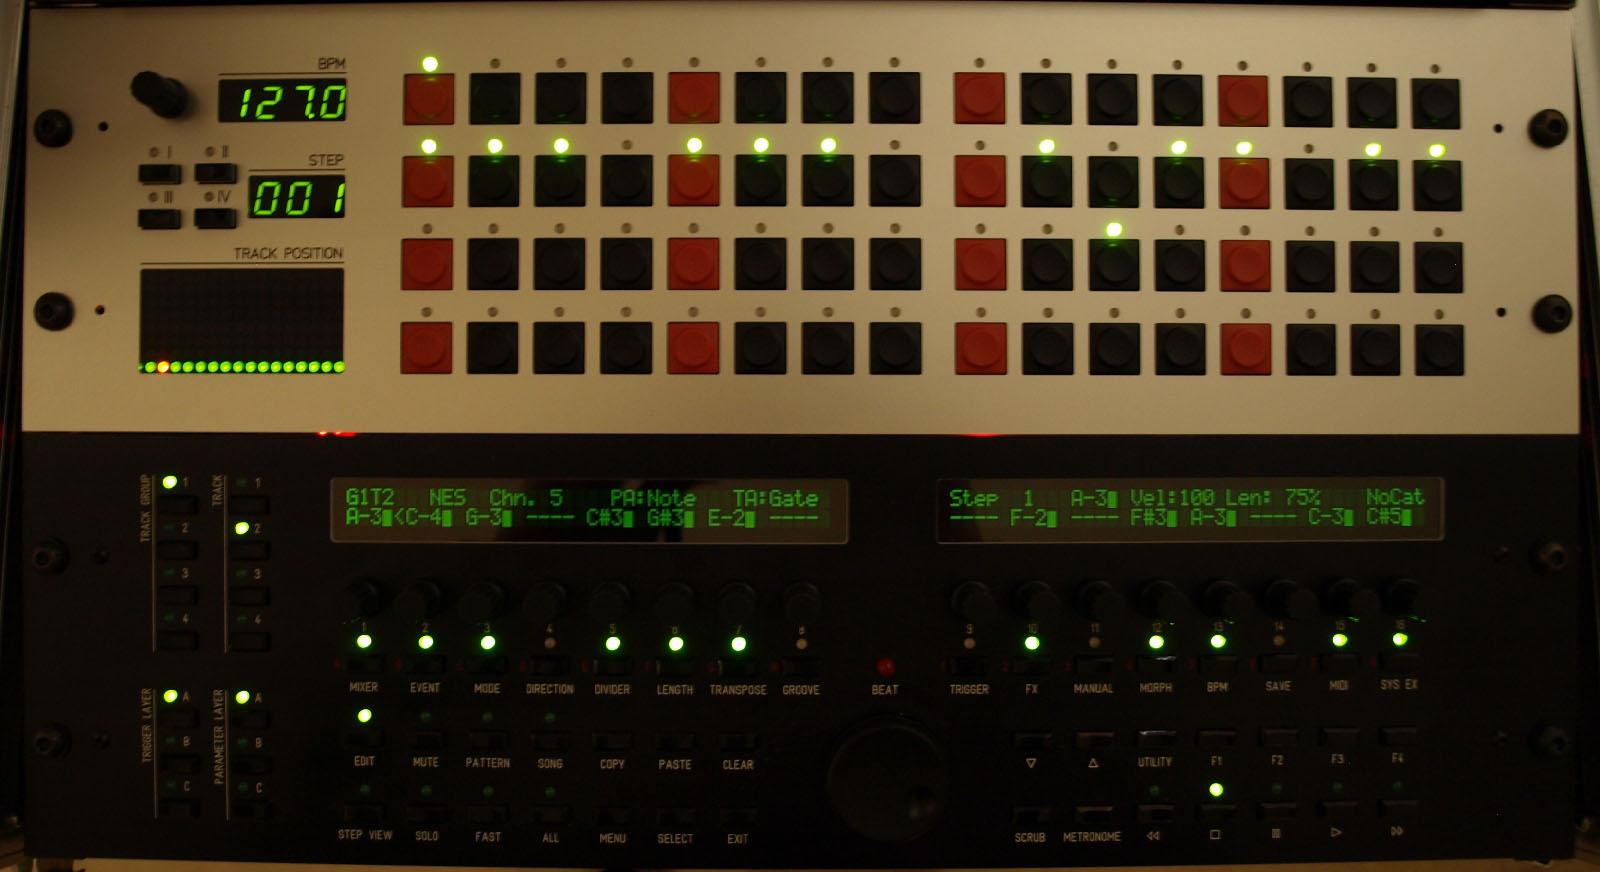
The BLM gives me direct control of the 4 tracks in the group selected
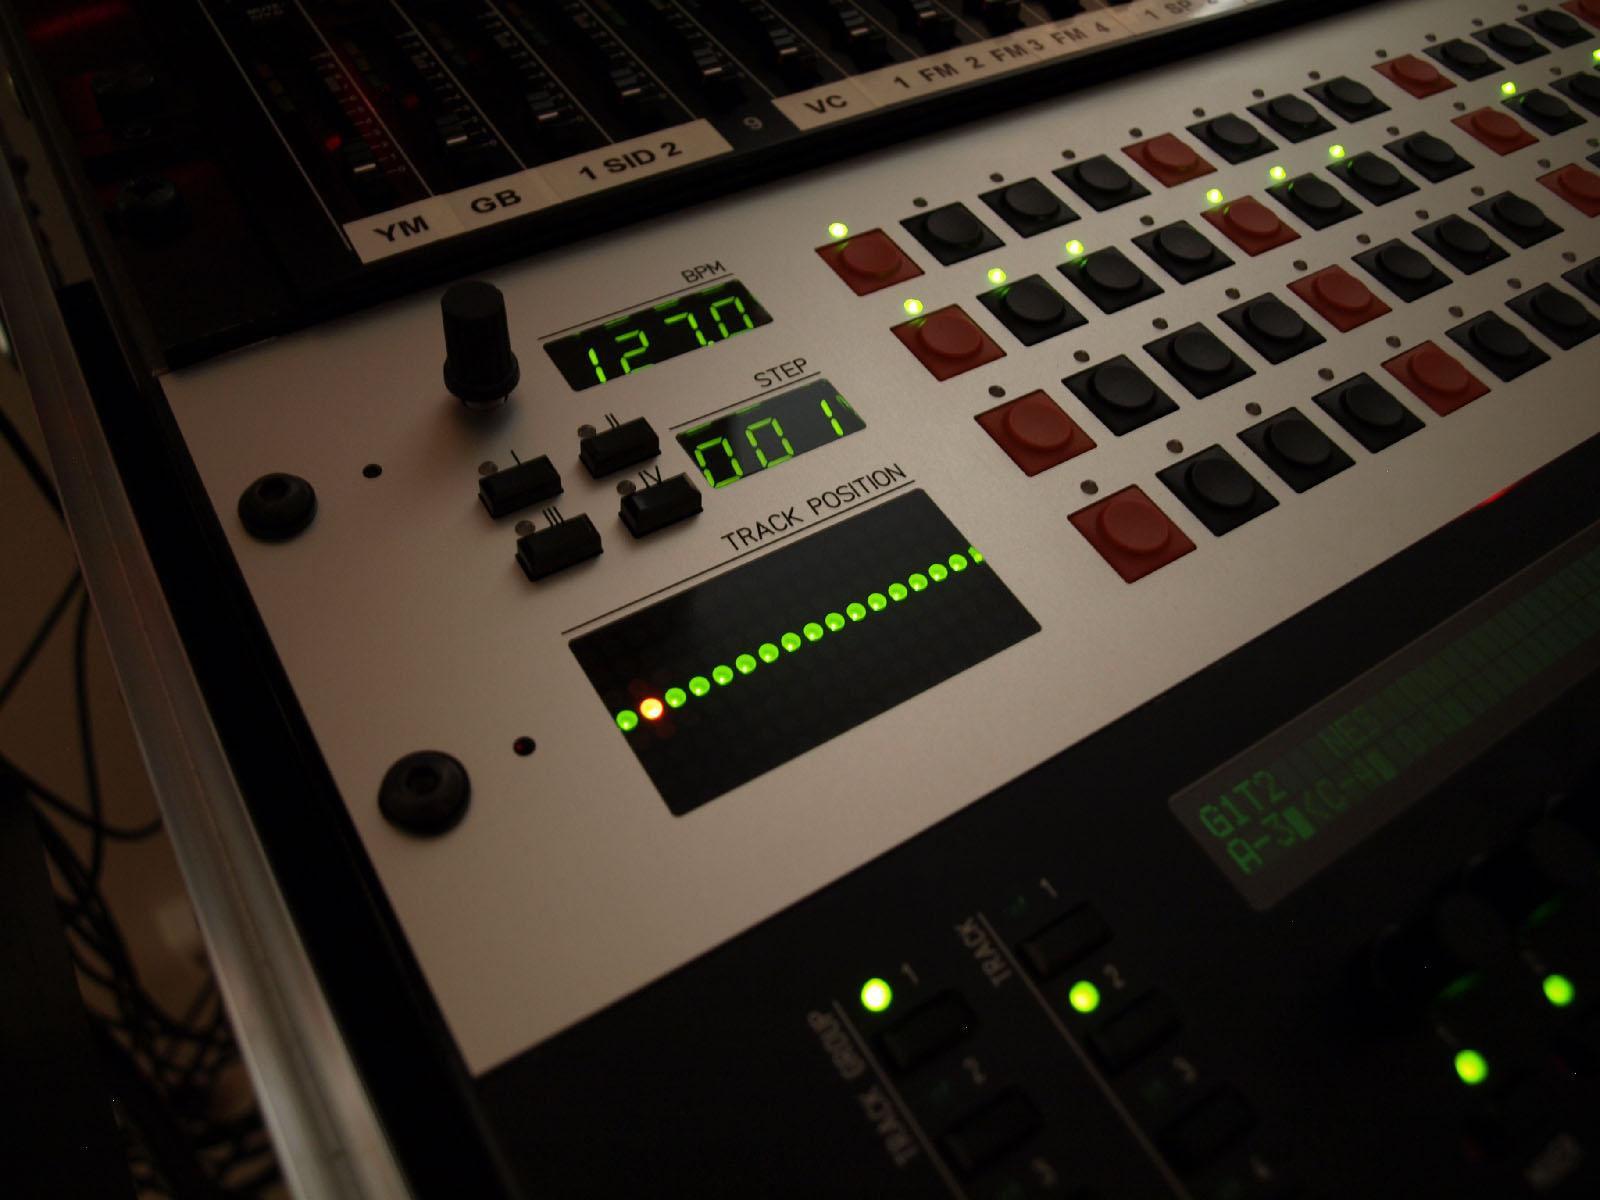
With the TPD I can see and adjust the BPM, pluss its blinking and blinging ;)
I find out something new every time I use the SEQ V4, and with the rate of new features, I don't expect to ever totally master it
I have put in a lot of effort and money to make it look and feel as "pro" as possible, but the "amazing, awesome and outstanding" part is Thorsten's MB SEQ V4 firmware.
I have looked around, and can't find anything close to it. It's in it's own league.
-
 1
1
-
-
In the beginning of this year I decided I was going to finally build The Sequencer.
I built my first MIDIbox project 4 years ago, a stereo MB SID, and have been hooked since.
Next to my kids, this is the greatest thing in my life, I love it.
There's so many great tutorials and tips on the forum about building the SEQ V4, so there's not really a need for another one, but I thought I'd share a few
things I did in my build.
I used the STM32F4 based Core, with the now available PCB.
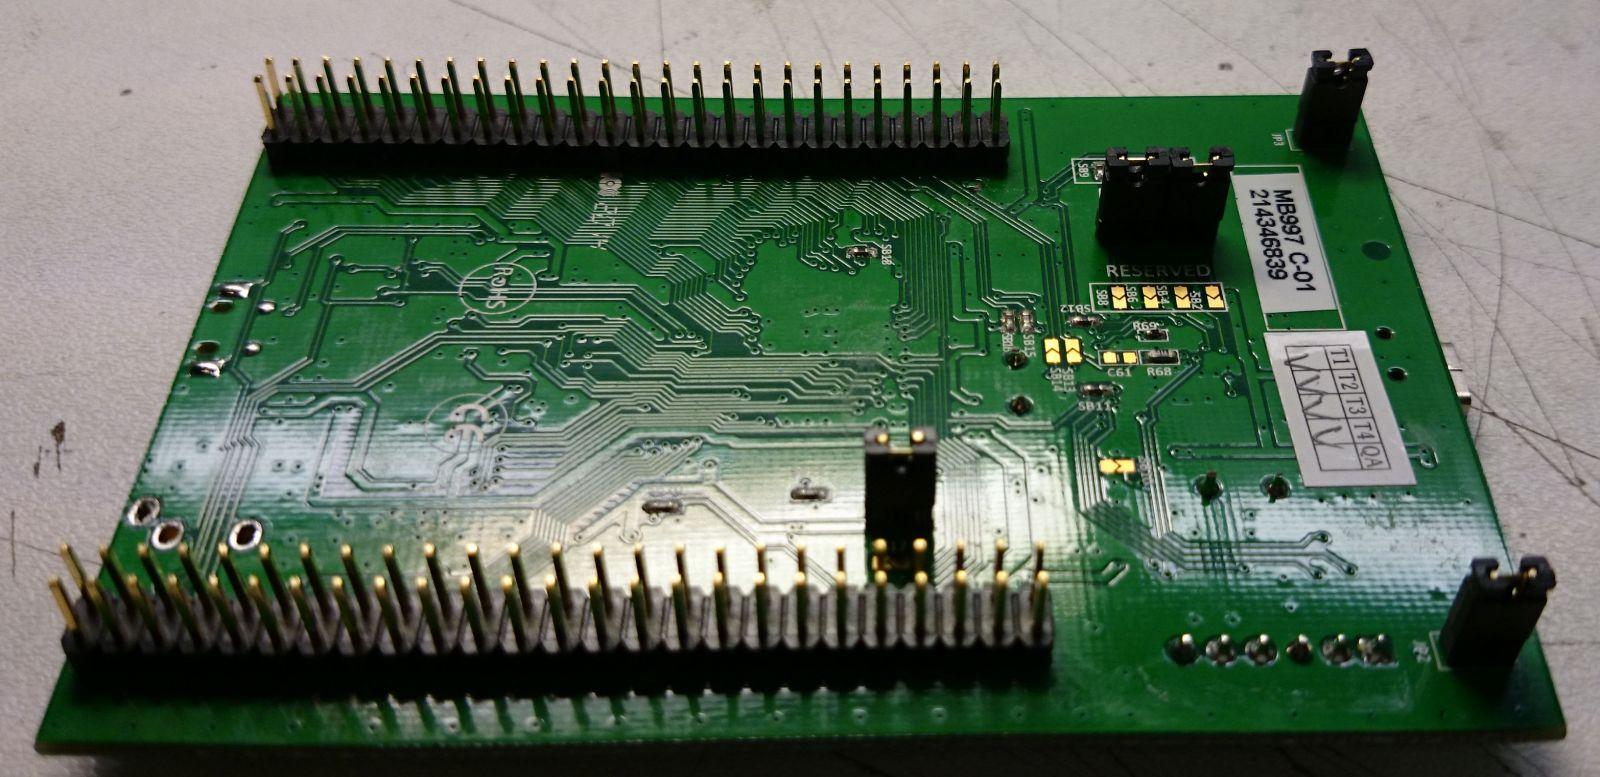
To save some space in the case, I moved and removed some parts.Removed the jack and the button caps. Cut the buttons and some pins. Moved some pins to the underside.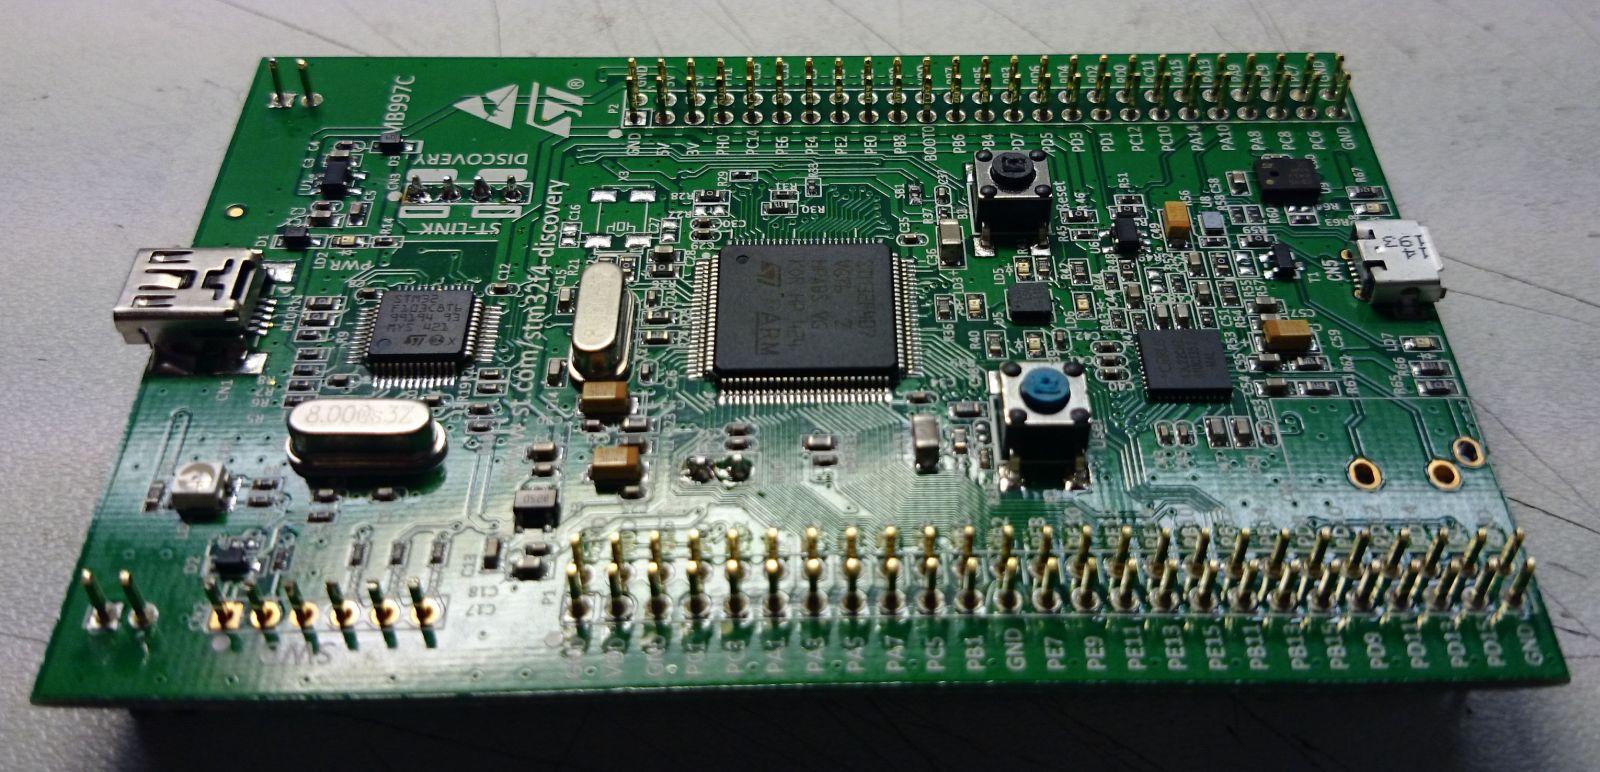
 I used the Kyocera LCD's, and read a tip by Altitude about the back light.I omitted the transistor and the resistors, put in a bridge and a multiturn trim pot.Like sometimes at Mouser, the part doesn't look like the picture, but it sort of fits ;)
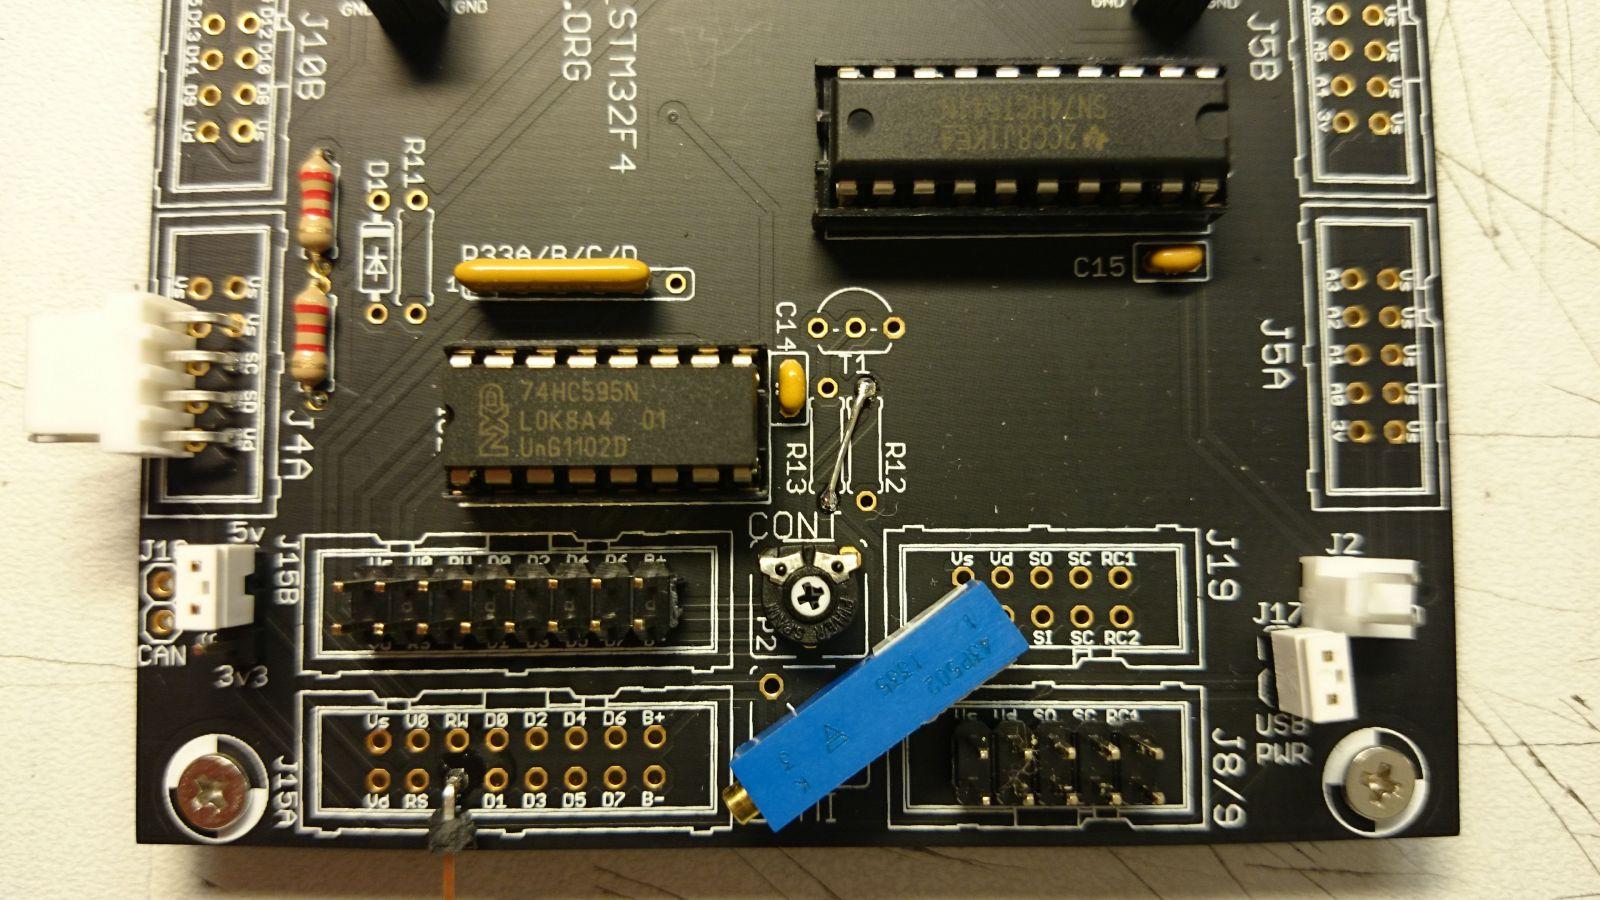 I wanted the max MIDI OUT's, so I used 2xMIDI I/O and 2xQuad IIC boards for 12 OUT and 4 INThe PICs on the second Quad IIC board needs a modified firmware.Tim AKA "Not Mike" AKA SmashTV has it now, but if you want to burn it yourself, it's downloadable further down.
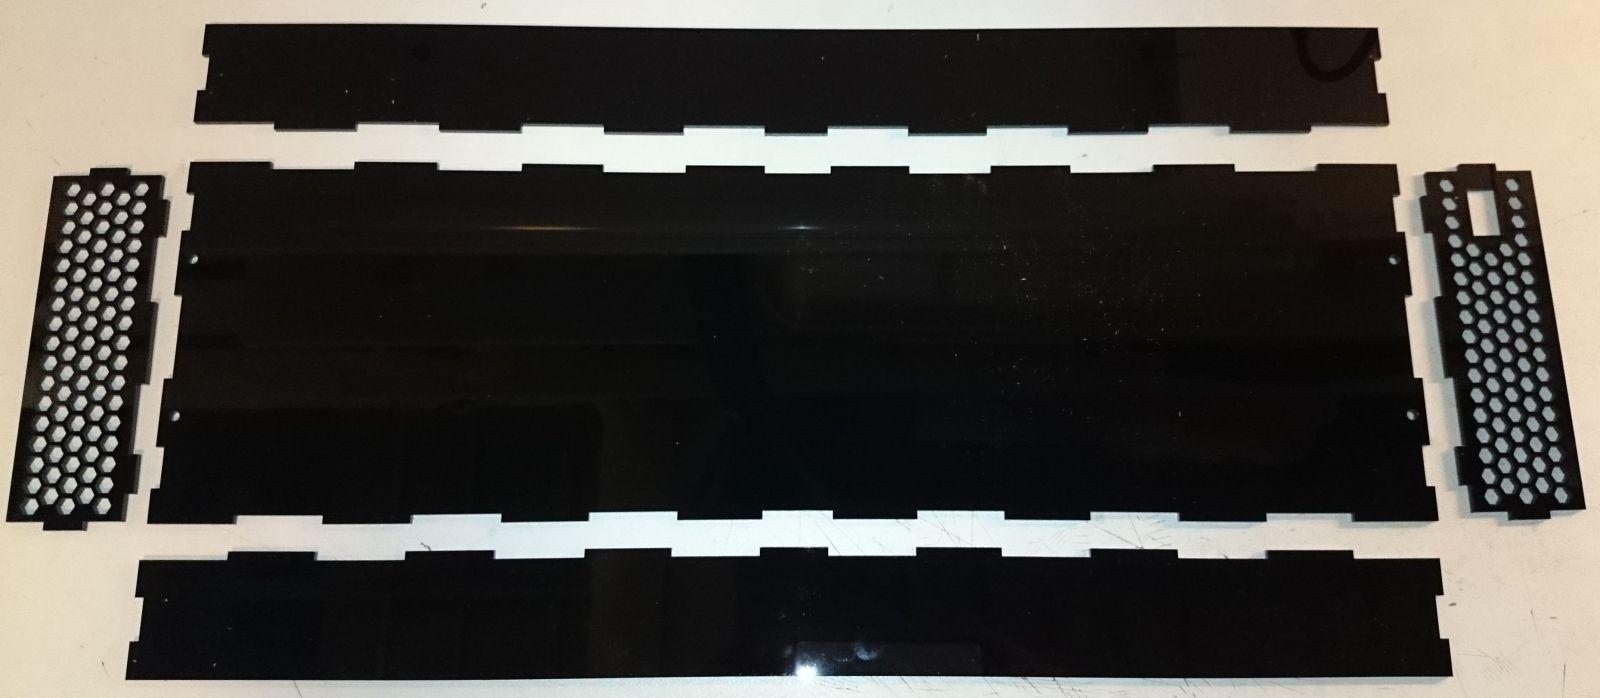
 The rest of the build is pretty standard.Wilba PCB, Schaeffer front panel and common parts.The case is laser cut acrylic done locally.With the mods on the Core, it's only 4 cm. high :smile:
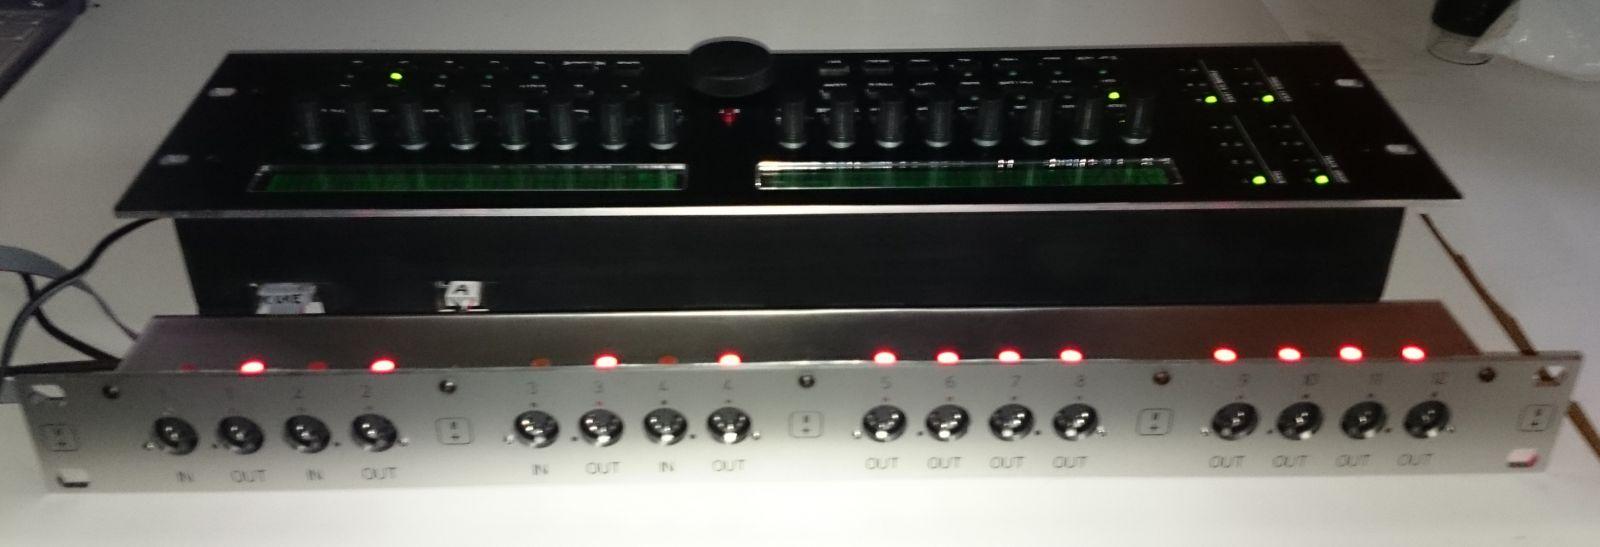
 While I was at it, I built the BLM 16x4 and TPD as well(FPD file further down)
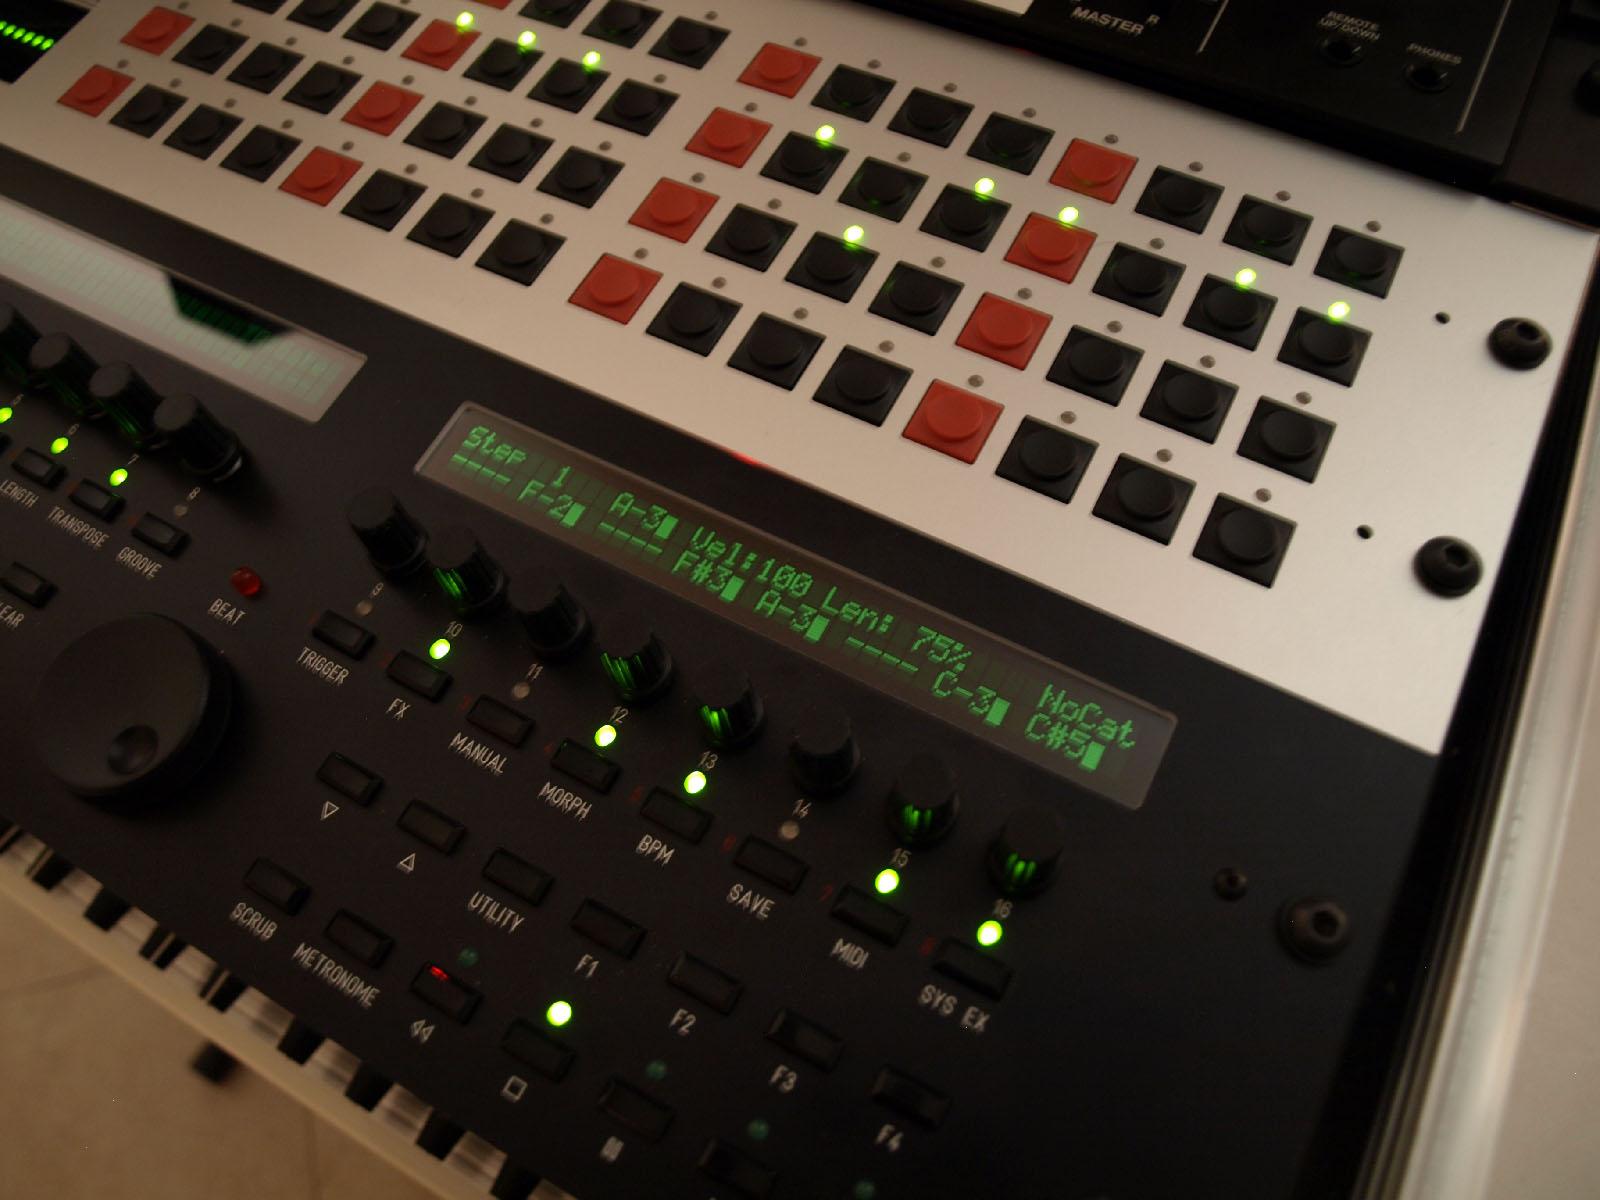
 The last piece was the tinted windows on the TPD, and they really look great I thinkI am very happy with it, and it's so much fun to play.Thank you TK for everything.Thank you Wilba for the PCB ++Thank you SmashTV for your shop and service ++Thank you ilmenator for the BLM and TPD, and the "bling"and of course thanks to the rest of you for all the help, support and inspiration.Beers all aroundedit: I thought I could buy you all beers, but it's only TK that has a working linkWilbas redirects to a Rick Astley video :), and the others don't have oneoh wellCheers Hal
-
3
-
-
I don't understand this message "MIDI protocol TIMEOUT" on the MBCV
-
-
OK. Thanks TK.
Forget about it, it sounds like too much work, and if Note On, Velocity = 0 is the standard, we'll stick to that.
For my synths, they are custom / home made stuff. I will try to change the firmware in them in stead.
-
is it a way to have the SEQ V4 send note off (80) in stead of note on (90) with 0 velocity?
I have a synth that doesn't care about velocity, and therefor triggers twice on each note
-
I am not sure what you want to do.
If you have sound, I guess the firmware and patches are uploaded.
MIOS Studio is only needed for uploading firmware etc.
Which chips do you have?
If you have 6581's, the noise is normal
-
Great \o/
Happy to help, especially a fellow Norwegian :)
-
the sammichSID has two shift registers on the front CS PCB
http://www.schickt.de/mb.org/sammichSID_CS_PCB.pdf
they are 74HC165's
next to them are the Resistor Networks
they are the 10K pull-up resistors
they have a "dot" by the pin that is the drain, an has to be soldered the correct orientation
the dot goes in the square hole, Ground
-
on the MBHP DIN module http://www.ucapps.de/mbhp_din.html
where are you located Arne?
If you're in Oslo, I could have a look at it
-
I think because Zephyrin is only using one MIDI I/O board with 2 MIDI IN, the BLM can use the 2 MIDI INs that's left.
I don't have this setup, so I can't confirm it, but that's how I understand TK's answer in the thread you linked to
-
I know you're on holiday TK, but maybe for when you come back :)
or someone else
I have my CV V2 connected to the SEQ V4 like you suggested.
When I run the SEQ (press play) the CV V2 displays "MIDI protocol TIMEOUT"
Any suggestions?
-
yes, that will work fine
-
thanks for the suggestions guys :)
-
I have ran out of solder, and my local electronics shop has closed down.
Can anyone recommend a solder suited for the typical through hole and surface mount PCB's for MIDIbox projects?
I have always used a Multicore 60/40 ERSIN 362 solder, but for no particular reason.
I have no knowledge about the different options.
I am about to order some stuff from Mouser, so something from their assortment would be great.
Anybody using a Kester 63/37 type solder?
Cheers
-
Yes, that did the trick :smile:
Thank you
Can I rename them?
Edit: Yes I can in seq_midi_port.c \o/
-
I was a bit quick with the "all working"
On the sequencer, in the MIDI router menu, and the other menus where MIDI port can be changed, only the standard MIDI ports are listed.
-Def.
-USB 1-4
-OUT 1-4
-IIC 1-4
etc.
The "extra" MIDI ports, IIC 5-8 are not listed
-
Thanks again TK :smile:
4xMIDI IN, 12xMIDI OUT,all working \o/
-
OK. Thanks TK.
I will change the connections and check in the MIOS terminal.
-
In the PIC16F88 based firmware, the IIC_DEVICE_ADDRESS value has to be changed from 0x10 to 0x18 (the value is defined in src/iic.asm)
In the MBSEQ V4 firmware, MIOS32_IIC_MIDI_NUM has to be changed from 4 to 8 in mios32/mios32_config.h
Best Regards, Thorsten.
I have now built the SEQ V4 with 2x MIDI I/O boards and 2xQuad IIC boards.
The two Quad IIC boards are connected to the STM32F4 module. Number 1 to J4A and number 2 to J4B
The first has standard IIC firmware on the PICs, the second have modified firmware.
I have also changed MIOS32_IIC_MIDI_NUM to 8 in mios32/mios32_config.h and recompiled.
midibox_seq_v4_88
In the SEQ V4 menu still only the standard MIDI outputs come up, Default - - - IIC4
Anything I have missed?
Best regards
Halvor
-
ilmenator,
I've converted your AI back to FPD, I'm attaching it if you want to put it to the wiki. It was seated to 3U panel but the whole 16x4 BLM is a single block and can safely be moved around or copied/paste to another panel design.
freddy
freddy's FPD file has a 1,5mm. corner radius on the 16x16mm cutouts for the button caps.
For the Marquardt button caps this is too sharp, the radius should be 0,75mm.
Here is the altered file
-
Hi,
Which Core does it have?
Type of LCDs, buttons and LEDs
Picture?
Best regards
Halvor, also located in Norway :)
USB connector on STM32F4
in Design Concepts
Posted
yes you can power the SEQ V4 over USB, but use a powered Hub, the computer socket will not work