

Elektruck
-
Posts
279 -
Joined
-
Last visited
-
Days Won
10
Content Type
Profiles
Forums
Blogs
Gallery
Posts posted by Elektruck
-
-
Looks great!
What's the actual size of 2'x4'?! And did you hear anything from ponoko? In Holland we got some 'fablab' labaratories/ workspaces open for public, where you can CNC-mill, or 3-D print, your own design. But the laser cutter can't handle aluminium plates, maybe it can do this stuff.
-
Only think I could think of was 'Wow you got a wonderful working/looking machine' when X11 starts complaining about his LED's. I thought they were fine, but OK superb you did something with them.
Some warmth for elektruck since the :baby: forces him to move his studio to a cold shed.
;)
Thanks for your warmth!
-
Dear Hans,
I think your LED's are a bit bright, and too yelowish!
-
Hoi P,
Welkom hier! Ik ben ook blij dat ik er nog ben, maar sorry hoor, wie ben jij?
Groeten,
Roel
Hoi allemaal,
Ik ben momenteel een mb6852 in elkaar aan het zetten.
alles zit erop nu nog de lcd aan de praat krijgen(hopelijk met negative voltage
en een triac crowbar voor de 5v protectie.
leuke hobby:P
groetjes !!
@Roel:ben blij dat je het overleeft hebt:)!!
-
Ok thank you!
-
I'm building a Midibox CV convertor with an AOUT NG module, but the link on the MBCV page: 'Interconnections to MBHP_AOUT_NG module' seems dead. The links for normal AOUT and AOUT LC seems ok.
Can somebody tell me how to connect the AOUT NG to the CORE 8.
Thanx
-
Thanks for the answers.
I swept the optocopler with a working one with no result.
I measured pin 21 (counter clockwise from the spot) and soldering seems OK.
But thanks anyway!
-
High,
Yesterday I finished my gm5x5x5 project from last bulkorder, Version 1.1.
Everything seems to work fine except for my forth midi input. If I put a signal in witch works on the other inputs, it's not working on input 4, no flashing LED's nor midi input in my software. I checked everything, changed both corresponding IC's, still nothing. Anybody any idea?!
Greetings,
Roel
-
I got mine too, thank you!
-
Looks great but can you be more specific. Maybe I'm just stupid but what do I see?
Cheers,
Roel
-
Hi Ultra,
I followed your project with much enthusiasm and it's great to see you've come so far. I would like to build such a controller, or controllers myself but LiveAPI or programming is a complete strange world for me. I recompiled some codes now and I'm really proud about that, it was all magic for me.
Last month I builded a MB64e as an Abelton's selected track controller in combination with this great midi remote script: http://stc.wiffbi.com/ I still have to write an article about it on this forum.
I use one slider to scroll through tracks and one slider to scroll through scenes, one volume slider, one start button and one stop button. And with those I can control all clips tracks and scenes in Live. But I didn't use any LED's so I don't have any visual feedback from my controller, Live only listens to my controller. The visual feedback you created using Live API and your controller 'listening' to Live and give visual feedback with those 3 colour LED's is just wonderfull.
So yeah I'm really interested in buying a kit or PCB! I also want to give you feedback but I don't know what, I had the same thoughts about the grid as StuartM, but I can follow your thoughts about it too.
I think you created a great machine and I'd love to play with it. Maybe then I get some idea of what I would change or miss or something else.
The case I like too, far more than the plastic case you had in mind before. I love the roughness about the aluminium box. It is small, normally I like big more. Like those monstermachine's like TR909 or TR808. Those are huge but that's great! All those new machines are so tiny and fragile that I don't get a real bonded feeling with them.
But with the (small)aluminium case you still get the sturdy feeling.
On a dutch synthesizer forum I came across an article about DIY etching those aluminium boxes, looks great.
Here's a PIC, a link to the 'manual' and a PDF I made from that link:acid graphics - enclosure etching
I hope more people are interested in a PCB or kit, and I'm looking foreward to the other boxes you have in mind!
Cheers,
Roel
-
Does anyone know where to find this "808 wiring" pdf? I can't seem to find it on ucapps :/
There is none. When you unzip the 'midibox_808_v1_1c' folder you can find the pinout in the setup.ASM files but you'll have to search. Somewhere I came across a pdf file, I'll attach it, together with a file I created for my own clearance. It looks difficult but as you start you'll find out everything quite simple.
Cheers,
Roel
-
He,
Ik zou die set wel van je willen kopen, heb je alles nog? En waar woon je in Belgie, ik woon nl in Tilburg, vlakbij Turnhout, Belgie.
Groeten,
Roel
200€... ?
-
That "Moppe" rocks !
Great idea and well done !
Moppe rocks indeed, but they don't sell them anymore at IKEA nor something similar. And I just got the idea to build more of these to hire them to schools or so.
-
This is really great!
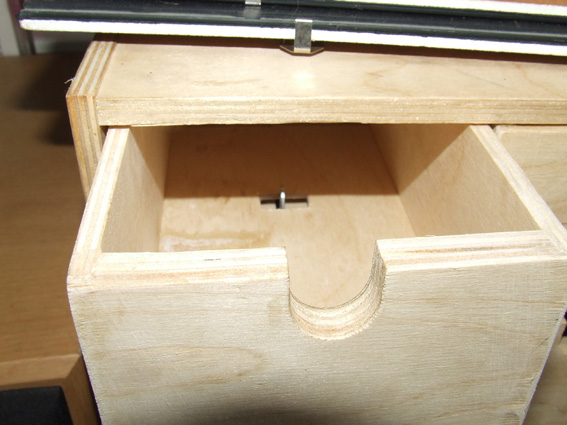
Can you explain what senses how far you pulled the drawer out? Is it a mechanical mechanism that moves a pot? Or is it optical?
Thanks. The technique used is really simple. I just used 8 faders and the drawers are attached to the mechanical wipers of the faders. See the attachements. This is also how I got the idea, I was playing with the faders and I thought they looked like furniture sliders. And drawers are for storing stuff, so 1+1=3. Sometimes simplicity is the best. The antenna just interrupt slider 7 and 8. The switch is an eight turn switch, witch selects just 8 different 'note on' events, to select different scenes in ableton.
Also, a suggestion: if you are trying to teach children, "more" drawers is probably not better. There's a lot going on with the drawers you have. You even might consider simpler musical phrases in each drawer, so that the kids can better focus on creating a groove. Adding more drawers will probably bring a lot more chaos. Kids, being impatient by nature, will want to open every drawer. By limiting their options a bit, they might be more inclined to find a good combination instead of being gratified by a bunch of new sounds in new drawers. To put it another way: most youngsters I know would want to pull out every drawer, but if they are limited to just a few drawers, maybe they will stop being amused by sounds sooner and instead focus on blending them.
Yeah, I think you're wright. But in my imagination I see this old big cracky magical drawers cabinet. I would really like to build that. Also funny to play a sort of sound memory with the really young kids. 'In witch drawer is the other cow?'
But I agree that there's already a lot going on right now, mainly because of the MP3's. And the 'less is more' idea will surely be better with the impatient kids, thanks for your suggestion.

-
-
Though the sound style wasn't my taste, this I must say was a pretty nice piece of work. Very cool, and I'm sure the kids dig it!! :D
Thanx, and about the sound style; you can put different sounds in the drawers of coarse, I used just different styles of MP3's with some samples.
-
Great to see you finished your box and you've a working machine now! Nothing better than get the thing alive yourself! "Oak's nice indeed" I wouldn't do any painting. I finished my mb64e box yesterday and it's working great. I made an Ableton Selected Track Controller and I'll post some pics and info next days.
Last week I finished a special MB64 project, see this thread:
I started midiboxing last Januari and I'm hooked, I finished some projects now and have some plans for the future.
Enjoy your machine and cheers!
Roel
-
Thanx, and that reminds my to post it on the Ikea hackers sites; http://www.ikeahack.org/ and; http://www.ikeahackers.net
Cheers,
Roel
-
Hey,
Last week I finished my midibox cabinet and it works and looks great!
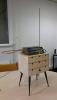
First a little introduction. Me and a friend have a little non-profit company called Elektruck. We transformed an old citybus into a mobile digital music workspace and we drive to school's to do music workshops with the kids. (see www.elektruck.nl, it's in dutch) About two years ago we won a big 'cultural community' price and a few days later we got a big secondhand truck from the government for free! The plan with the second truck is to transform it into an experimental play/soundgarden for kids. So in the first truck we got 10 little PC based studio's with Ableton Live and the second truck we want 'interactive music installations'. After breaking our heads over what kind of conceptual interactive installations we wanted I decided just to start experimenting with the UcApps stuff with my midibox cabinet as a first result. In dutch it's called 'klankkast' witch means resonator box. What is it?
It's just a drawing cabinet with different sounds in each drawer. By turning the knob on front you select a different sound set. If you open a drawer the sound comes out, by pulling multiple drawers you can mix the sounds. On top sits a Paia theremax witch sends out CV's according to the reach of the antenea. Those CV's go straight into the core and let you play with Ableton's grain-delay(pitch)and an other delay.
It's the most simple setup with only one core, (for 8 analoge inputs) and a dinx2 for the select knob, that's all!
In the big truck we would like to build a huge cabinet with 64 drawers so the kids can go wild!
-
How's your project going, I'm just curious.
Cheers,
Roel
OK, damn it! :)
You guys really want to see this finished?
I'll give myself another week and see if i can finish it. I just found the power supply today.
If it's not on the way by next week julienvoirin is first in line and then Elektruck.
I'll be back with the news!
-
Ok,there you go! Goodluck, and if you got any questions, feel free, I'll be happy to help you!
Cheers,
Roel
-
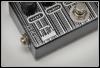
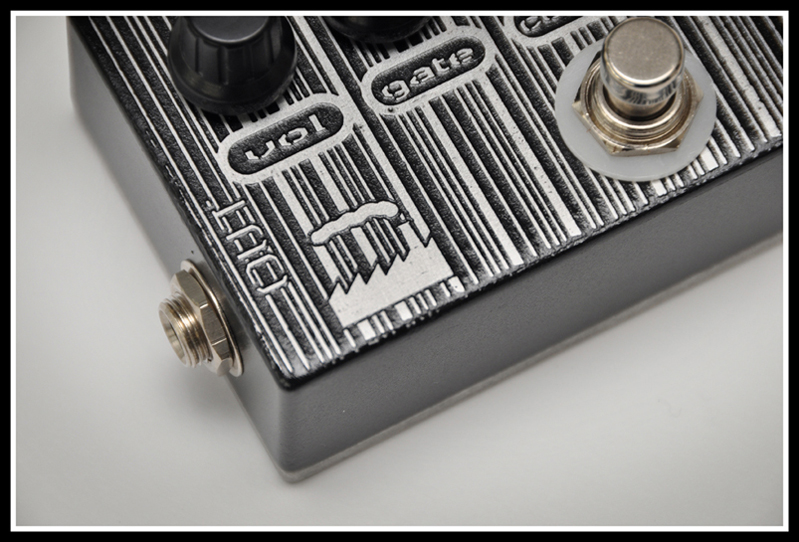
Electruck, how did you get the printing on your panel?
First I designed the panel with the free frontpanel designer tool from schaeffer. Then I printed it as a PDF file, and then I simply printed it on an aluminium label (sticker) with a laser printer. Works really well. I bought it here: http://www.mdaelektronica.nl/nl2/index.php?item=frontplaatfolie-aluminium-voor-laserprinters-a4--5-vel&action=article&group_id=20000644&aid=7268&lang=NL
Only the site is in dutch, but it's an online electronic shop and you can buy the sheets there for 20,- euro's for 5 A4 sheets. It's specially used for prototype frontplates.
I heard other people talk about this site: http://www.lazertran.com/ They also sell some kind of sheets for laserprinters, specially used by artist, but I don't know anything about that.
On a dutch synthesizer forum I read about etching aluminium frontplates, looks realy well, there was a link to a tutorial, really interesting! here's the link: http://www.aronnelson.com/gallery/main.php/v/MarkMs-Gallery/album24/
Cheers,
Roel
-
@Electruck: WOW! +1 FREAKIN AWESOME. Nice work.
Thank you, that's nice to hear!
And to Jeff, I agree with nebula, it's not so hard as it looks. Download the zip-file and it will become all clearer as you start, and if you got any questions, just ask.
And to digineural; You have a great design lying so get back to your project, it's a wonderful machine!
Cheers,
Roel


MB 64e ableton visual feedback
in MIDIbox HUIs
Posted
Dear people,
I builded quite some 8bit PIC based midiboxes, like MB64, MB64e, MBFM, MB Clockbox, MBCV and the MB808 sequencer. Sometimes it was really hard but in the end all projects went really well. But one thing I couldn't get my hands on, and that's how to get visual feedback from my MB64e controller, controlling Ableton Live.
This is my problem and I don't know where to start: I use Live's looper for Live looping and I want to make a special controller for that. I want to use the 'footswitch' knob of the Looper device to record, play, overdub, stop and clear the Looper. In this case only one button has four or five different states/functions, and I want to see in witch state/function it is by different LED's on my controller. Is that possible, and if it is, how do I do that or where do I start?!
If it's not possible I can make different knobs for the functions, but I still want visual feedback from the LED's of my controller. I never used a DOUT board in my MB64 or MB64e. I guess it will work like hitting one DIN entry, the corresponding DOUT will light up and I can choose somewhere that the LED only flashes, or it will stay on till I hit the DIN entry again. Where do I choose the LED's function? in the midibox menu or the ASM code?
Any help appreciated!
Cheers,
Roel