

Elektruck
-
Posts
279 -
Joined
-
Last visited
-
Days Won
10
Content Type
Profiles
Forums
Blogs
Gallery
Posts posted by Elektruck
-
-
Hi,
I'm building a midi triggered snaredrum with solenoids controlled by a relay board wich is controlled by a stmf4 running MIDIO128 V3. To get some sort of velocity control I want to use different solenoids, micro's, 5N and 20N strength. So when for example, C3, velocity 64 is played it will activate DOUT pin D01, and when C3, velocity 96 is played it will trigger DOUT pin D02 and when C3, velocity 127 is played it will trigger DOUT pin D03.
I hope someone can point me in the right direction how to achieve this. If someone knows how to do it in Ableton, change C3, velo 65 to C#3 for example then that would be cool too. I make midifiles in ableton and let them play by MIDIO128
Thanx
-
12 hours ago, lukas412 said:
Feature request:
Using the Midiphy build
In drum mode while Inst is selected flash button for instruments that are playing notes when the note plays.
Yess, that would be nice, I'm always wondering where my sounds come from!
-
wowie I like it more than expected, looking good!
-
I'm interested,... but the LED window is way to small for me. So I don't think this is an option for me, although I understand the feeling about the shining through the neighbour knobs.
Last weekend I did my first gig with the sequencer, There was a lot of smoke, lasers and other flashing lights and I totally loved the big coloured buttons, it felt very sturdy/secure! So obvious what you are doing :)...

-
 5
5
-
-
Hi,
I just tested it on a windows10 64bit with SeqV4+ and it seems to work very good/fast. But when using MIOS File Browser I still get the "Invalid response from MIOS core during read operation" when I try to download the MBSEQ_HW.V4 file..
But with my new machine I can easily pull out the SD Card so no troubles for me.
On my previous Seq I glued the SD Card inside and couldn't reach it anymore. Only by making it an external Disk and then I only was able to upload the Seq firmware again through my GM5x5x5 to the Seq.
Thanx fotr the update!
-
Hi,
I managed to get it working right on time for the party, but I didn't play there...
Here's a little table I made with all CC's I needed to send to get it right, clock on output 7 and start/stop on output 8:
function
ch
cc
value
1
Start/stop
1
103
1
2
Midi clocked lfo
3
70
64
3
Square wave
5
102
127
4
Stop LFOs when clock stopped
13
90
1
5
PW
7
102
64
6
Ouput direct control
1
6
64
After sending these CC's I stored the setting as a preset. And after that I choose this preset to be the startup default preset. And now it always works without any hassle.
And as I promised, here's a quick video with the FH-1 and SeqV4 . Nothing special, just pluggin in and hitting start, followed by some rough tekno. I didn't test the accuracy of the outputs as I don't have good oscillators or test equipment in my living room rack. It all seems really stable but if people want tests I can try with logic analyzer and multimeter...
-
I'll try to shood a video, but that will be next year...
-
Ok, I just managed to get a midi syned square lfo output at output 7 and a start/stop on output 8. But I need 4 tracks now wich sends cc's on different midichannels to achieve this, and when I load a new song these settings are gone. So I need to save these as a default startup setting. I don't have time for this now but I'll figure it out later.
Very nice evening and new year for everyone!
-
On 12/17/2018 at 9:45 PM, Rowan said:
I have been doing a bit more reading into how to get clock signals out of the FH-1 and the There seems to a solution that I’m yet to try. The FH-1 have An LFO avalible on each output that can be tempo synced, so the idea is to use a tempo synced square wave LFO as clock! Simple but effective.
And did you manage to output midi synced clock signals? I recieved the module yesterday and it works perfect so far with my new SeqV4+ :) but I don't understand the lfo/clock part so far. Would be nice to get this fixed for newyears eve party...
-
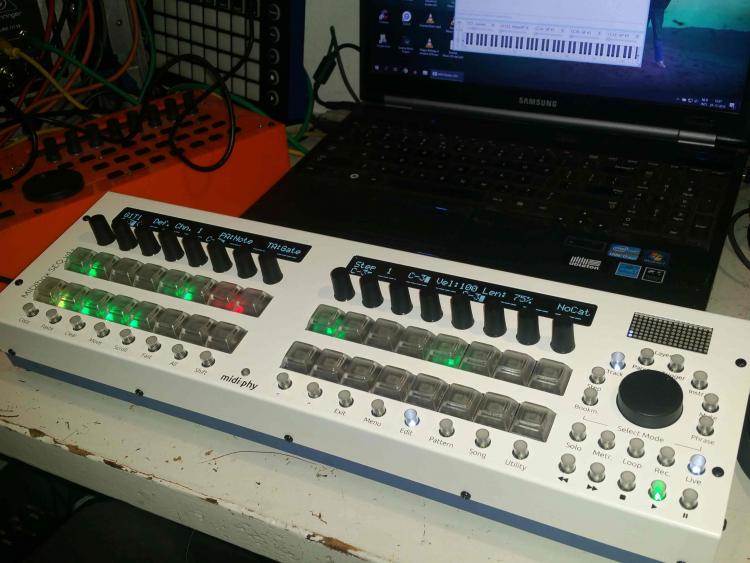
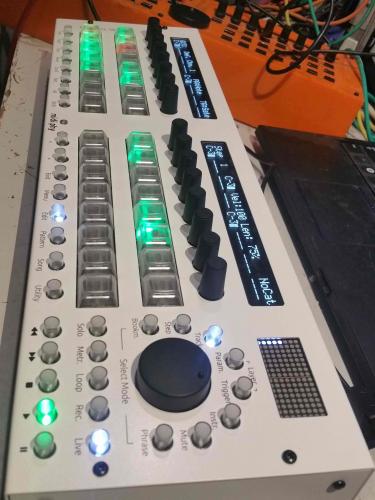
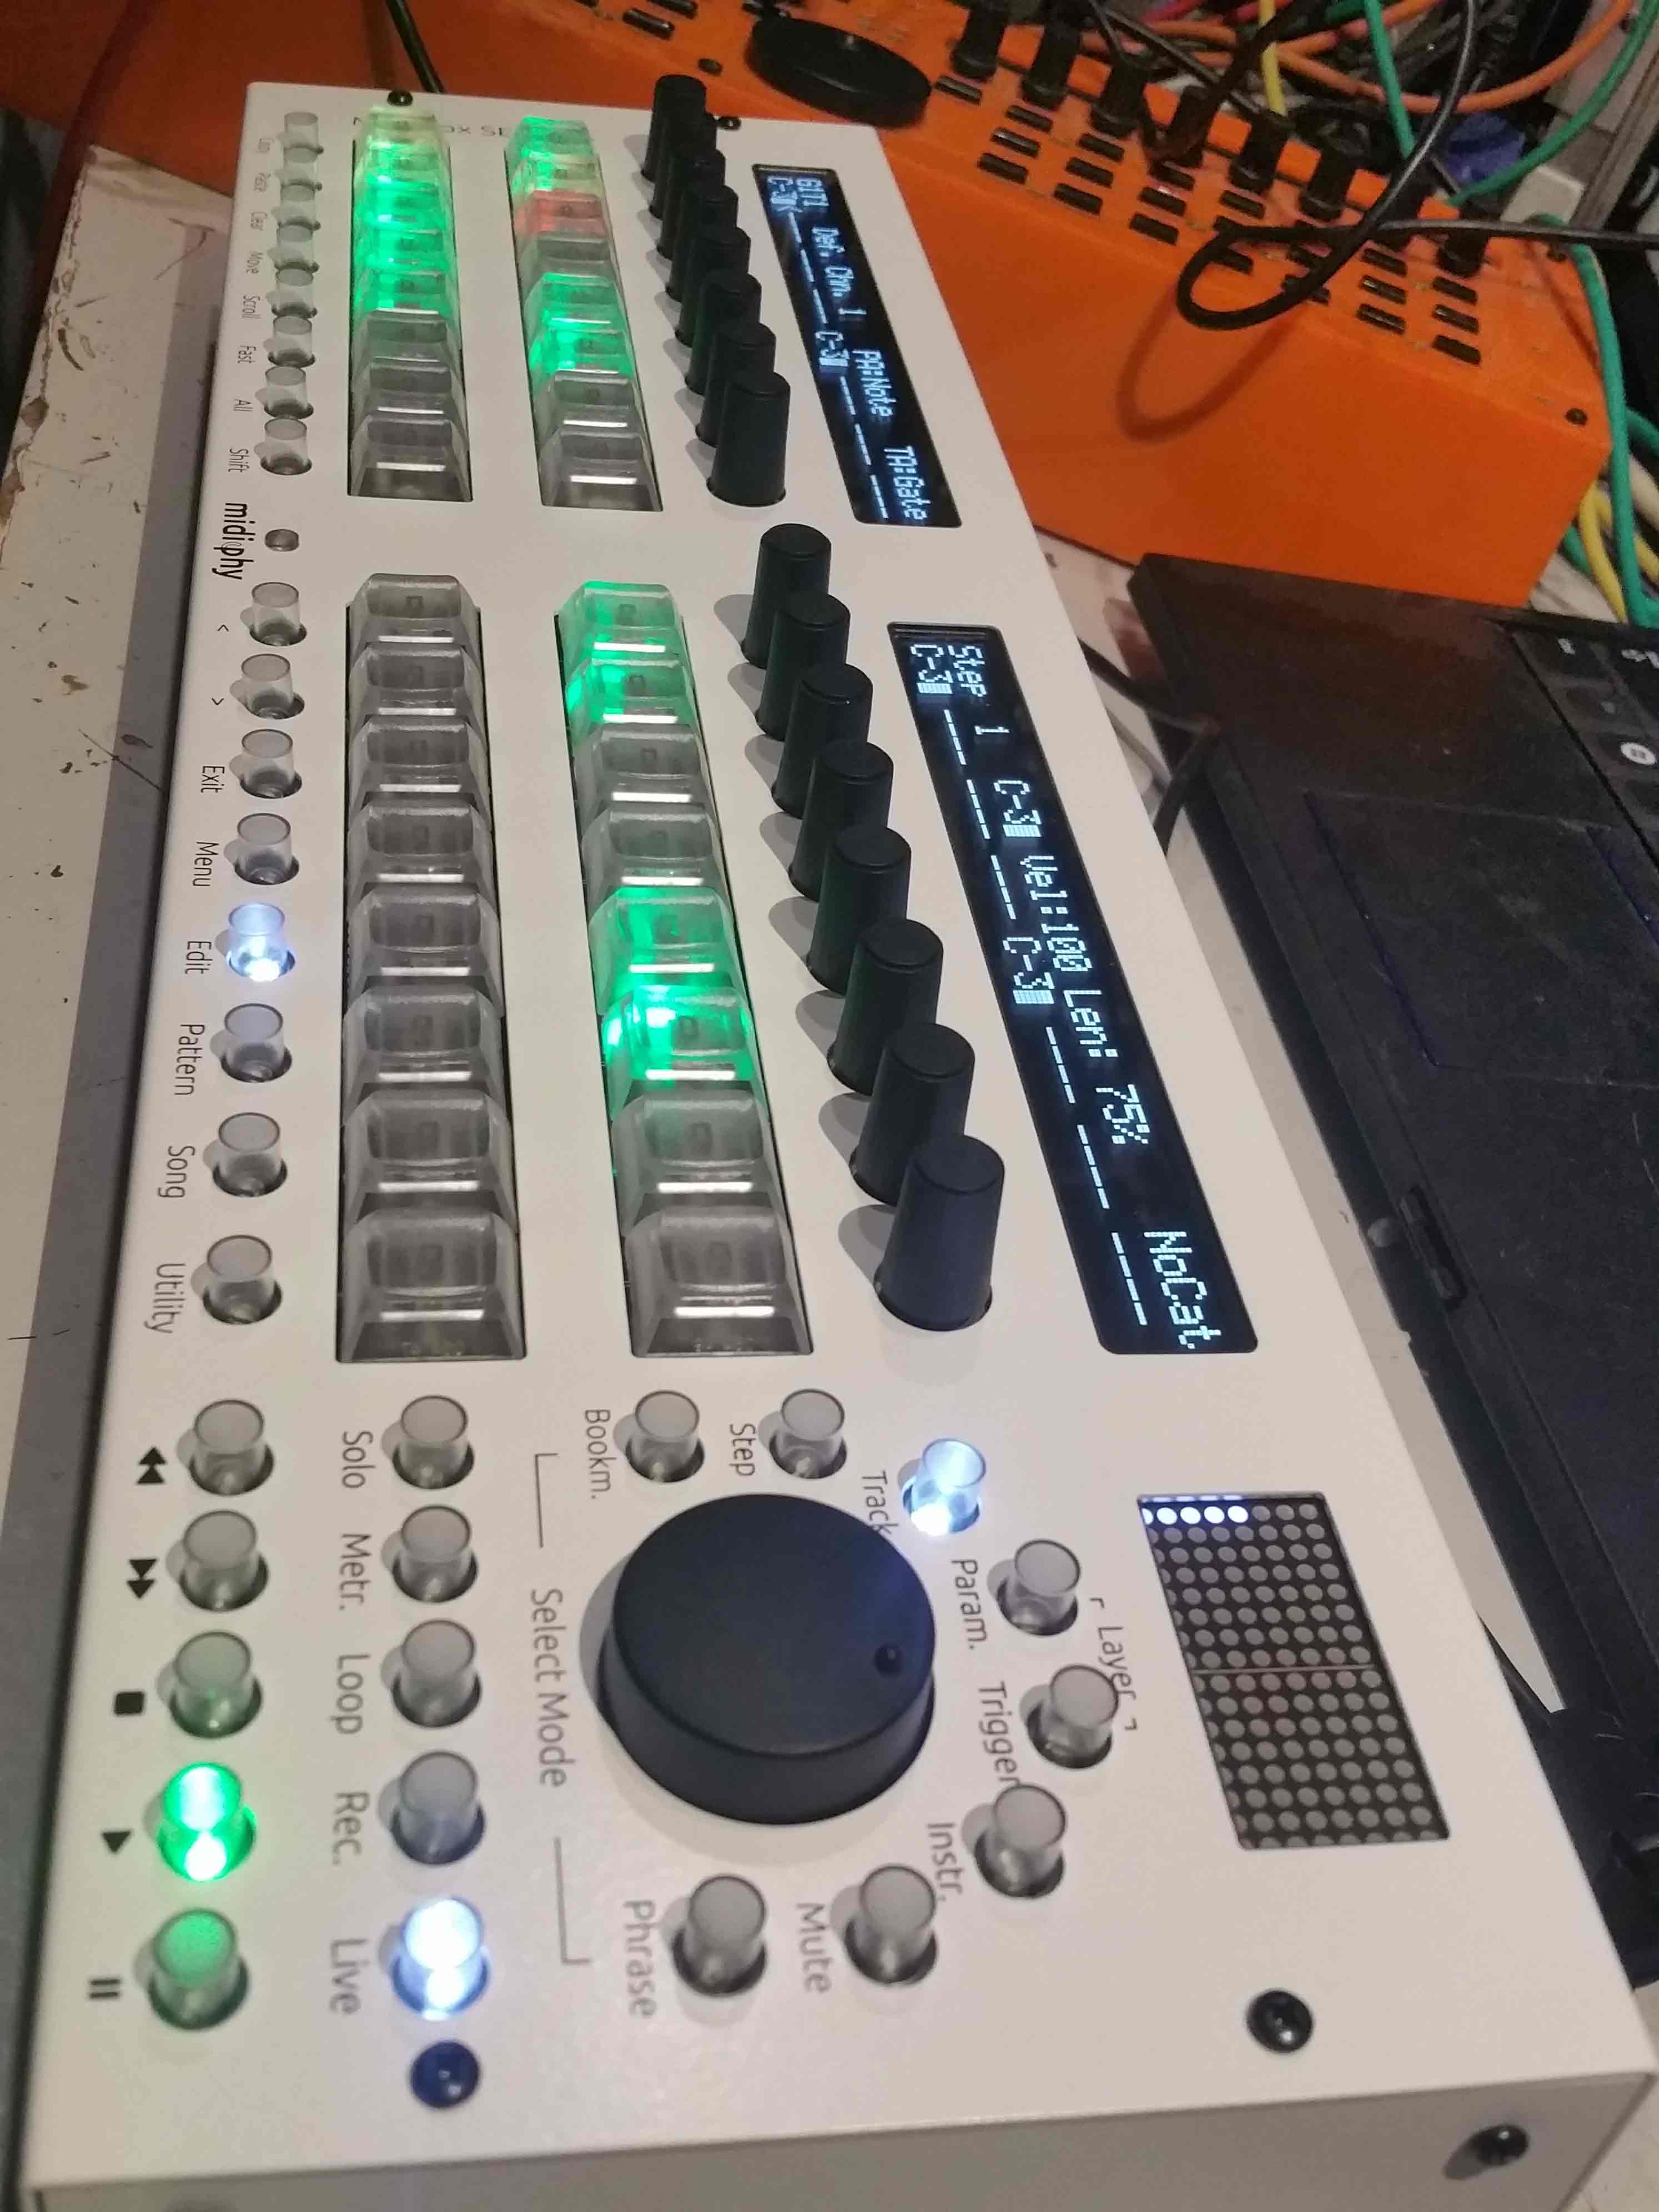
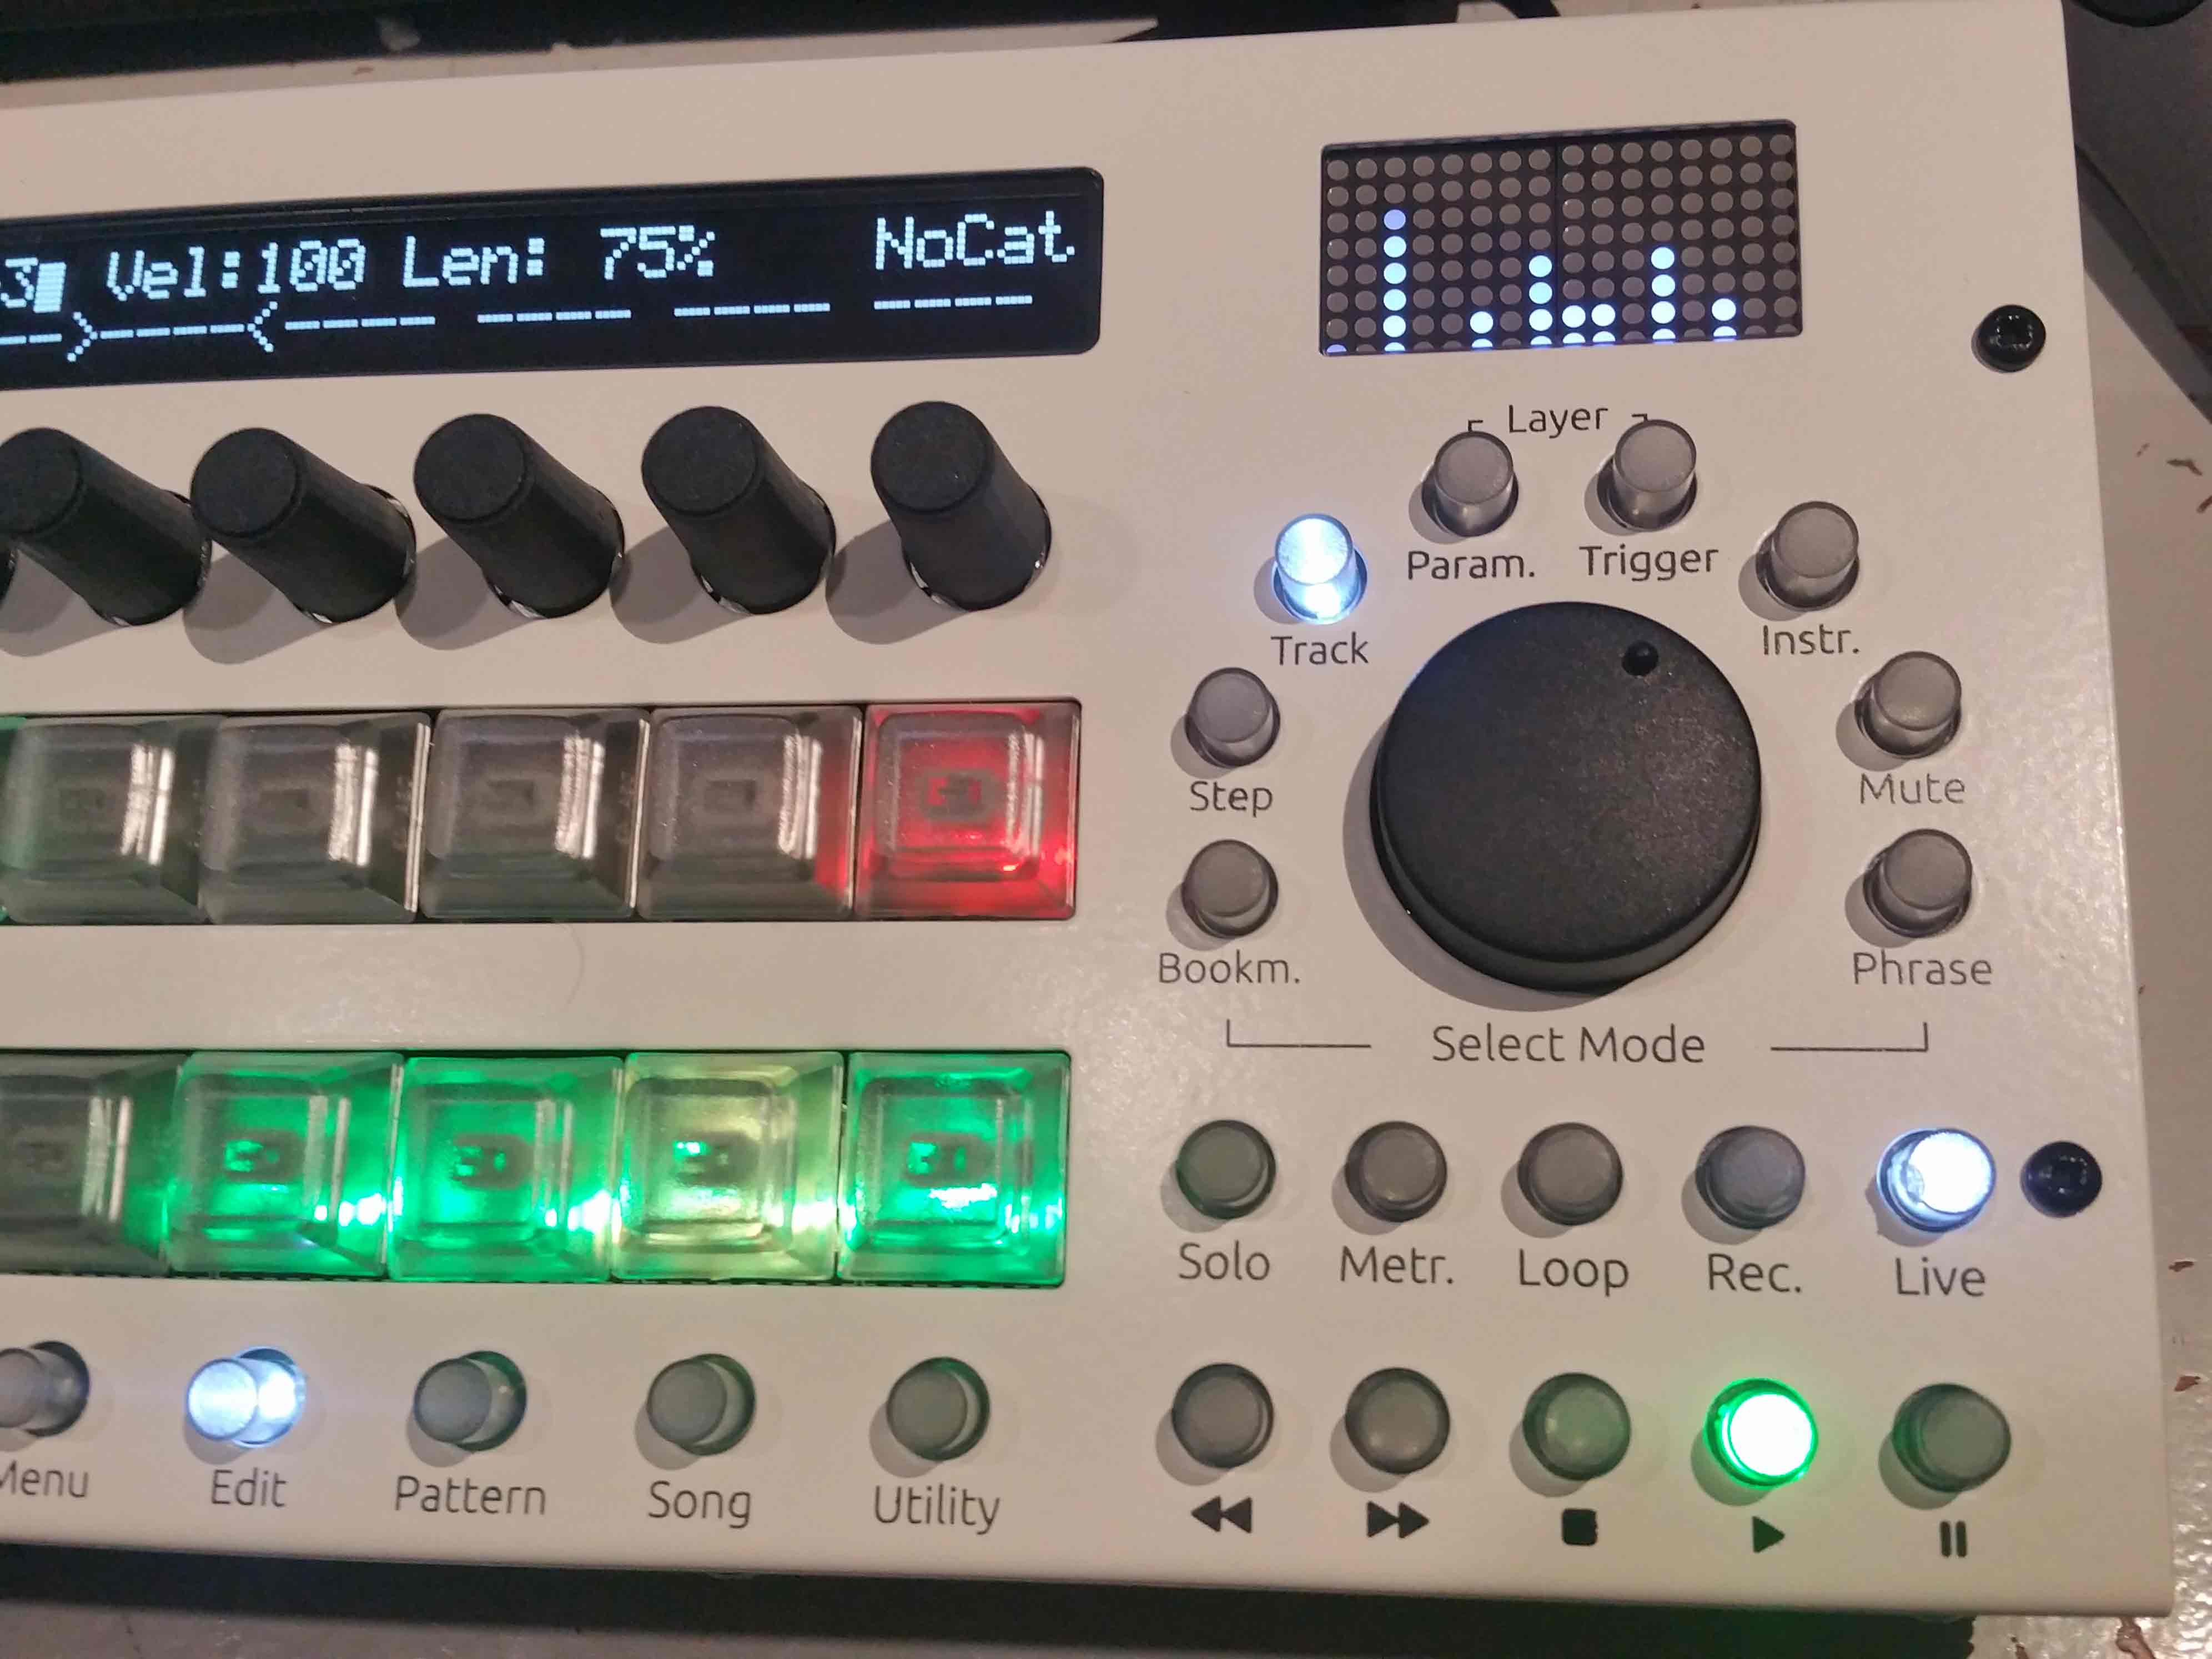
Yesss!!! I think I managed to give birth to number 5! It's looking awesome (and I never use this word) My camera completely fails to catch the beauty of this beast. The case is not white, but a bit creamy, it looks so professional, like a medicial/laboratory equipement.
I just followed the tutorials, no modifications. Only some tiny drop of superglue on some bolts to secure them. Oh and I ordered a clear beat LED and didn't like the looks so I sanded the top flat and now I like it.
Very big thanks to TK, Peter, Andy and Adrian and everyone else involved in this evolution. Looking forward to the LoopA!

-
3
-
-
53 minutes ago, latigid on said:
Merry Xmas!
62083 is available at TME:
https://www.tme.eu/at/details/tbd62083afwg/treiber-integrierte-schaltungen/toshiba/
Best,
AndyP.S. fantastic work so far!
He that's good news, thanx! I got a package from TME yesterday, if only I had checked.....I looked for the 62381 at TME, not the 62083, thanx again!
-
Merry Christmas everybody!!!
Last week I also got all packages in my mailbox, the case looks supurb, stylish and sturdy, really profi!!! I already finished and checked the Core PCB's so yesterday I started on the rest with the new video tutorial. Also outstanding work on this tutorial. It's quite an advanced soldering job, but with the video it's all very clear and do-able. Thanx indeed for all this hard work!!!
But as soon as I came to the TBD62381A, I noticed I had ordered a smaller piece. The original was out of stock, so I choose an other one, but the wrong one, aaahhh. .HERE you'll find the right replacements, But they only ship from US , digikey or mouser and I need to order at least for 20 or 60 euro's, and the thing is like 70 cents...and I'm a bit broke after these orders...So I'm stuck for now :(...
I did the tests and everything seems to work fine, encoders and LeMec and Matthias switches, see PIC, so I can't wait to finish the machine. Maybe someone in Europa with a spare TBD62381A I can buy?!
Cheers,
Roel
-
That sounds logical and like a good solution. I just made a deal with someone on modulargrid, so there's one coming my way :)
-
On 16-12-2018 at 6:36 PM, Rowan said:
I spent more time messing about with it last night and I’m happy to report it’s working as expected with very little effort. The only thing I have tried yet that I’ll need is getting it to output clock signals. Other than that it’s working perfectly. It seems that it also accet modular clock signals and convert them to midi clock, very useful.
That sounds cool, I'll try to get my hands on one. For the clock signals I made a little module with a DOUT chained after my TPD module. That works great and using a CV ouput seems a bit of an overkill, but OK if you don't use the output for CV....thanks for sharing this idea about the FH-1!
-
On 14-12-2018 at 10:18 PM, Rowan said:
Once I've spent more time configuring the system I'll elaborate more as the Expert Sleepers FH-1's capabilities are very deep (up to 64 CV/GATE outputs).
I'm also very interested in this. I'm about to build a new SeqV4+ and this looks like a nice solution. I've build a breakout CV/gate module myself for the SeqV4 now, but without linedrivers, etc. I have my Aout board in my sequencer now, and I think I leave it there, so I need a new solution for the new sequencer. Looking forward to your tests!
-
yeah welcome darkkat!
It is like Antichambre/Bruno said, all information is here but you have to find out the basics yourself. If I had a schematic I would sure give it to you, but I don't have one. In the first post of this thread you'll find the link to the wiki. There you can find most recent stable code, and some hints, like bank selector switch is attached to J10. If you go the the ucapps site you can find the schematic of the core board for stm32 and there you can find to wich pins of the stm32 J10 is attached etc......It's quiet hard in the beginning to get overall information, where to start, how the system works etc, but if you just start you'll find out soon how it works and how versatile the MIOS system is. That's also one of the reasons why there aren't any tutorials, (exept for this supurb new video tutorial for midiphy SeqV)
So I would start reading about the core board: http://ucapps.de/mbhp_core_stm32f4.html together with this thread and the dokuwiki in the first post. You'll have enough information to start, and if you have any questions you'll know a lot better what to ask...
ps, I'm not a programmer at all, but a patient puzzler and I got quite far midiboxing
goodluck and cheers,
Roel
-
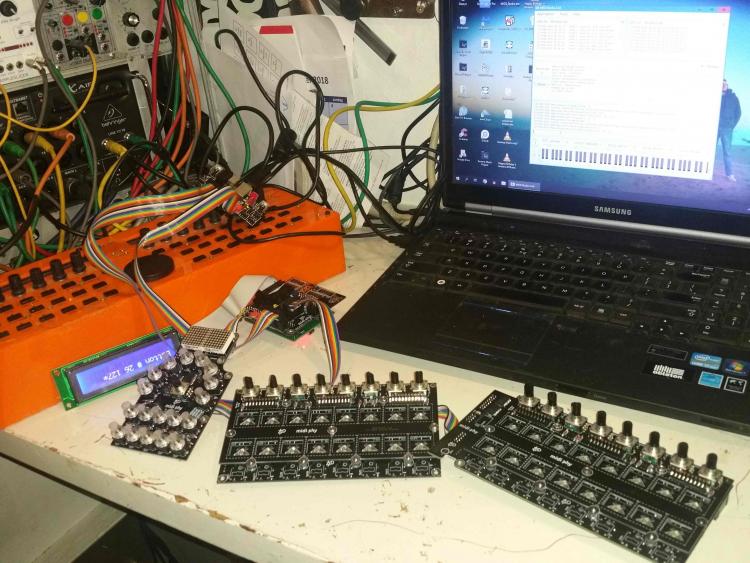
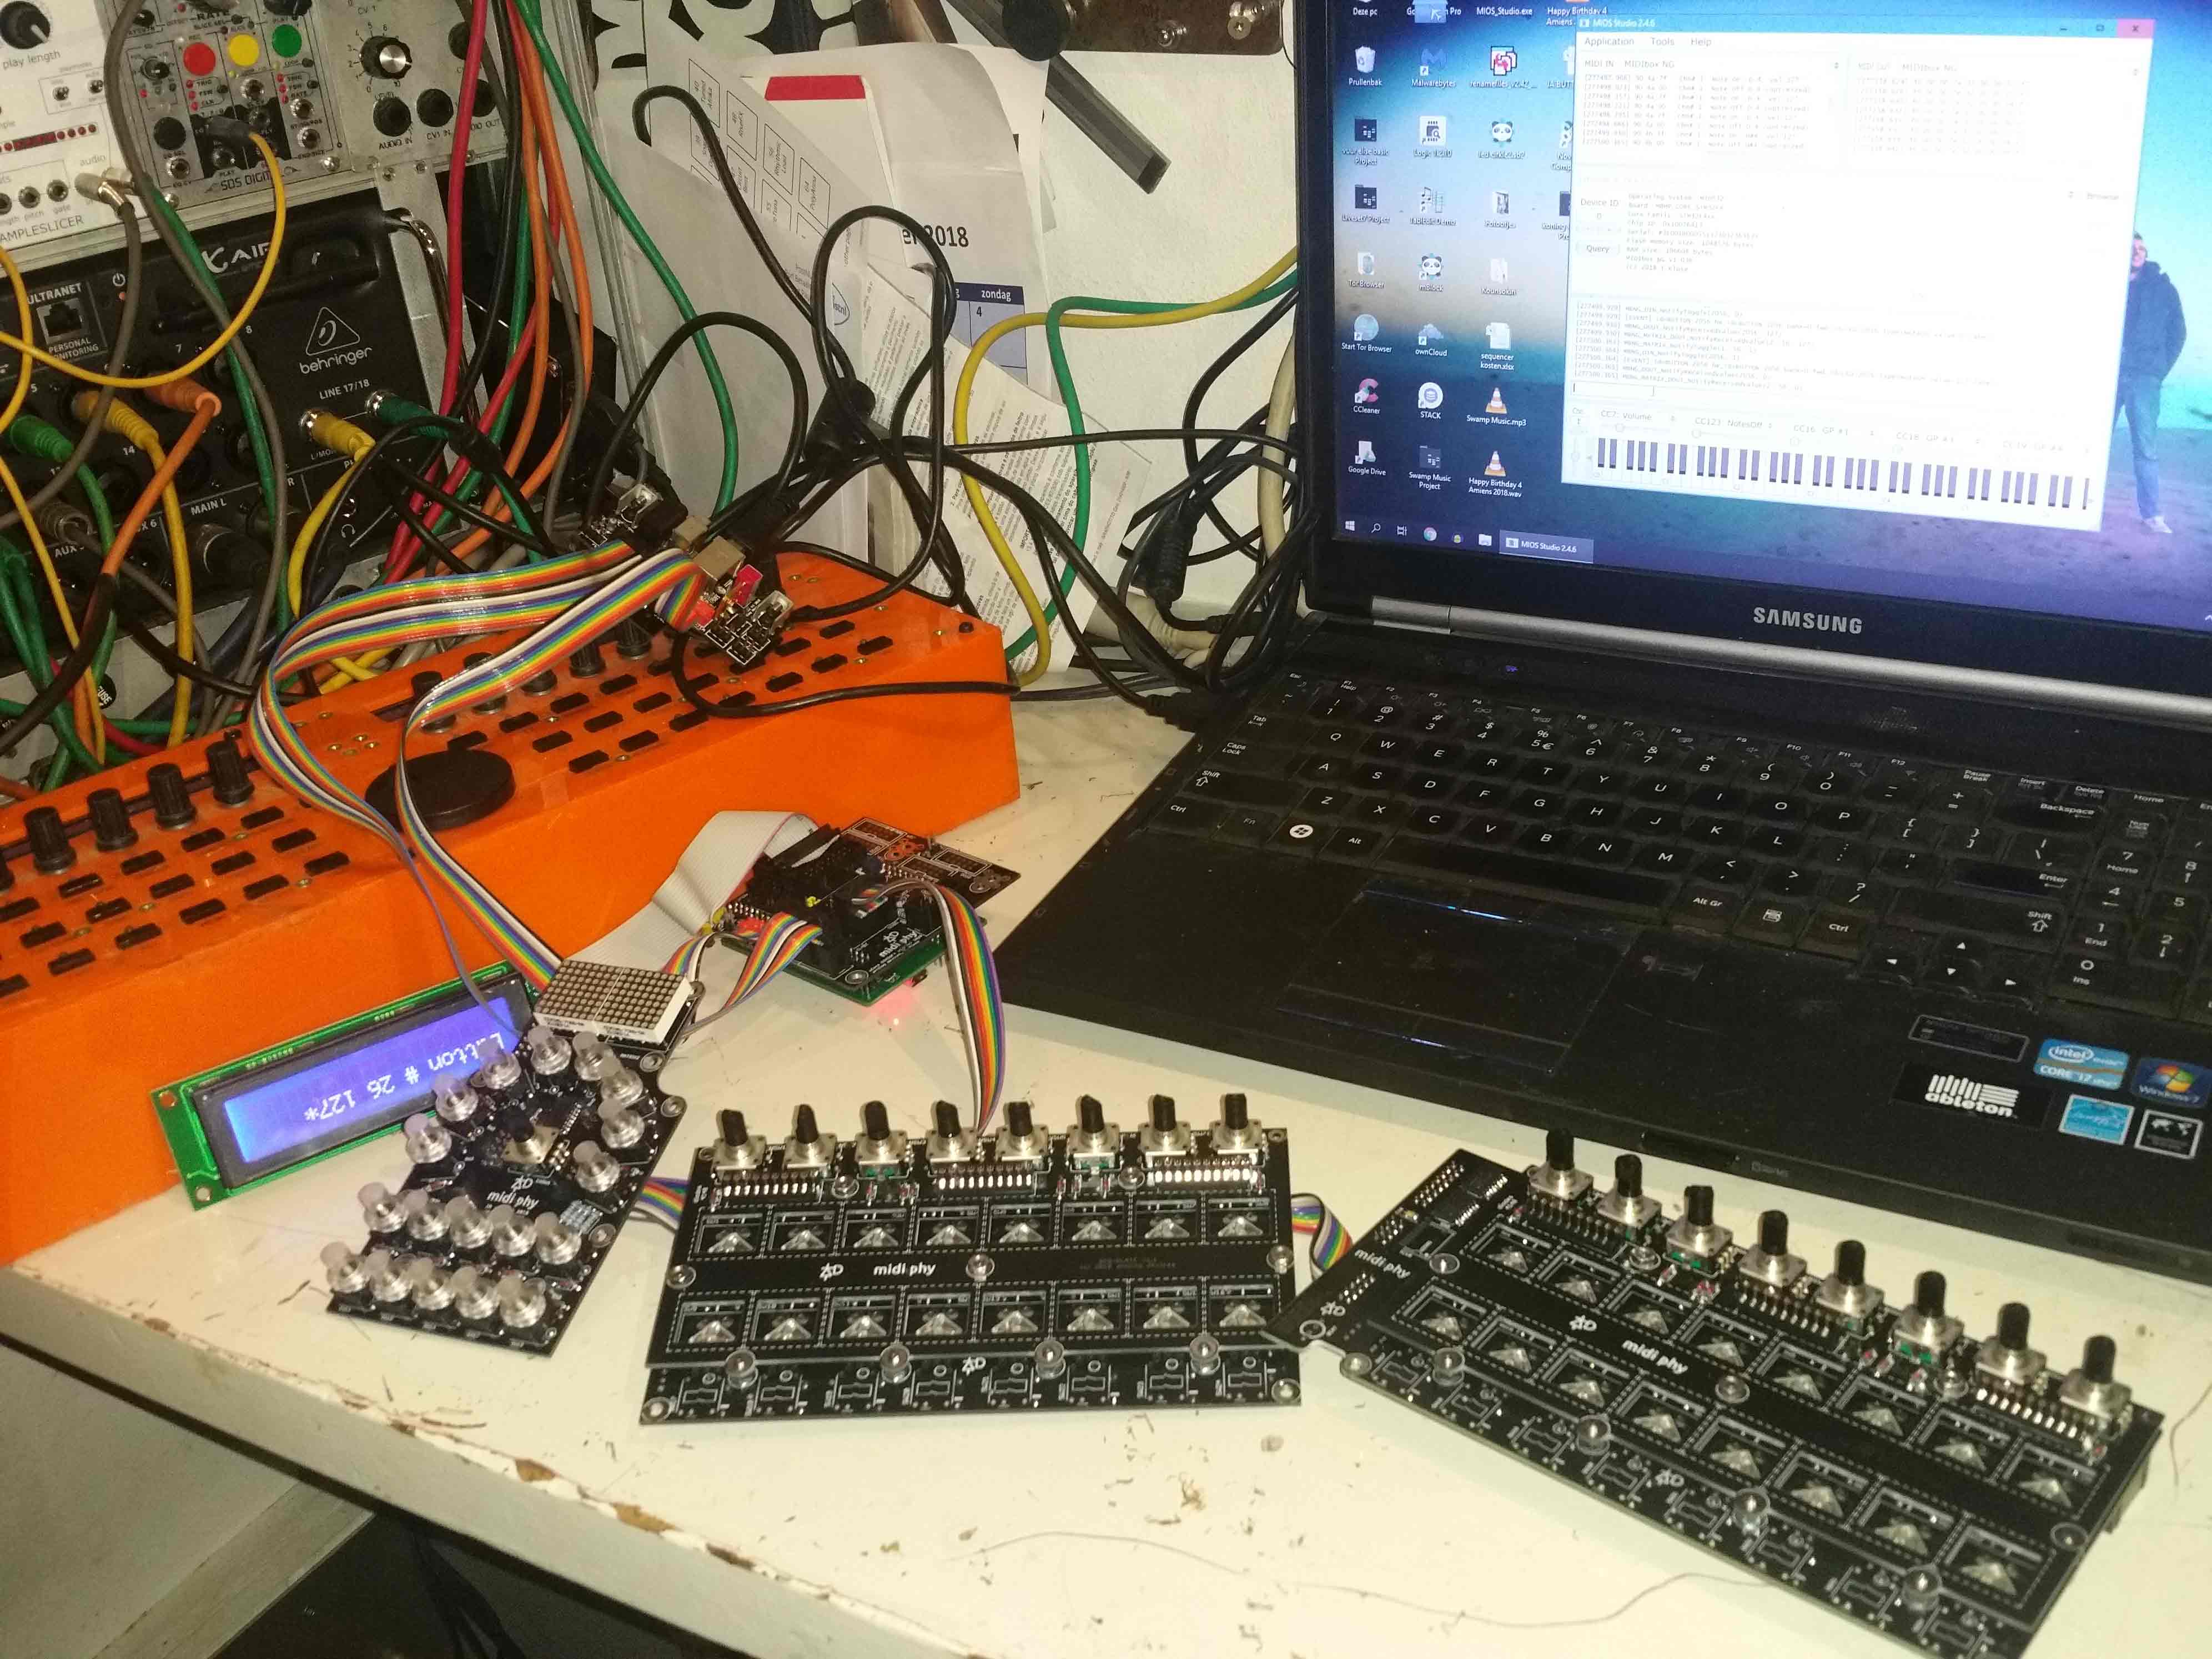
Hi!
I just finished the boards from video tutorial 1. It was all very clear, straight forward and I didn't find any difficulties, but I've a lot of soldering experience :). Great to work with the video only, without all different kind of documentation to check. The video has a very high Bob Ross level, lovely soldering this way, I got really tranquillio!!!
If I had to be critical, only point I would mention is next time I would also use high quality IC sockets for the 6n138 optocouplers. In the BOM are cheap ones and the video mention that the cheap ones are OK for the optocoulplers, but I had some trouble to put the IC's in nicely.
I attached the Core to MIOS Studio and I could upload the sequencer app, so that's good. It could also find my SD Card but I couldn't format it. And none of the LED's did any flickering, should they?! and is there more I can do/test right now? I don't know about jumper settings or other stuff to do, but I would like to play along or test some stuff.
And I didn't notice before but there isn't any ethernet socket?! I have a SeqV4 now, with LPC16 with onboard ethernet, and I use it a lot to attach my Ipad to the sequencer and play with the virtual BLM. I think that's a really cool feature, how will I be able to attach my Ipad to this new sequencer?
Cheers and looking forward to build the rest! Roel
-
2
-
-
Yeah supercool, I want one!
-
I'm so excited!
-
You're very welcome!
-
Hi Buhler,
HERE is a link to the original downloaded zip file from Jjonas
and last week I've been (very) busy with extending the octave ranges from the mellotron sounds. I made a samplerbox with raspberryPi for my daughter, and I was amazed how good it was. One pretty neat function is that the samplerbox extends the octaves automtically. The mellotron samples have a range of only 3 octaves or something like that, but samplerbox plays them over 6 or more ocatves. And especially the lower sounds are really cool, like steamboats.
So I loaded the samples into ableton and converted them to get more octaves, then into audacity to get the right format etc.
HERE is a link to my current SD Card set. I only have 5 banks so far, but it took a long time, now I want to do something else:)
I don't know about your lenght issue, I just checked mine, these are about 6 seconds long, and play entirely, if I play the right lenght of notes.
Good luck and have fun with the samples
-
2 hours ago, gomiboy99 said:
If you want to modify the clock box, my visual metronome project was based on it, it has been a while since I looked at it but think there was some code for using the eeprom. Hopefully it will provide a few pointers.
Thanx, I'll look into it. I use the eeprom now, but I want my clockbox to startup with the settings from the eeprom. Maybe better to start another topic ...
-
17 hours ago, Hawkeye said:
and TK's recommendation should always work - use subdirectories! :)
I know you're right, but I'm not sure how to do that. I guess the application checks the root directory, so I should make a change in the application, and for me that still is hocus-pocus most times.
I tried yesterday with the FAT32 card and that seems to work OK, so no problem anymore.
I like to develop my MIOS skills, but I have a hard time with it. For example; I'm struggling with the Clockbox application for 10 years now, I got it slaving to masterclock, but that took me months/years and it's an ugly hack, but it works. Now I want to load an initial set-up at start up, wich is saved on the internal eeprom. But I dunno were to begin.....any idea's
Cheers, Roel
-
It's not really as I said before. I downloaded Jjonas his mellotron zip, and unapcked on a SD Card. There were 346 files on the Root, I put it in my MBSD Card player, anf it worked like a charm. So I checked the card and it was FAT32 formatted. Anyway, it seemed to work, so I'll investigate this further.
Only thing I'm sure of is that my windows PC said that the max number of files was reached on my FAT card. It was around 250 files, and there was enough room left...
Cheers, Roel


C3 with diff vel. 2 diff. notes
in MIDIfication
Posted
Hi Bruno,
Thank you very much! Altough this is quite "abracadabra" to me, I managed to copy your example in the app.c file of the MIDIO128_v3 folder and after some troubleshooting it recompiled, and it works!
I can play C3's with different velocities and they're played by DOUTpin 0,1 and 2. I'll manage to expand this further to my needs. Only thing I'm a bit worried about, is that I just add a bit of code to the MIDIO128 app, and that this piece of code will "struggle" with the original app. Or shouln't this be a problem?!
Thanks anyway, I'm ways further to my goal now. HERE is an early vid of my experiments