

Narwhal
-
Posts
226 -
Joined
-
Last visited
-
Days Won
2
Content Type
Profiles
Forums
Blogs
Gallery
Posts posted by Narwhal
-
-
Does the kit include a cutting tool? I couldn't see one listed.
If by cutting tool you mean a spindle, yes I got a spindle with it. You may be able to see it in the back in this picture.
If by cutting tool you mean end mills, no it did not come with any end mills, but it can use up to 4mm bits.
I think that it is currently possible to order the same version as what I have without it coming with a spindle or mounts, but the currently selling next version comes with everything (cnc, computer, spindle, all tested and run-in, ready to go).
Do you know how precisely this will cut, and what size plate you can work on? Is this pretty much limited to 2D work?
The 3D working area is around 12" X, 8" Y, 2.5" Z. It can work on plate of that thickness and still be able to move without touching it, but that is mostly dependent on bit length. The lumenlab website shows 1/2" aluminum that was milled to the full 1/2" depth all the way around.
I'll have to get it off my cellphone, but I have picture of a spiral that it drew and it's well beyond my human capabilities. Precision is all in how well I tram it today, how slow I run it, and what micro stepping mode I put it in. It can move in increments that are somewhere around .0001" (9600 steps per inch = .0001041666666" movements to be exact), but I only expect the accuracy to be about .001" currently. I don't think anyone has put the micro into micro-stepping mode yet, which should cause it to be capable of 16 individual steps just to move .0001" (153600 steps per inch!!!). This would be ridiculous for anything that I will ever use it for, but the drivers it comes with are capable of this and EMC2 can be configured to do this easily.
-
So over a year ago I bought into getting a small CNC setup from Lumenlab.com. Little did I know at the time that it would literally take a year and 1 week before I would ever see the device in my home. I knew I was buying into a work-in-progress with the agreement that I would get great deals and free upgrades along the way, so the wait wasn't completely unexpected or without its benefits. Also luckily the guys who make them posted video updates every week about the R&D they were doing and the progress was easy to see. It was very exciting when it first created items, and I can't wait to get some creations going.
Here are some pictures of the machine itself.
Anyway, I've spent the last two weeks getting acquainted with the machine and generating models and paths and wanted to share a look at creations that will hopefully coming down the road. 8)
So, one of the main things I want to create with it are front panels and at the top of my list is the MB-6582. So tonight I created the g-code, tested the measurements, and ran simulations in EMC2.
Here are the MB-6582 Front Panel CNC G-Code test runs to get everyone as revved up.
O2Vt9CS-jno
C7QVPHUX0l0
I may be a while off from getting to the state where I can actually run these, but g-code is generated from the DXF and looks really good so far.
Here's an inlaid logo I can engrave into anything.
[img width=380]http://www.midibox.org/forum/index.php?action=dlattach;topic=13824.0;attach=5444;image
And any time you want to engrave Thortens head into a panel or wooden end cheeks, its possible too :D
[img width=350]http://www.midibox.org/forum/index.php?action=dlattach;topic=13824.0;attach=5446;image
LOL
-
If anyone else is interested in tinkering with one of these, someone just posted on
that they have two MM-RC's for sale in the LA area. The units are completely hackable and the hi-resolution encoder alone sells for $50 which was the price of the unit for me. Good stuff.Mine is currently all wrapped up with 4 external relays and a primitive sequencer ready to control solenoid on a flame thrower that never got assembled.
-
Your wiring looks correct.
<second eyes deactivate>
-
Can I get a picture of your third image from the other side, where I can see the wire colors and the pads they go to? ie: Keep the LCD facing down, but just spin it around 180 degrees and take a picture.
-
I'd place a bet on the wiring to the LCD. Perhaps some detailed pictures of the LCD and the cable plugged into the main board could help get a second set of eyes to verify. Miswired LCD's look have symptoms a lot like what your video shows. I do the same thing all the time myself.
-
You have it correct, but the datasheet for that part can always help clarify things like this for you.
http://www.datasheetcatalog.org/datasheet/eic/KBP206.pdf
I would disconnect any wires from the + and - on the bridge before declaring it dead. Sometimes other failures can make strange things happen there. But I can't see any reason why you would ever measure any significant amount of AC on the output of the bridge. Measuring the DC voltage across the + and - pins of the bridge when it has no other connections made to those pins should help you confirm whether it is malfunctioning or not.
I'm not too familiar with the inner wiring of the DIN socket that you are connecting power to, but make sure that you are connected to the correct pins there for sure.
-
I'm also curious what DC voltage you measure across the regulators pin 2 and pin 3.
-
In your top red box, you should be measuring __DC__ voltage, not AC. The diodes there inside the bridge are what changes the AC to DC.
What kind of DC voltage do you measure there?
-
It looks to me like your components selections are good. I'm guessing the L78S09CV is bad, or something around there.
Where is the vertical wire in the schematic that goes from the right of the base of the 7809 (pin 2) down to the 5V section? I don't see a wire for that in the picture of your board.
Kurt
-
I'm in for a set.
-
I have a Lumenlab Micro on order. They are shipping now, but mines on hold for a few weeks for another part. I'll try to run a pcb milling test when I get it up and running, then post here with how it turns out (or link to a more detailed log about the process).
Kurt
-
Yeah I got your message with your address. I sent you a message with the shipping costs yesterday. I think it was amazingly less than $3.00 USD to mail it to Moscow from California. The sheet of paper with the shipping costs is on the seat of my car right now with your board all packaged up.
Let me know if you need me to send that again. I included my address in case you need it for western union.
Kurt
-
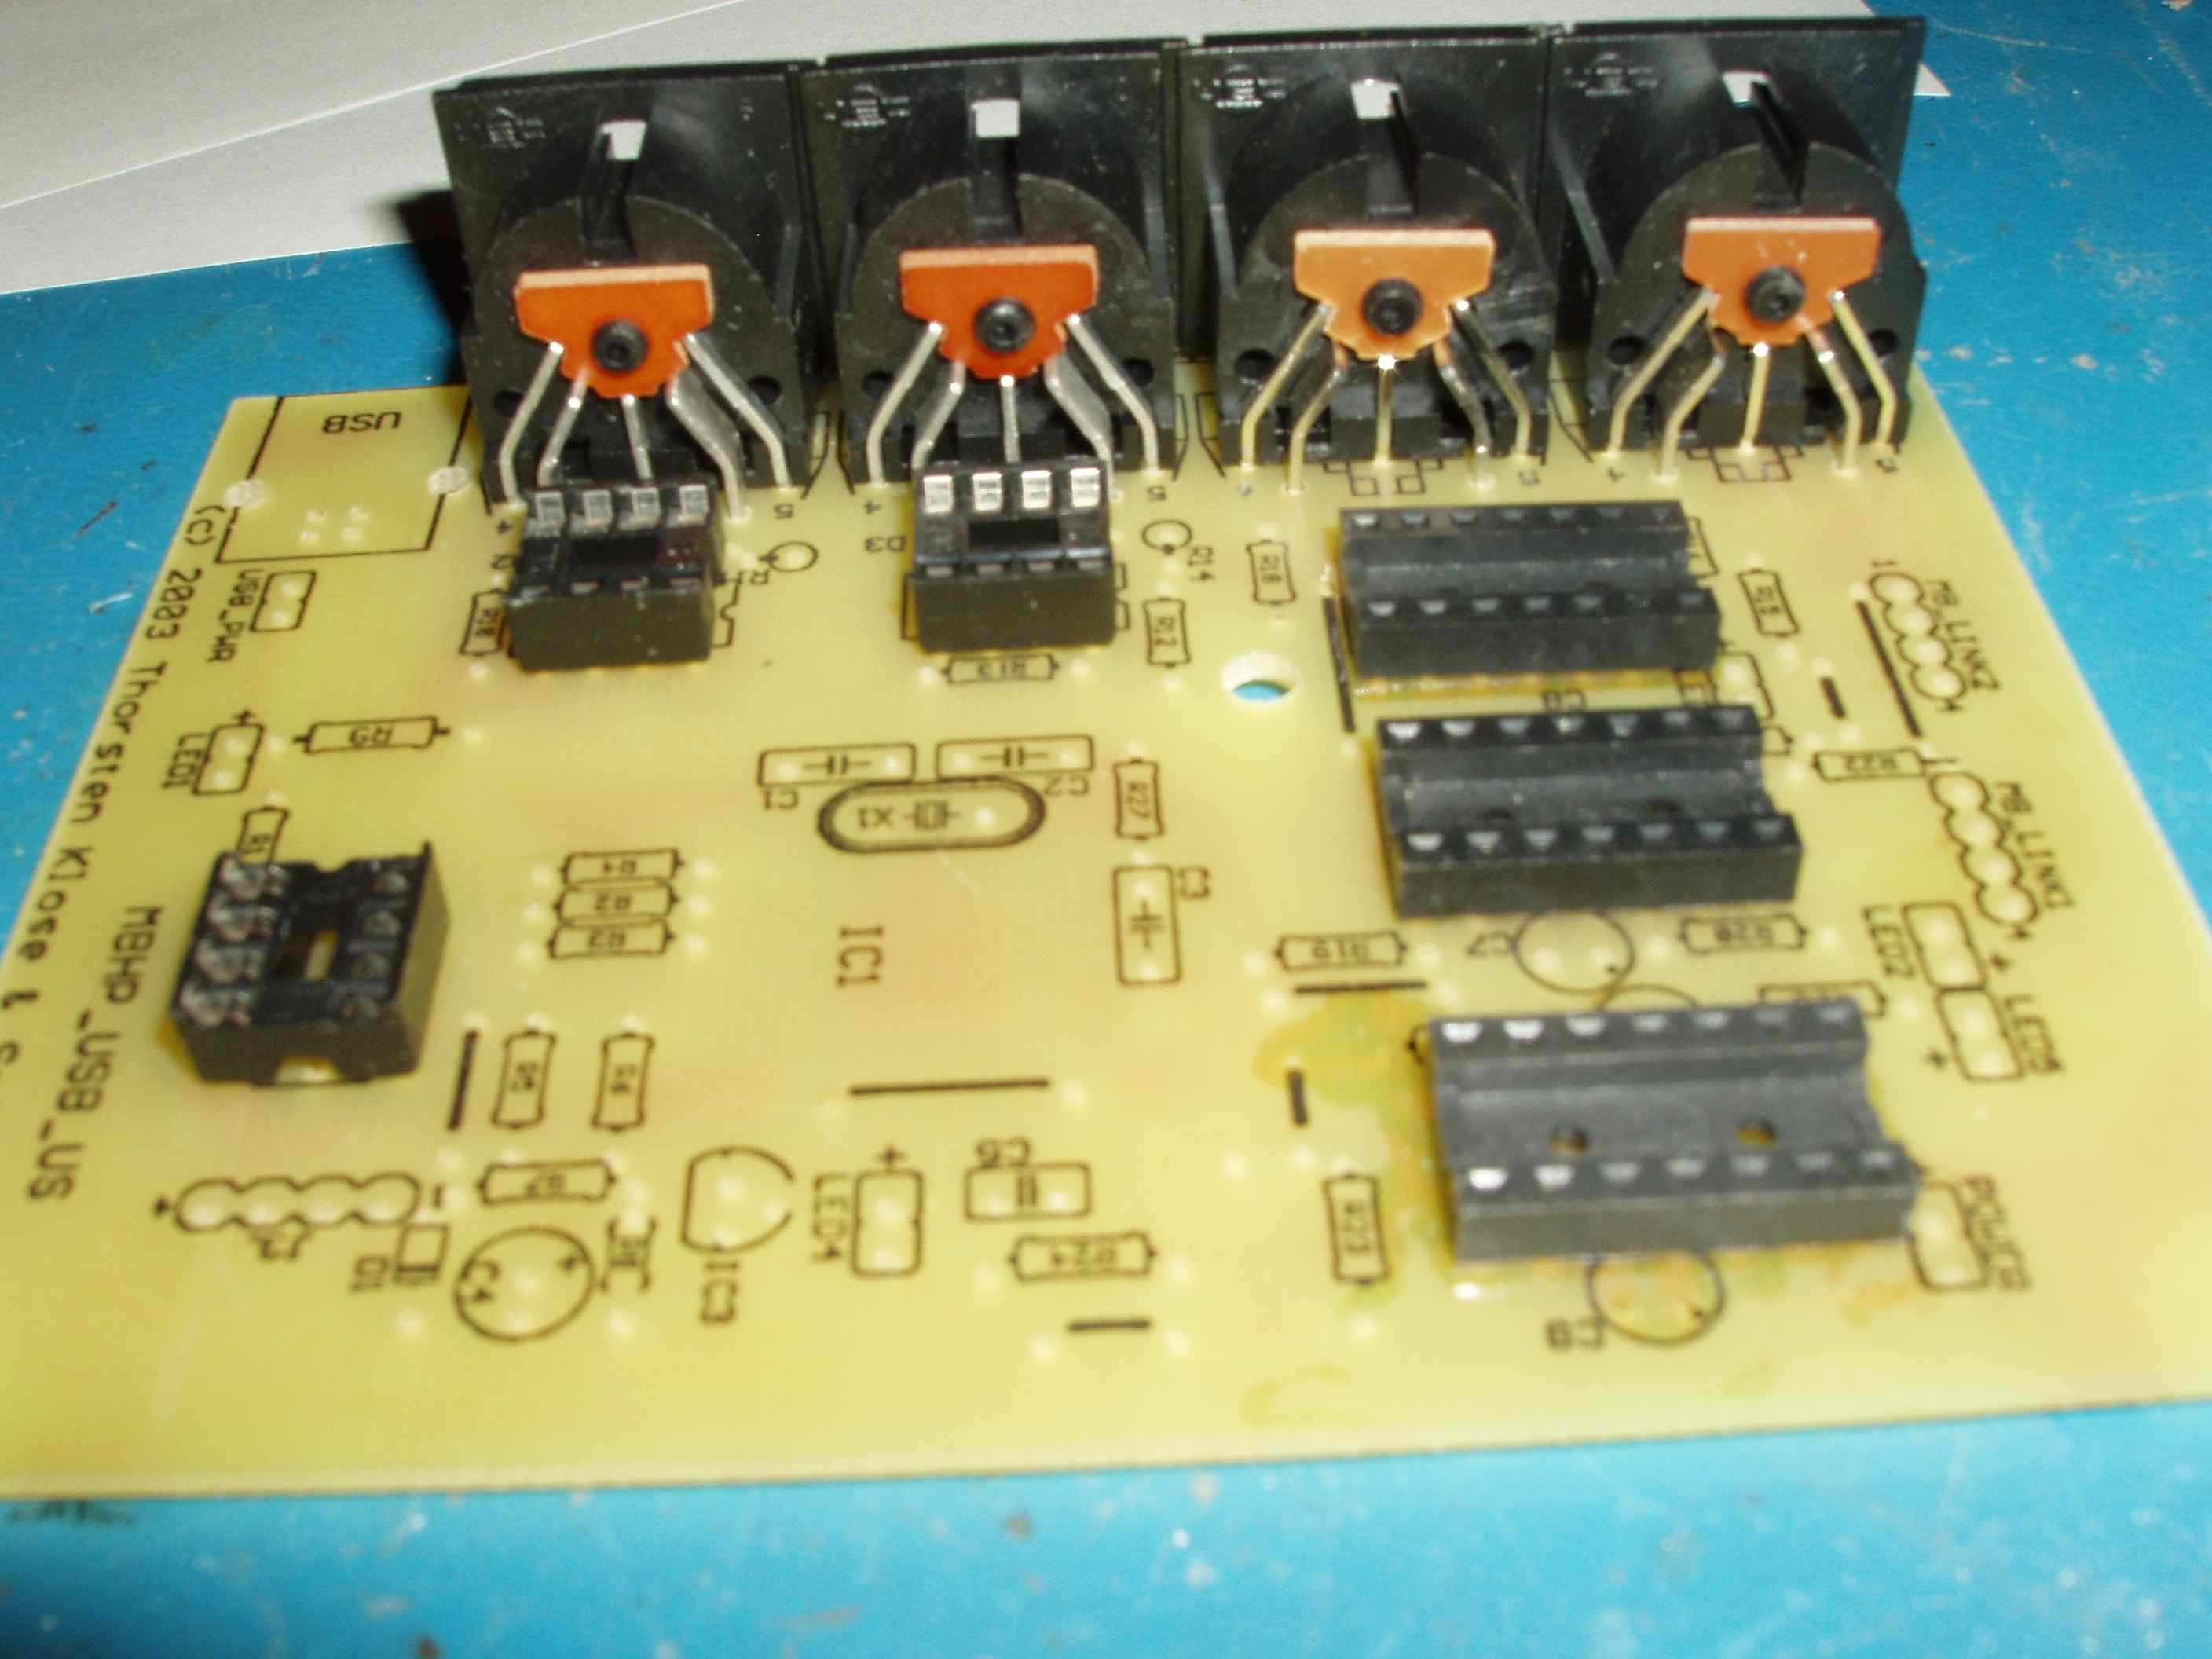
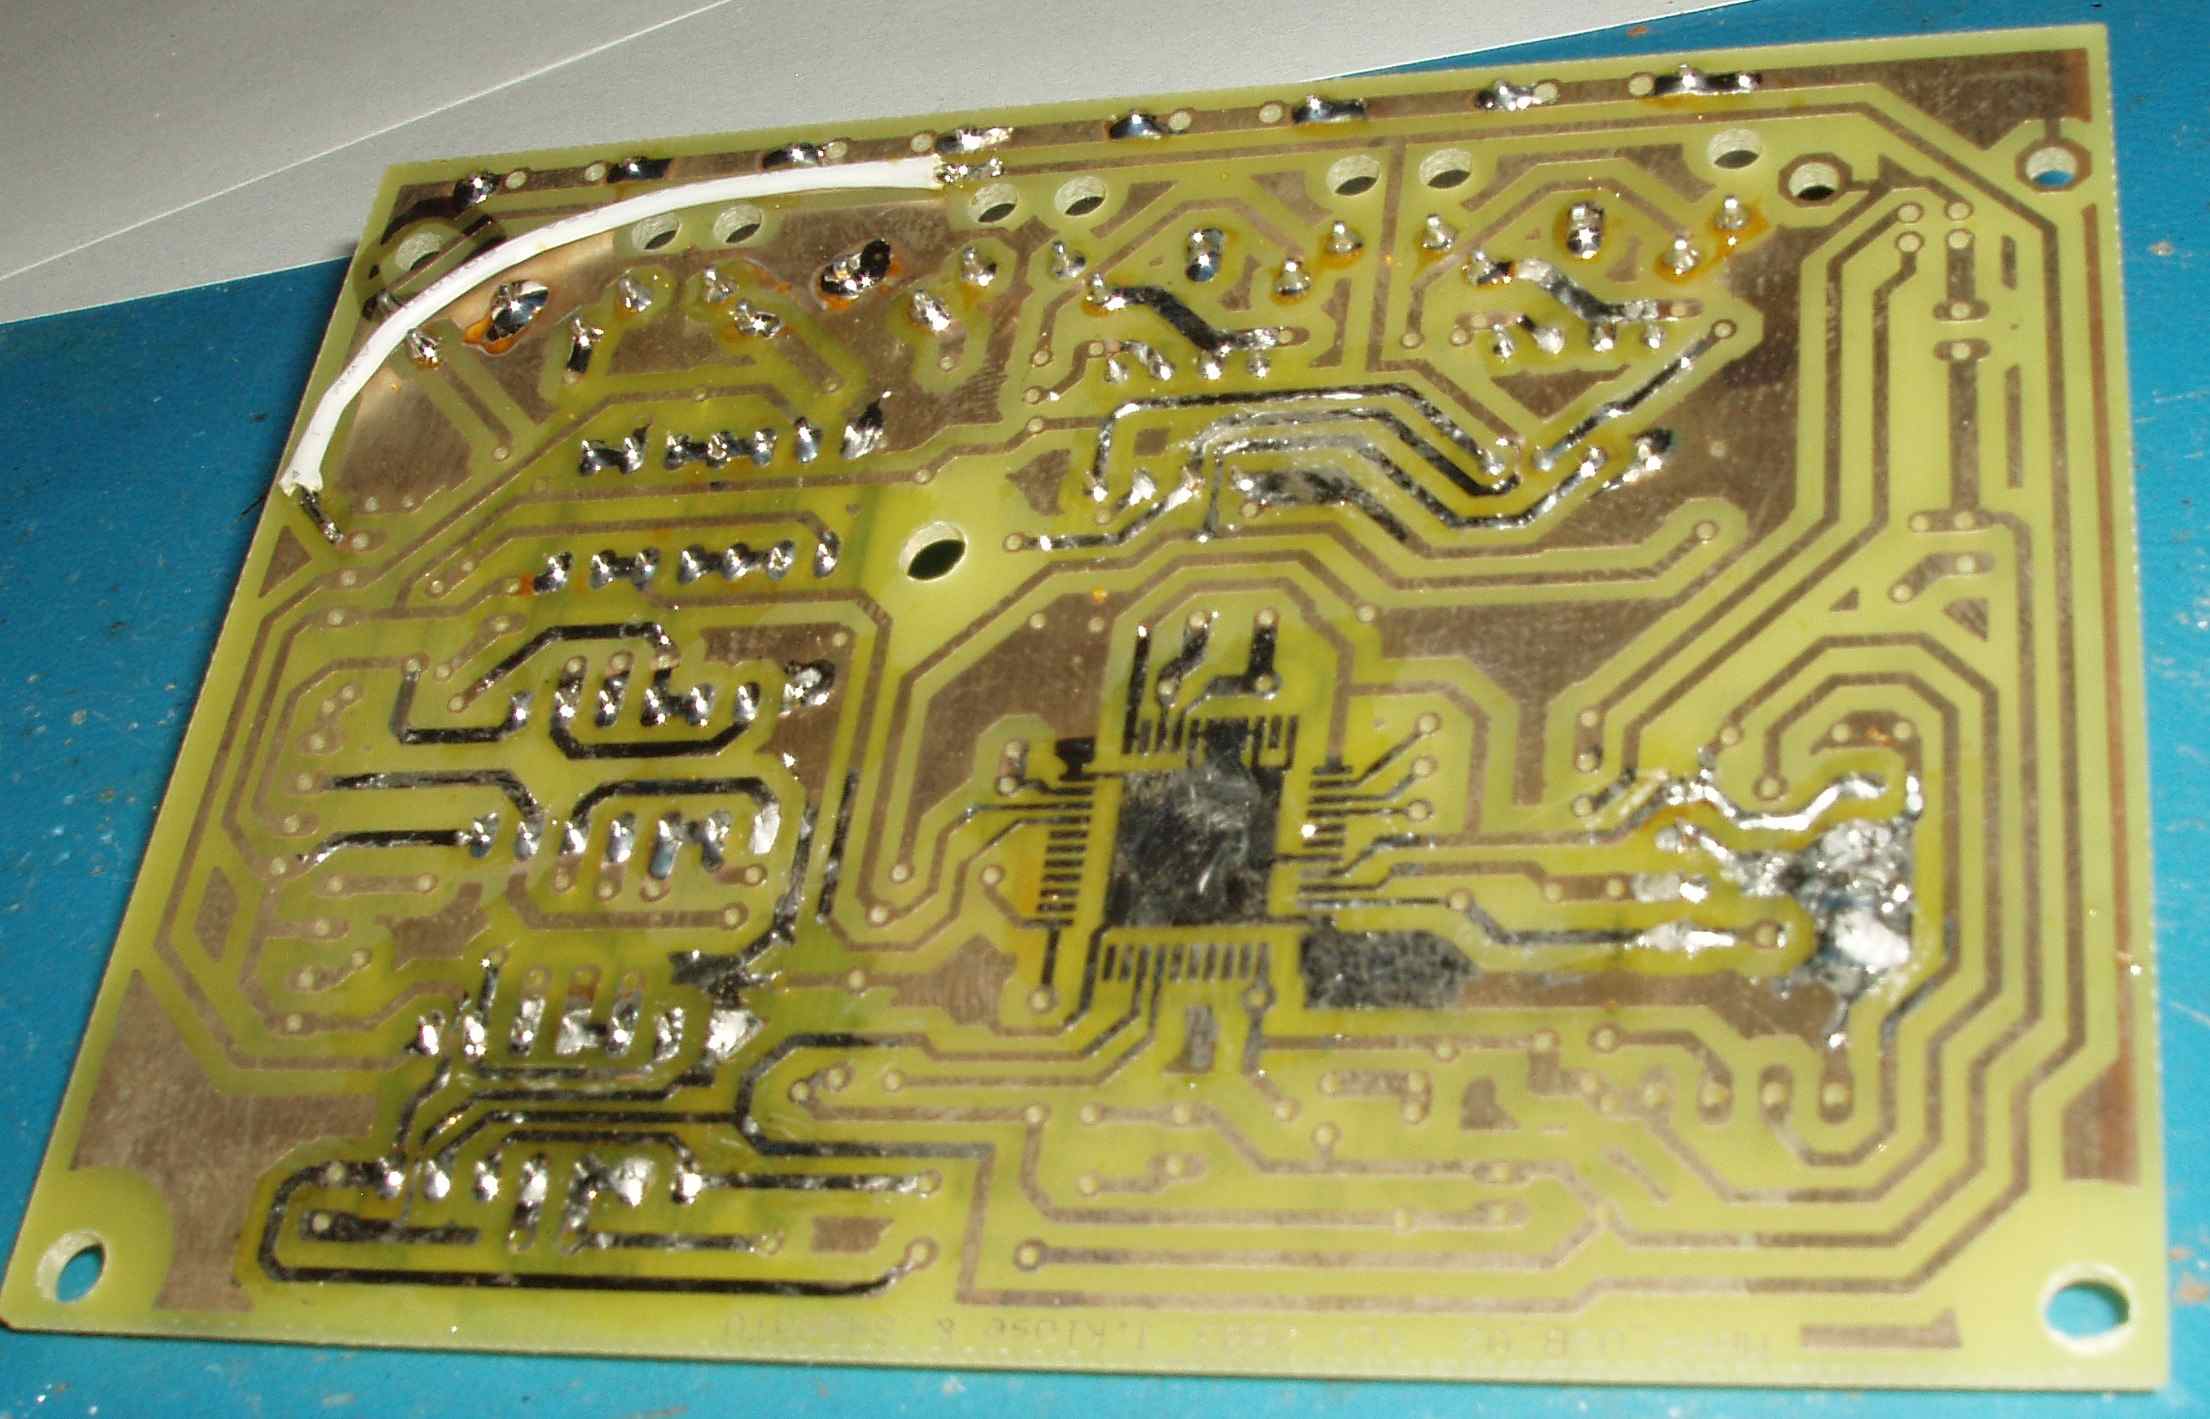
Here's what the board looks like. Looks like it has all of the sockets soldered in already. Back is primed to have the USB chip soldered on. I also added a jumper wire to reinforce a trace that was nearly drilled through (the board came with a note attached to double check the continuity of that trace).
Lets say $3 US for the board as it is + shipping costs. Sounds fair to me.
If you are still interested, private message me your address and I'll check to see what shipping costs will be to send it Russia.
-
I'm speechless.. awesome work!
-
Hi Max,
I may be able to help you out if you still want to use the AN2131SC. I bought a stack of unfinished midibox boards some time ago and one of them is the old usb board. I was never able to located a AN2131SC, so it's sitting unpopulated. I'll have to check when I get home, but I may have mounted a few other parts on it already as well. If you'd like it, I could mail it to you for very minimal cost.
Kurt
-
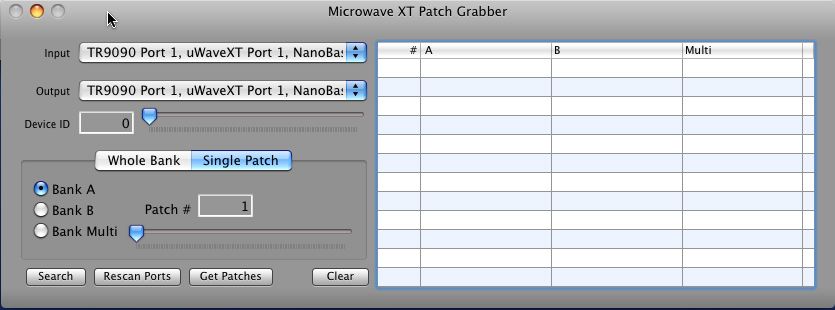
For those that care, I've updated the patch grabber zip file in my post above. It's now much much better, and is about 80-90% functional. You will want to reference this version because the last post had memory leaks and was pretty incomplete.
Kurt
-
Ok here we go. While it's far from done, it is at least doing something usable now, and demonstrated using the PYMIDI framework. There are three attachments below.
1) PYMIDI_RELEASE_FRAMEWORK.zip - Take the contents of this and place the PYMIDI_2008.framework in ~/Library/frameworks folder. NOTE: You will most likely need to create the frameworks folder, I did. The app will not run without this framework in place. I've included Pete Yandell's license and other files just so you know I didn't create them.
The reason that I named this PYMIDI_2008 is because it now contains both i386 and PPC code, so it should be useable by most os x users here. There may be other ways for the code to locate this framework. If you know of a way that is cleaner than the frameworks folder, please let me know.
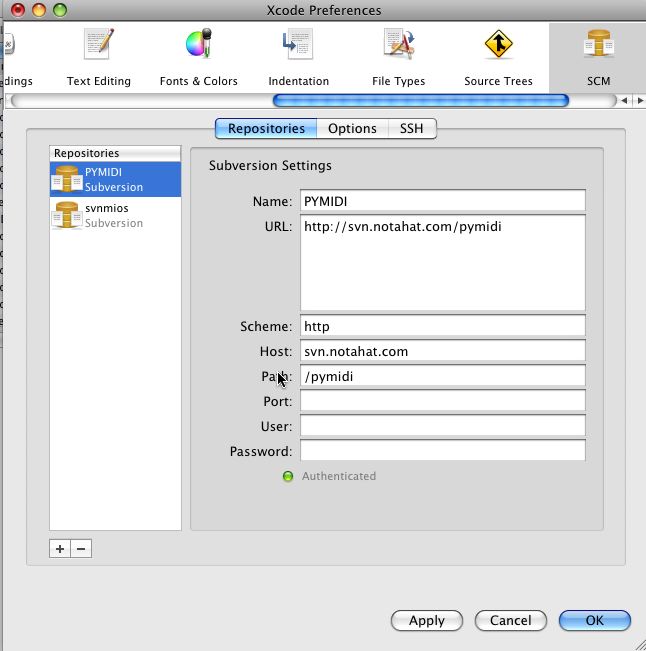
2) Shows you how to setup xcode to get the PYMIDI source.. its super simple to make a framework project for this code, but I'm lazy and don't feel like going into those details. Just use the framework that I've already built and reference this code to see how it works. http://notahat.com/pymidi
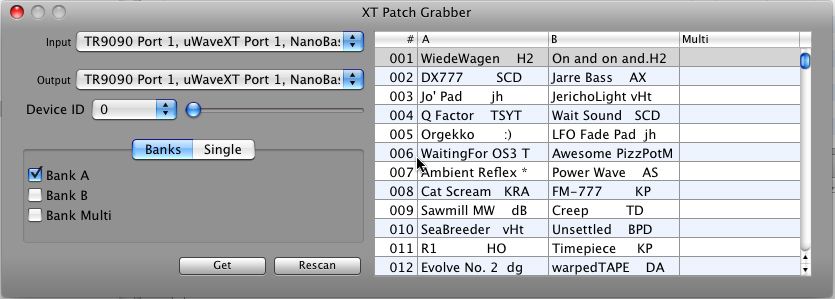
3) XT Patch Grabber 2008.zip - This is is my code tree for the patch name grabber app. Currently, the search button works very nicely. When you click search, it will setup a timer and send a LCD screen request to all of your MIDI output ports to located the first Waldorf XT that responds. Additionally, it tries all device ID's starting from zero and incrementing to 126 until it gives up.
The window saves all of its setting, but for some reason it never saves the setting unless its an item that the user has clicked on. This means that it doesn't save the selected ports and device id that it determined from a scan.
The app is probably pretty close to grabbing patch names, but I want to build it all the correct cocoa way and not use char pointers all over the place. At least it shows you how to deal with the endpoint lists and sending and receiving midi. If you have a microwave XT and want help out with this, let me know.
** UPDATE 2008-10-07 **
XT Patch Grabber.2008.zip - contains memory leak fixes and now actually grabs patch names in both batch and single patch mode.
Kurt
-
From the error message I was quite dumb. I just needed to copy the framework into my ~/Library/Frameworks directory.
I have it running, but here is the gotcha. I have two versions of this program.
The first version I named "XT Patch Grabber 2007", catchy name I know. This one works and grabs patches and puts the names into the columns of a table view. But.. its code is super super horrible, and some of the interface items are broken. It's really the first time I ever started to play with cocoa, so the code is all in one file, and may be exceedingly hard to follow.
The second version I named "XT Patch Grabber 2008". This one has been built from the ground up to have a clean code organization, with view controllers and data controllers and the whole works. I think it's a darn good example of how I'd like build a cocoa app and interface. But this version of the program seems to be more of a work in progress, in that it doesn't yet actually do anything (that I can tell yet). It does however have most of the code to actually do the same things as the 2007 version. I just need to hook up the buttons, and fix the things that the new XCode complains about.
I have all of next week off for vacation and this is a prime example of the kind of things I want to work on during that time. If you can wait until early next week, I'll share what I can get going because I don't think anyone should learn how to do this by looking at the 2007 version.
Kurt
-
I just wanted to let you know that I'm working on getting this ready, but the last time I looked at this code I had a PPC Mac and the previous version of XCode, so it's going a little rocky at the moment.
I'm having to update the PYMIDI framework so it will contain PPC and Intel code. Pete has posted his framework in a less than useable format right now. I have it building successfully but it's failing to load the framework library for some reason.
If anyone knows anything about cocoa frameworks, this is the error I'm getting:
dyld: Library not loaded: /Users/kurtarnlund/Library/Frameworks/PYMIDI_2008.framework/Versions/A/PYMIDI_2008
Referenced from: /Users/kurtarnlund/Documents/Software Projects/My Midi Apps/XT Patch Grabber.2008/build/Debug/XT Patch Grabber.2008.app/Contents/MacOS/XT Patch Grabber.2008
Reason: image not found
Kurt
-
Ok I'll gather it up when I get home. The application finds a connected Waldorf XT then requests all the patches from it so that it can extract the patch names, and hopefully someday it'll write them out to a file in the format that logic uses so that my logic environment objects can have all the real current patch names. I've always wanted to take this application way further, but it rarely comes up very high on my list of things to do :-)
It current does succeed at receiving all of the patches and remember it's window settings.
-
Also I'd be happy to share the last application I was working on that used PYMIDI, but I can't guarantee that it's the best cocoa programming the world since I'm still learning its quirks.
-
Yeah I have some code for this at home that works very nicely. Actually its a framework that you link into your code and it simplifies communications to, and management of, the midi endpoints.
Check out Pete Yandell's PYMIDI framework.
-
hehehe.. thanks for checking it out. On Friday, when I found out that this was actually playing in theaters, it really made my day.
Stryd: I call that sound the whistle, because it sound like whistling at a girl. Once I hit on the guitar whistle idea I pretty much built the rest of the song around doing that at just the right time and then trying to get a tempo that would match with most of the transitions.

Tascam MM-RC Conversion to Midibox
in Miscellaneous
Posted
Yes I am.