frailn
-
Posts
297 -
Joined
-
Last visited
Content Type
Profiles
Forums
Blogs
Gallery
Everything posted by frailn
-
Didn't know about this other Sasha until TK mentioned him...no offense Cool Sasha!
-
DJ Sasha!
-
http://goruco2008.confreaks.com/02_bowkett.html
-
I'll keep you updated on the progress. I'm building the Step A control surface, not step B, however, if programming is required, I'll let you know my experiences. Mouser is good to work with - and shipping is fast. But, the shipping is a bit expensive. That is why I suggest that you buy extras of anything you order, just in case you miscalculate your needs or you break or lose a part. And, when you order from SmashTV's shop, don't make the mistake I made - I failed to notice that PCB's are included in the parts kits and I ordered extra PCB's I didn't need. I'll end up using them in the future, so no big deal.
-
Count me in.
-
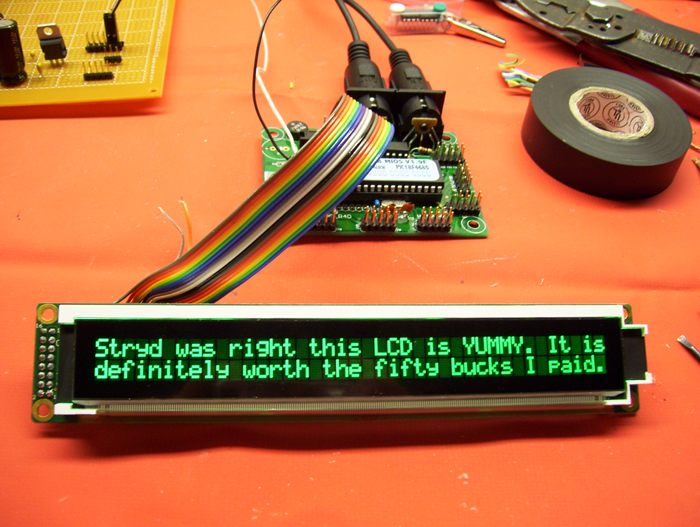
I should clarify this. I managed to get one core and one SID module running with a 2x40 LCD without having to change any programming parameters and no issues. I have not yet hooked up the Step A control surface, so I haven't been through all the menus yet.
-
Hey, those are sweet! You can order them barebones - just case, LCD and PSU for around $180. Without modification, it might be good for SID v2 Control Surface Step A. You could add buttons, knobs to the top of the case...
-
Corrrect. You are correct, the C64 power supply is used. The "optimized psu circuit" takes the incoming power and splits into a 5v line for the Core, 9v line for the SID modules and separate line for a "power on" LED. It also cleans the power, reducing noise in your sound output. See Daniel Price's web page for a good overview of how he put one together. I haven't gotten to this stage yet, but I would suggest that you get the size screen you like. The programming, if there is any, would not be hard. It's just a matter of changing some preset paramaters, the documentation is extensive. It's very easy. You should get the LCD you want because you will wish you had later. Might as well order 8 and save on shipping later down the road. You might want these in the future after your box is complete and you start learning how to build your own patches. Also, never hurts to have spares in case you fry one or break a pin. These are available in Smash's shop. I purchased one meter of 10-pin cable and one meter of 16-pin cable from Smash's shop. Plenty for what you need to do. Correct. Don't forget to order the following from SmashTV's shop while you are at it: For Core, SID and OPSU: 10 pin Female IDC Connector (Smash 33) - you'll need at least six of these to connect SID 1 to Core 1 and SID1 to SID2 also for SID 3 to Core2 and SID 3 to SID 4. I ordered extras. 16 pin Female IDC Connector (Smash 32)- at least one for the LCD connection to the Core. As before, I would order extras. SIL Pin Headers/DIL Pin Headers (Smash 3 & 24)- included in parts kits, but I order extras, they come in handy. Especially for the Optimized PSU connections. For Control Surface Step A: Rotary Encoder (Smash 17) Pack of LED's (Smash whatever LED flavor you like) And order these parts from Mouser, DigiKey or whatever electronics store you like. I used Mouser, so here's my parts list: Audio Out Jacks. I used 1/4" switched, panel mount. You may want a different flavor (RCA, 1/8", etc..). Mouser 550-10021 Switches for operating the menu of your midibox. I used Mouser 688-SKHHDT. Pay close attention to the size of your LCD screen versus how many switches you'll need. Longer screen, more switches, easier menu navigation.
-
I bet you might be able to fit a Core module into an empty drive bay. Depending upon the number of empty drive bays available, you could fit in more modules (like SID) Some newer PC cases are sporting LCD screens that I think are pointless. It's beyond me, but you might be able to disconnect that LCD that is build into the case and connect it to your core sitting in the drive bay... Connecting MIDI in and out...have to think about that one. Maybe get sound card with MIDI and access the MIDI ports from the internal part of the card, inside the computer? Somehow connect that to the core internally? You would have to get a card that has readily available schematics so you could decipher how to connect it to the midi ports on the core.
-
Sorry I did not link to that photo in my first post - I was in a hurry and it slipped my mind! You will need to download SID version 2 application from ucapps.de. The download has multiple files/folders. You will upload the hex file to your Core module once it has been assembled, LCD attached, voltages properly tested and PIC inserted. You will use MIOS Studio to upload the hex file via MIDI. Here are the general steps I took on my first attempt to build a CORE plus SID: 1. Assembled Optimized PSU circuit and test voltages. 2. Assembled all components of CORE module except the IC chips. a. tested voltages as suggested by Thorsten on ucapps.de b. connected LCD c. retested voltages as suggested by T on ucapps.de d. inserted IC chips into core e. connected MIDI cables from my PC to the CORE f. opened up MIOS Studio and followed TK's instructions for connecting MIDI IN's and OUT's in MIOS Studio g. powered up the core and crossed fingers. If all goes well, you will see the copyright for a few seconds, then "Ready." h. use the MIDI troubleshooting section of MIOS Studio to sent text messages from your PC to the CORE that should show up on your LCD screen, if you like. 3. Assembled one SID module (all components except IC chips). a. tested tested voltages as suggested by Thorsten on ucapps.de b. connected Core module to SID module. I did this wrong at first and couldn't get sound out of the SID. After searching the forum, I discovered the simplest way to connect the CORE to SID is with a 10-pin female connector to DIL using 10 pin ribbon cable from SmashTV. Powered on CORE, retested voltages c. inserted IC chips into SID module d. connected to speakers/sound output d. uploaded SID version 2 HEX file to core. e. rebooted Core/SID. Crossed fingers and saw the SID software screen come up on LCD! f. opened up the little softsynth keyboard in MIOS Studio and played a few notes. 4. Assembled one Bank Stick. a. I used a desoldered joystick port from an old C64. Soldered it to the OPSU prototype board. b. Soldered wires from old joy port to CORE per ucapps instructions. c. Soldered the EEPROM with wires to a female DSUB connector from Radio Shack. d. inserted DSUB and EEPROM in a connector hood. e. plugged in the newly assembled bank stick to old joy port e. booted up Core g. Core will recognize your bankstick automagically and format it for you. h. Used MIDI-OX to upload TK's preset patches to the bankstick via MIDI cables connected to CORE. The preset patches are part of the SID version 2 download package mentioned above. It is a Sysex file. So use MIDI-OX not MIOS Studio to upload it. MAKE SURE THAT MIDI-OX IS SET TO 7200ms DELAY. I didn't do that and the upload kept crashing. Once the delay was set, it uploaded with no issue. If I missed a step in here, I apologize. Do not take this post as the comprehensive guide, because I just build my first CORE and one SID module. These are the steps I remember taking in the order I remember taking them, but as you get closer to actually powering up and hearing sound, memory becomes blurred with excitement. You sound like me - read, read, read - in preparation and worried about missing something due to lack of experience in these techniques and technologies. However, after reading for weeks, it didn't all truly come together in my head until I had my hands on the PCB's and components and was putting them together. Once you get your hands dirty, it will all start coming together.
-
Hey and welcome... You can see from this photo on Swindus' forum post that he hast one Core module and two SID modules purchased from SmashTV (the green PCB's). The other sections are circuits built on prototyping board - upper right is the optimized PSU, to the left of the PSU looks like a bankstick board (think of it like memory for saving patches). Bottom left is the DIN board (digital input) for the buttons and encoders. For four SIDs and a minimal control surface, you will need to buy 2 core kits, 4 SID kits and a DIN kit.
-
Thanks! I managed to get one SID module running and was playing my first MIDI file through a 6582A using Sony Acid Pro last night. I chose the background music from Super Mario (the old NES version) from the underground levels. Sounded sweet for the first test run! Well, any MIDI file sounds sweet the first time you hear it coming from your first DIY synth. I also built my first bankstick. It was nice to watch the progress of the patch uploads on the LCD. I ran into several issues before I actually heard sound coming from the SID. Thank goodness every single issue I hit was documented on this forum, ucapps.de or the wiki. I can't thank TK and all the other midiboxers enough for taking the time to document all of this. And special thanks to Wilba for running the SID Mega-Sales! That 6582A sounds sweet! This the first time I've ever heard a SID output sound with no audible background noise. Can't wait to build my second SID module next weekend, and a control surface after that....then figure out how I'm going to case this thing. I was going to use my geiger counter, but after playing with the SID synth last night and this morning, I'm thinking I need to go for a larger control surface than that geiger can provide. This makes my Prophet64 look like a Speak-n-Spell. You guys rock!
-
Perfect timing. I'm building my first MBSID this weekend and probably won't get to the control surface, yet. This will be fun to play with once I get my SID modules built, tested and working. Thanks Rutger and TK!
-
Woohoo! My first core module went online today! And I only had to ask two questions! Now off to build SID modules... Thanks for your help, Stryd!
-
Should we include WINE and Front Panel Designer? WINE required to run this program. I looked up the copyrights on FPD: The >Front Panel Designer< is freeware, so you can install and use it always and everywhere for free.
-
Added links for the Audio software and added kicad to the list of MIDIbox software section since it's opensource. I don't think we could use eagle since it's copyrighted.
-
You know what - I've been struggling with that Optimized PSU this week, and it didn't cross my mind that the voltages might be different coming out of my C64 transformer's DIN pin-out, then what I'm reading on schematics and on Daniel Price's web page. I suggest flipping your PSU board over and checking the voltages at the power port solder points with a multimeter. That way, you will know where your 5v and 9v lines need to be connected - wherever the pins read 9V or 5V. I'll be doing that for mine later today. This could be the solution to my problem. I was just following Daniel's example exactly. Lesson learned. I tried to test the voltages with a multimeter by touching the DIN pins coming out of the C64 transformer, but that was just too hard to get a reading. The multimeter contacts kept slipping off. I wouldn't fear plugging it in, just don't hook it up to the CORE or SID modules when you do test the power. My first three iterations of the OPSU were so messy and so many shorts, but I plugged it in a bunch of times and had no scary things happen. Just be careful how you handle the board while you are testing connections - I hold mine by the edges only.
-
Paid! Thanks Seppo!
-
I like it! You have to include Dr Bunsen's icon somehow...
-
MIDIbuntu? Xanabuntu?
-
So now I'm curious.... How many people are really interested in this? Me too! I would use it! What are the chances of linux being your primary OS? Or would this be something you'd use as a secondary option? This would be my primary OS for MIDIboxing, music composition and editing in the basement work room. I would still share my upstairs Vista box with my wife for our finances, watching television, movies, business, all the non-musical stuff. Should this be more strictly midibox focused, or is it worth broadening the scope for other goodies (won't be hard) like AVR, arduino, Synth-DIY, etc (could be a general DIY audio/electronics distro) I like the idea of it being midibox focused since you could spend the next ten years exploring the possibilities available through TK's concepts and those added by the community. Maybe it should be midibox focused at first and expand the scope later? What features or apps would be a "must have" for you? MIDI Sequencing, Digital Recording. Any apps that makes dealing with ASM and C easier. All the software that has sprung out of the midibox project. Perhaps WINE for those wanting to run Windows based programs like Ableton, Sony Acid Pro, Reason. What would you really like to see? The cover of Xanadu desktop background. What would be a dealbreaker? Couldn't think of one. I would use this no matter what. Are you an ubuntu hater? Did it not "just work" for you? Do you have any other suggestions? (remember , "just works" is a must). I would be happy with Ubuntu. Especially since it is based on Debian, which I use on a regular basis for web apps. Can you help if we do this thing? I would help as much as my knowledge allows. I have experience installing Debian remotely, configuring it for web applications (installing and configuring mysql, apache, joomla, etc...). I'm no programmer, but I have managed to keep a Debian system up an running on the web with no issues for about a year. Maybe I would be good for testing or menial tasks. Feel free to call on me for help, if I don't know how to do something, I'll figure it out. If I can't figure it out, I'll let you know.
-
I'm definitely interested in a linux distro. In addition to the features listed by Stryd, I'm sure people would want a DAW. I don't know if there are Linux versions of the popular commerical DAW's...but there is Ardour (which I've never tried) and Rosegarden (which I've briefly tried, but haven't given a good run). Both can handle MIDI if I remember correctly. There is a good article about using Linux for recording and mastering. Not suggesting that these be a part of the distro - just optional programs for those that want to use MIDI sequencing software (Rosegarden) or a DAW (Ardour) with the distro.
-
I tried scite briefly when I was playing around with Ruby about a year ago. All the features you need don't come with the original program, but there are developers out there adding features all the time (like a file explorer). Worth a look, at least.
-
Thanks, Stryd. I am trying to get through this first project without asking questions to which there are answers available on the wiki or elsewhere. So far I'm 0 for 2! Sure do appreciate your input even when the answer is available in documentation.
-
Quick question about wiring symbology for LCD's... Using documentation found on ucapps and on the wiki, I was able to match up all the contact points on my LCD to the contact points on the Core module with these three exceptions. I'm hoping someone can tell me if this is is correct: Core LCD Data sheet Vd ---- Vcc V0 ---- Vee E ---- F