ultra
-
Posts
832 -
Joined
-
Last visited
Content Type
Profiles
Forums
Blogs
Gallery
Everything posted by ultra
-
use a conditional based on pin state to only trigger when you press or release the button.
-

MIOS32 Voxel Space Graphics Demo on 256x64 Graphical OLED
ultra replied to Hawkeye's topic in MIOS toy of the week
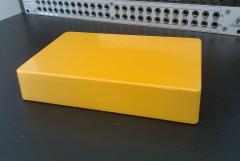
thanks for the info. i've been meaning to learn about writing drivers and such (right now it's beyond me), so maybe tinkering with your code will be a good place to start. these seem to fit every requirement i have for a display for my project. i found that newhaven has a 2.8" version of your lcd, and look how perfectly it fits into my case: -
MIOS32 Voxel Space Graphics Demo on 256x64 Graphical OLED
ultra replied to Hawkeye's topic in MIOS toy of the week
thanks for the reply. i did watch the video and it looks great. i am wondering how many characters in both directions you can get out of this, and how easy would it be to design my own simple graphics for it. i know you don't know until you've written in the code, but let me know when you do. a single one of these might fit the bill just fine. also, could you have characters in different shades? so some look lighter and some are darker. thanks, ultra edit: also, could you please link me to where i can get a data sheet? i'd like to get the exact dimensions so i can draw it up in CATIA and see how it would fit into my design. -
From the album: MIDIbox Live
i'm really enjoying working in catia. the "midibox live" stuff is still in full swing, and the clip trigger device is almost done. after this, i have some ideas for an automapping instrument controller device that also has some nifty sequencing abilities for making clips. -
MIOS32 Voxel Space Graphics Demo on 256x64 Graphical OLED
ultra replied to Hawkeye's topic in MIOS toy of the week
this is great, and definitely along the lines of what i'm looking for in my next project. so it's about the size of a 2x20 character lcd? any chance you have some images with just text on it? as in, what 4 or more lines might look like. -
perhaps not one of those, since i can only find toggles up to 4 poles on that site.
-
i don't think you want a rotary switch if you're only switching two devices. they're usually for cycling thru several things. just get a 5 pole on-on rocker or toggle from somewhere.
-
i'm looking to buy a cheap 2 x 20 lcd in the us. industry standard pinout. whatever color should be fine. thanks, ultra
-
looks like i'll be getting one from altitude. thanks man!
-
not sure of the chances, but i'd like to buy a LPC17 core from somebody so i can begin development with it asap. thanks! ultra
-
thanks nils.
-
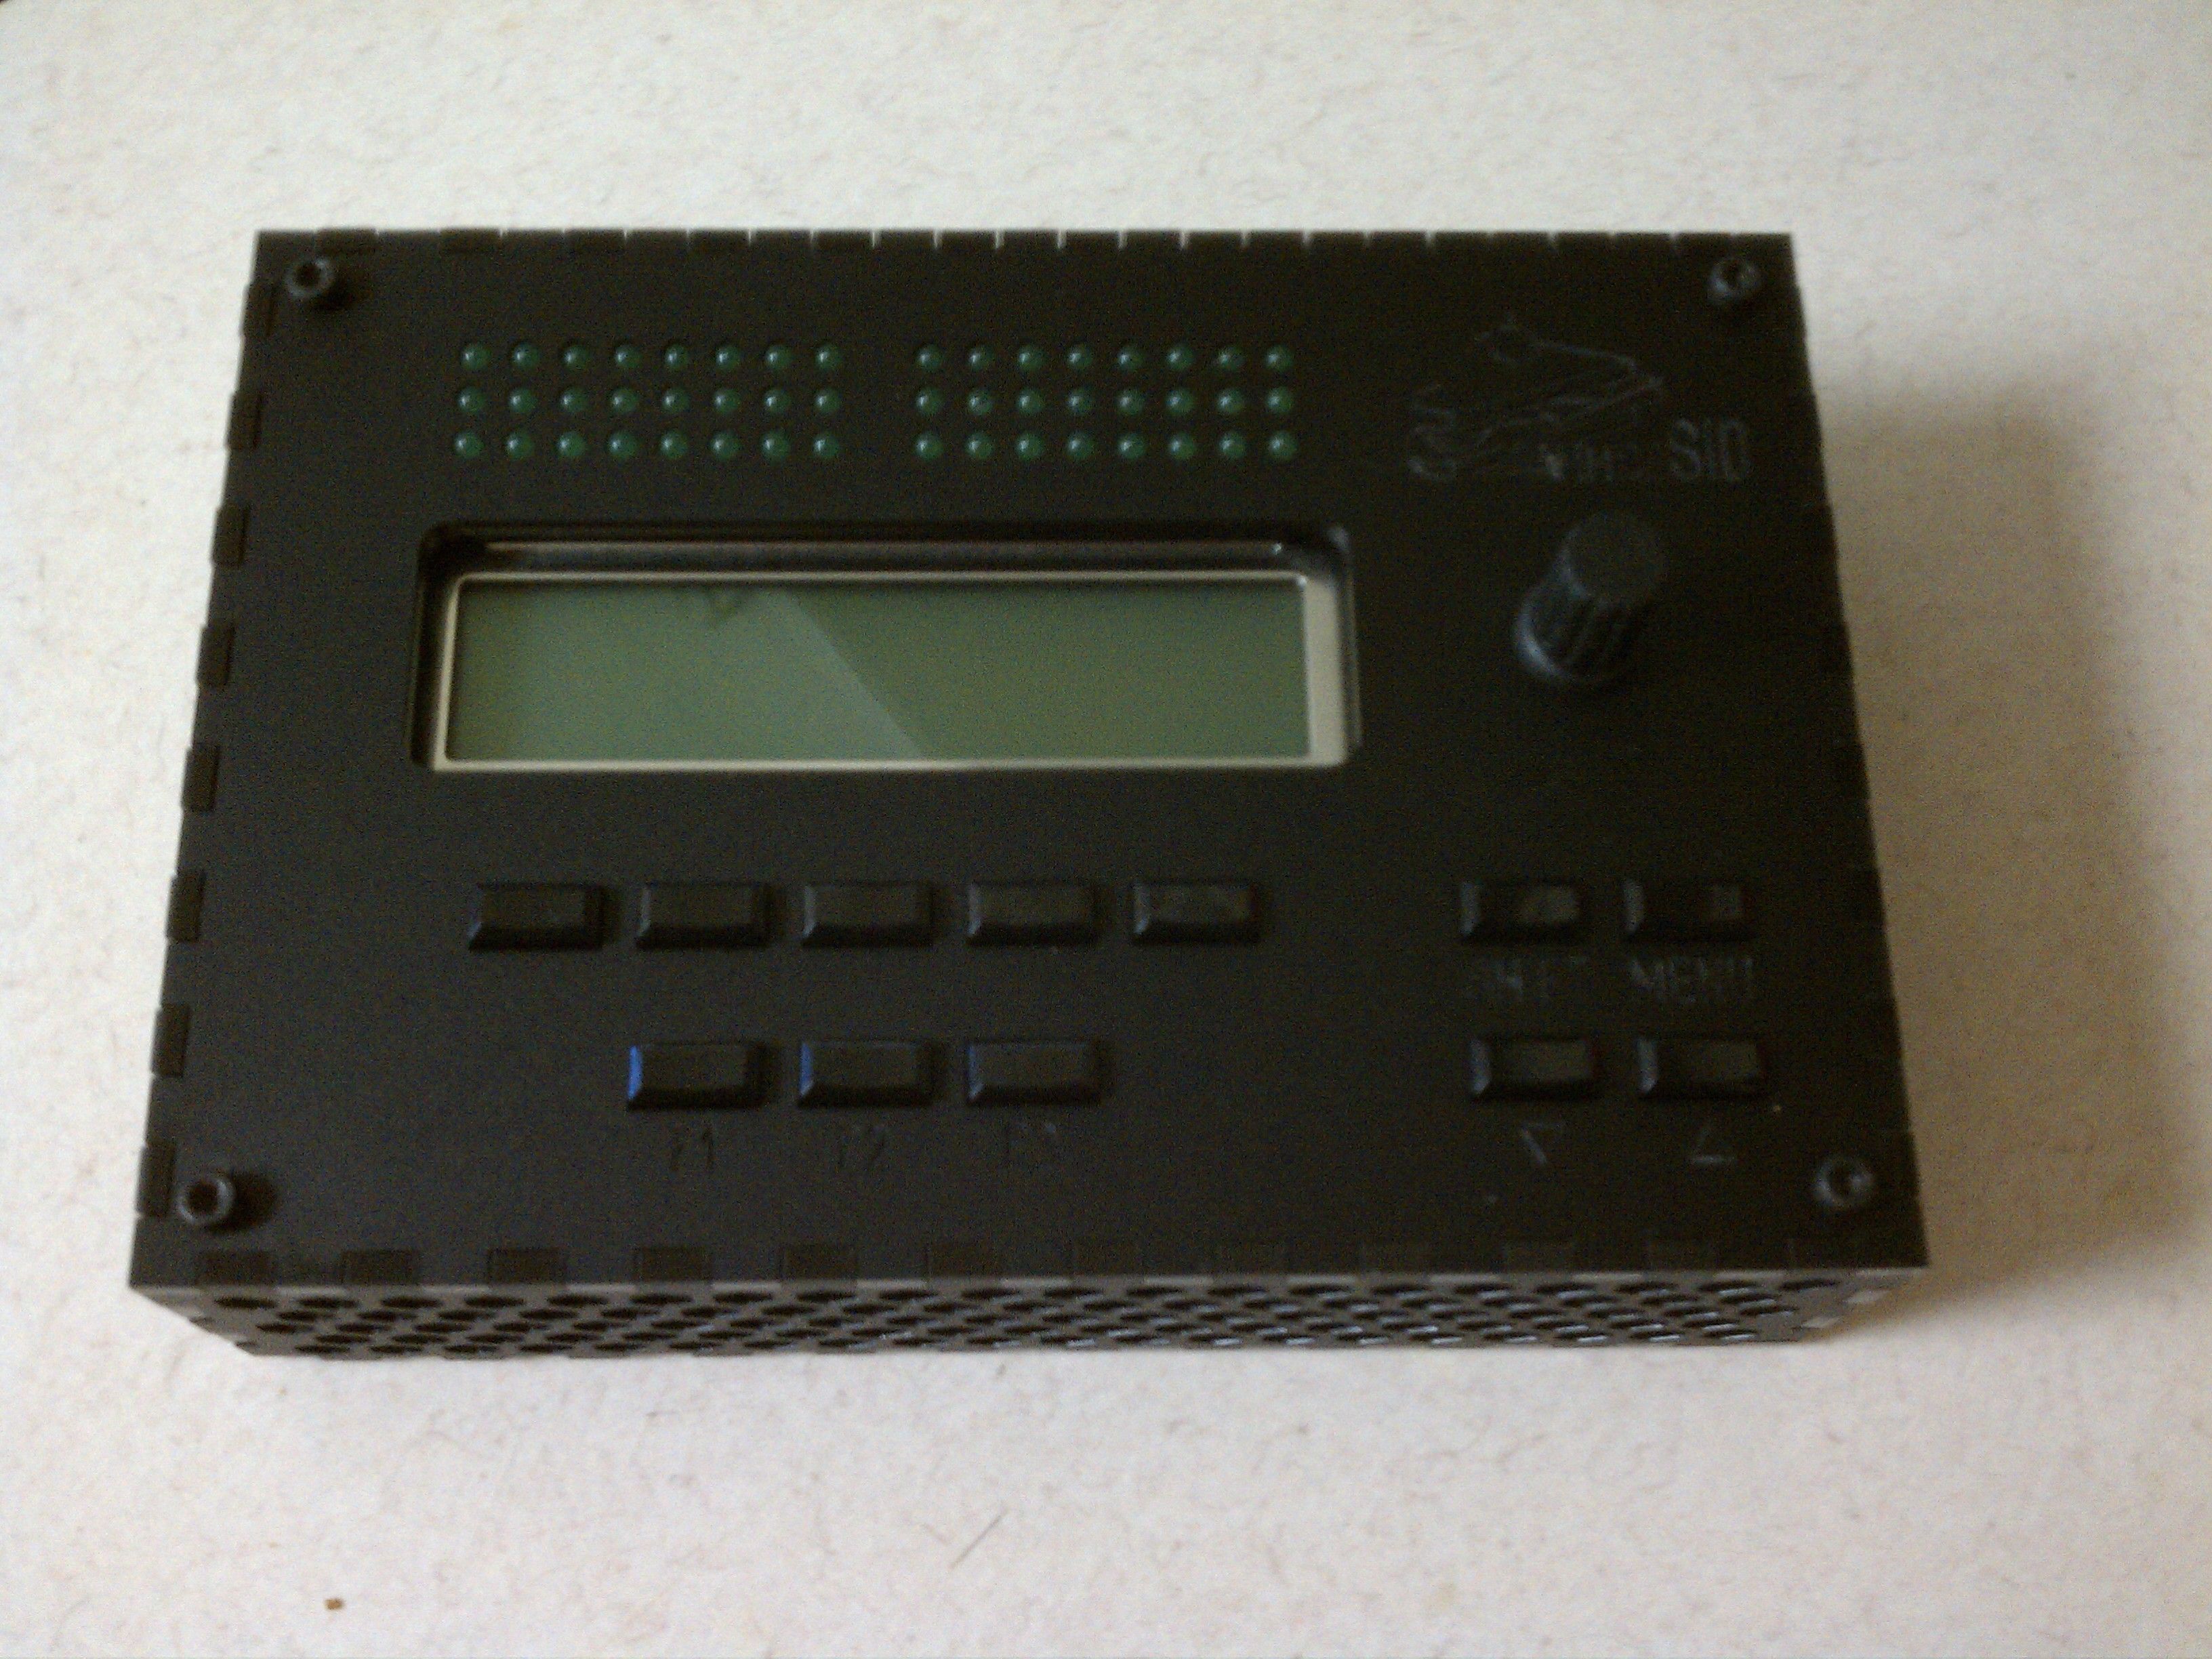
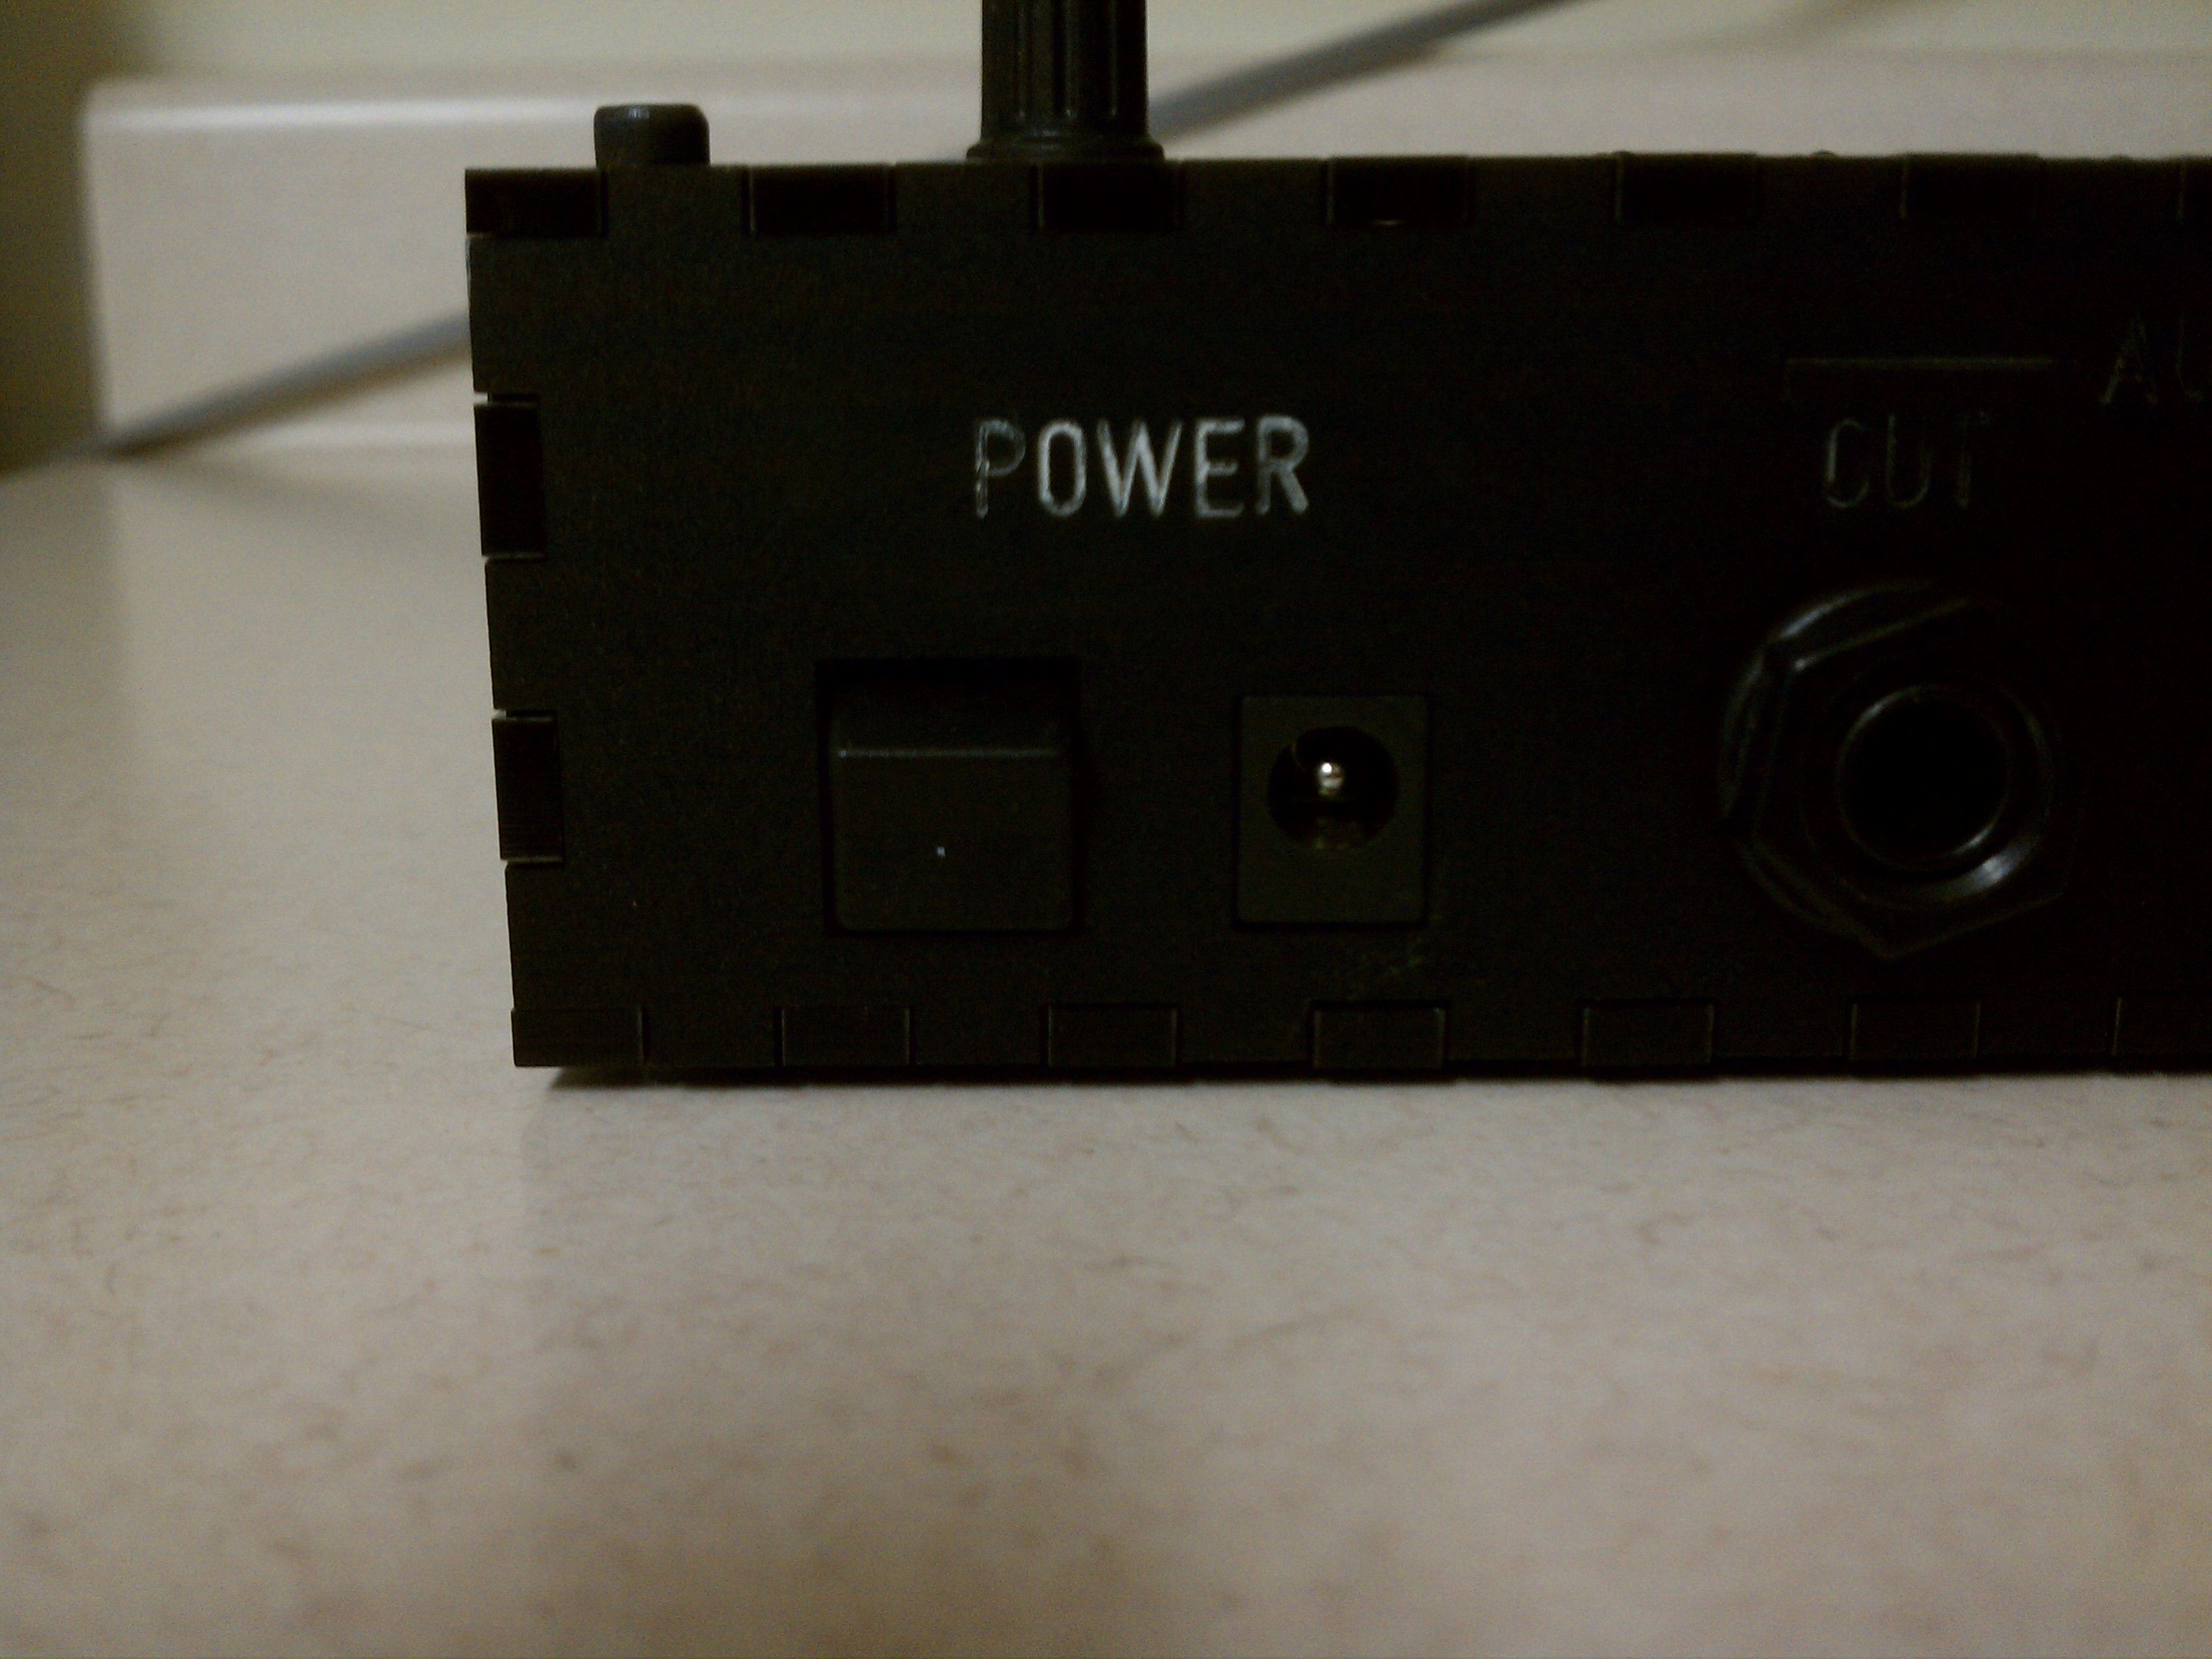
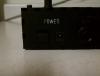
i'm selling my midibox sammich sid b/c i need to eat! the price is $250. the lcd backlight doesn't work (can be easily replaced with one of your choice) but the voltage is there. i currently have the jumper set to 5v. also, my ex had started to paint it and i'm not sure what she was thinking. only the "power" label on the back is painted in white, and there's a faint white smear of paint around the label that can be seen in the right light. if you plan on painting this, it'll disappear no problem. pm me if you want to buy. thanks! btw a 12v psu (switchable voltage) is included. also, shipping is whatever actual cost to wherever you are. you can choose whether or not you want it tracked. i'm in USA. ultra

-
back at working on the ableton live controllers, and i'll actually have enough money soon to build them. :)
-
maschine!
-
didn't notice the 1/4". that for sure won't work with the size of pots i'll need. i like their aluminum cases. i bought one for my ableton live clips controller and i'm gonna have it cut/etched.
-
mammothelectronics.com/category-s/25.htm
-
i would look through the existing apps and see if anything fits your needs. there's probably one that uses ain and dout at the same time, with notes that are reconfigurable. i don't know much about the existing apps because i code my own. writing something like this on your own is pretty basic, and there are plenty of code examples available.
-
i don't think my controllers are the answer, if i'm understanding what you want to do. you want to build a device to specifically control one instrument, and mine speak directly to live. they will have generic midi control as well, but they're not worth building if you're not using them for the intended purpose. i think you just want a custom controller. i'm not sure which apps that are available fit your needs, if any. so you may have to code something for yourself. for hardware, just check the modules at http://ucapps.de. dout is for leds, din for switches, ain for pots, etc.
-
From the album: MIDIbox Live
-
 lucem i left them out b/c i don't see a reason for them.
 -
discovered reaper is can be scripted with python... perhaps another automapped device for my live controllers?
-
very nice. too bad i already have my panel.
-
ableton live clips controller - "finished" design
ultra replied to ultra's topic in MIDIbox User Projects
thanks for the feedback roel! i think i can only get away with this size because it's aluminum. it'll be heavy enough that it'll feel sturdy and it won't slide around too easily. these cases are built for guitar pedal/stompboxes (although bigger than most) so they'll be strong. i like the aluminum etching, but i'm not sure if it's accurate enough for the way i want to do the text because it'll have to be small. the text in the images is just temporary. i'm thinking that even FPE's etching will be too big, and i need to do something graphical like lasertrans. i think that altitude (on this forum) will have some answers regarding that, and i'll ask him when i get closer to that point. i'm realizing that i have a lot of buttons available to use as multi-function. most parameters like bpm, punch in/out, etc, i have already coded and know how to listen to in live. i didn't know tap tempo was available (i checked out that script you linked), and i'll look into that. the idea was to create a clips only controller with just a couple extra functions, because of the other controllers i'll be making. but i'm trying to keep in mind that someone might only build this one and not the others, so maybe i can add some additional control without adding more buttons. i also didn't know about monitoring. maybe i can use that too. i appreciate your enthusiasm. right now the only thing stopping me from having this in my hands is money, and i'm hoping to work that out in the next month or so. also, i'd really like to use this format for the future midiboxes, and i'll need to do some design work to make sure they'll fit into this case as well. i also like the idea of bigger, having one big controller that does it all. but i also imagine sitting in the park with a full studio, all running off the laptop's battery. ;) i appreciate your enthusiasm, it keeps me going. ultra -
ableton live clips controller - "finished" design
ultra replied to ultra's topic in MIDIbox User Projects
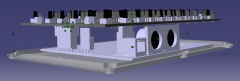
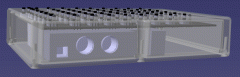
hello and thanks for the input, the vertical distance is exactly the same but i don't think it'll be a problem. they're only .3" apart as it is. the closest i could get is probably .2", but then you'll be touching the led when pressing a button (maybe) and i just don't like the idea of that. after a short time of use, your eyes automatically look above the button for the led feedback. i think once this becomes a physical device, it'll look like it makes more sense. the case for this device is pre-made: http://www.mammothelectronics.com/4S1590DD-p/500-1003.htm i'm limited to the dimensions of this case, which is already pretty small. i did the 3d design work to see how it would all fit together, and this is working well. i'm using short switches which will allow enough space for the ribbon cable and the core32. although you see the big capacitor in the transparent image, that will be gone (as well as the 7805) in the final version. it's not needed for usb power, and if i add a power connector that automatically disconnects the usb power (which i probably will), it'll have to be 5v regulated anyway because the power connectors are 3 pin (they share a ground). you are right, it's core32 only. a couple reasons: i'm not using midi in the traditional way. one command is comprised of at least 3 midi messages. doing it this way wasn't so necessary with this box, but the flexibility is for future boxes (i.e. delivering track or parameter names to a midibox). i'm concerned about the bandwidth, and i think the core32's usb midi is 16kbps. so any bandwidth issues are solved. also, the core32 gives multiple interfaces in a single usb port. one is dedicated to ableton live communication. another can be used for general midi. and another can be used as a midi to usb interface for the physical midi ports. also i'm considering making a java application that allows customization (mostly for the future boxes) and a dedicated midi port can go to that as well. thanks for the input and keep it coming! ultra -
i'm looking to get feedback on my design for an ableton live clip control device. especially from anybody who might be interested in pcbs or a kit. i've designed the entire project with easy to get and inexpensive parts, so if anybody's interested i may do a run of pcbs. as some if you know, i've been working on this for quite a while. i started out with the software, making a way for midibox and ableton live (via liveAPI) to communicate with detailed information. then i designed pcbs for it, and have a working prototype. now i've changed the design to be much smaller than the original PT-10 case. i took a CATIA class this semester and did the design in 3d so i could see how it all fits together (the case is only 1.3" high). the box is comprised of only two pcbs. a core32, and the control surface. it's usb powered (although i might add a power connector that automatically switches off usb power) so there are only two wires necessary: the ribbon cable from the core32 to the control surface, and a usb cable. simplicity and minimalism is best. :) my own needs have been met with the design, but i'm looking for feedback from anyone else who might want to buy a pcb and build it. maybe i've left out some kinds of control that others could use. keep in mind that other boxes are planned for other things, and this design is pretty much only related to clips. the interface: the interface has 64 tactile buttons and and 59 3 color leds (green, red, orange) done mb6582 style. the main section has buttons that trigger a 5 (scene) x 8 (track) grid of clips. the leds above each button give feedback based on what's going on in live. red if a clip exists but is not playing, green if a clip is playing, flashing green if a clip is about to be triggered, and orange if a clip is playing or looping (these might change). the 5 buttons (vertical) to the right launch scenes. the 8 buttons across the bottom stop the playing clip on the track, and the bottom-right button stops all clips. the left side has play/stop controls, record mode toggle, overdub toggle, and each has led feedback to show the state. the bottom left are the bank buttons. the script puts the famous red box around the clips on live's interface, and the bank buttons will move the red box accordingly, and of course the led indicators on the clip grid will change as well. prev is a preview button. if you "get lost" on the button grid, holding preview and pressing a clip button will put the red box around only that clip so you can see which clip you would be triggering with that button. using preview with the stop button will highlight that track, and a scene button will only highlight that scene. sel is a select button. holding select and pressing a clip button will activate that clip and make live show clip detail at the bottom. using select with a stop button will activate the track and show device view. select and scene will activate that scene, and while holding select, a scene button will toggle between clip detail and track view (i haven't yet finalized how this function will work, but it's an idea). the alt button will allow many other parameters to be changed at once. the first row of clip leds will now show which tracks are muted, and allow you to toggle mute for them. second row is for solo. the third and fourth row will allow you to nudge the clip forward and backward. the stop buttons at the bottom will let you toggle arm for the track, and the leds will indicate which are armed for recording. the scene buttons will change the entire mode of the box for future applications. finally, holding the loop button will change the clip leds to show you which clips are set to loop, and let you toggle loop for that clip. the case: the following pictures show various views of the casing. the case is aluminum and is sold in a 4 colors, as well as bare aluminum so you can paint it yourself. i will have FPE do the cutting. i haven't yet figured out what to do for the text graphics. getting FPE to etch it is easiest, but i'd like some graphical design on it with screenprinting or lasertrans. i'm certainly open to suggestions on this. the overall size of the case is quite small: 7.38" x 4.70" x 1.30" (188mm x 119.5mm x 33mm). i'm estimating that the cost to build will be around $150 - 200. i realize that something like a novation launchpad can be bought for the same price, but money is not a reason to DIY. this will be part of a larger system, and i think that the way it's used will expand with other midiboxes. so if anybody is interested in having one of these, this is your chance to help finalize the design. the button count will stay at 64 or less, because it's just a lot easier to use one blm scalar matrix. however, the functionality of the buttons at the left can be changed pretty easily. and almost anything you can imagine is possible with liveapi. pr0n: