
Jidis
-
Posts
838 -
Joined
-
Last visited
Content Type
Profiles
Forums
Blogs
Gallery
Posts posted by Jidis
-
-
program_insect,
I hate to sound like a broken record (or laser printer salesman), but I've been very lucky with the toner transfer process on various materials. There should already be a few threads here on it. I've got an eighth inch piece of aluminum beside me with a print on it that looks almost exactly like what was on the computer, and it was only about a second attempt. You can wipe the stuff off with solvent and do it again if it doesn't work, plus the material cost is minimal. Both a Sharp FO-2850 multi-fax-laser and an HP LaserJet 6L have worked well here, and if you only need it for PCB's and panels, you can go with a model from a couple years back for real cheap. Some of the toner carts also last a ridiculous length of time too (I've heard of 20,000 sheets), and someone on the Homebrew PCB Yahoo group recommended the no-name eBay stuff over the original toner (lower melting points). They've also recently recommended a new Reynolds "Release" aluminum foil as the carrier. I bought some, but haven't had a chance to try it. I've been fine with Staples and JetPrint photo paper. There's also several types of toner reactive foils that you can iron over the stuff afterward to get weird colors. It's all cheap and convenient enough that it's at least worth a shot, plus the tools and materials are good for lots of "regular people" stuff if you can't get the transfers going. I think with adjustments to the amount of heat/time and maybe some pre-coating, a pretty wide variety of substrates might take the transfers. - My future goals are Plexiglass (Lexan) and fiberglass (most likely painted FG). I've already seen it go on plastic laminate (for countertops), so there's a wide range of possibilities there.
If you should end up trying it, one trick I learned on non-PCB stuff was to get a light coating of spray acrylic on the surface before the toner ironing. I used Krylon brand on aluminum and for some topside component labels on a PCB. There are probably other sprays that would do, but I'm not sure what. I tried lacquer first and I think it's a "no no".
I think the alignment issue would actually be better with the toner way. I can use the same picture and same hole markings for a front panel template as for the board, so they have no choice but to end up with the same spacing. Depending on what app you use, you can delete or mask elements that you don't want in the hole template. I haven't done any big stuff that way yet, but will be soon. I'm debating over whether to do my template transfer and cut my holes first, or to do the whole label first (with crosshairs and markings for the holes). The two factors are- Will the panel with gaps and holes already in it be any more difficult to transfer labels to, and if I do it all first, will I be able to keep from ruining all my hard work by gouging into something during the hole cutting stage?
??????
It takes some practice and getting used to, but it's fun and rewarding if you experiment for a little while.
                               Good Luck!
George Â
-
I hope that's an accurate description, but they might be carved out of toothpicks.
Well, maybe not quite toothpicks...... ???
They actually already got here yesterday. The verdict is still out on the quality, but at 26 cents for something that usually costs me 6 dollars, I probably shouldn't have gotten my hopes up. ;D
They don't appear to be as sharp as the Dremels I'm accustomed to, but I can't really get a good look at the ball end without a microscope or something. They also weren't very well sorted. There appears to be a bunch of different ones mixed in with this first bag I've opened, with the average checking in at closer to 1mm. Throwing three other random ones in the chuck to double check the cut quality and drilling way too fast, I've now snapped the balls off two! (I guess that's why you have to buy 100)
Doesn't look like anybody needed any here, but just in case, I thought I'd mention that I may be deciding that they suck. I'll probably email and tell them what's happening, as they do have a heck of a lot of positives and a money back guarantee, so they may end up headed back if things don't shape up.
I could be back where I was in the mini-bit market if anyone knows some good deals. The Dremel burrs, although a bit too large, were serving me quite well, and were a big improvement over the quick dulling and breaking of the regular steels.
A quantity of really small (1mm) regular drill bits might also suffice. I used to be able to get a glass tube of about 5 such bits by Dremel (even had a PCB in the pictures), but they've stopped selling it here.Â
-George  Â
-
I don't think it's got anything like that at the moment.
If the octave up/down command you're talking about is like a transpose message or something, I'd guess you mean throwing one at the receiving device or sequencer??? I've never had to do anything like that in real time, but I would suspect that having MIOS add 12 or whatever to the note bytes would come out faster.
I think we need to get somebody in here that knows what *we're* talking about. ;D
-George
-
I'm no expert, but it seems like if all the pinouts and power requirements were the same, maybe you could specify that chip to MPASM and try to compile to see if it complains. ??? (unless there are other speeds or specs. involved here)
-Good Luck
-
The other option is to buy individual cherry keys
I definitely wouldn't pay for new ones, but I do also have a small rework (desoldering) station here. ;D On the plus side, the two types I've scavenged only had two pins each, so they might be OK even with a pump. I think the beige Mac keys are a sure thing for non-matrix (maybe Cherry's), and they're all considered old thrift store junk now. If you need a jpg of the type that came out here, let me know.
Then again, MIOS sounds very attractive also. I would love to have some sort of key that pushes up or down an octave when held down. Sort of like a shift key but for octave's when playing the keyboard.This has come up occasionally in various forms. I've wanted a simple one to switch all of a board's buttons between solo/mute/select (to remap to an optional set of output messages while in "shift",etc. mode), either with a global momentary switch, setting a "mode" variable somewhere and activating a corresponding LED with the output message map table somehow tied to the variable state, or even a toggle with the input pin being polled before the output message was determined.
There's another similar idea here-
             http://www.midibox.org/forum/index.php?topic=1898.0
Unless I'm overlooking something, none of it sounds unrealistic, even to me. There were much more confusing things I'd considered tinkering with since I got into this MB stuff. I'm surprised someone here hasn't already got it going.(?) I'm trying to re-balance my PIC/MIOS energy with all the electronics, soldering and etching junk. I'm building a new test board that's laid out like my board design (which uses shifts). If I can knock that out soon, I'll get back to the assembler mess and try to tackle that button thing. I figure if I can get anywhere near it, maybe TK or someone here can pull me through the tail end. Â
BTW- I flipped through that keyboard service manual for a minute last night. Aside from some aftertouch button or something, it's all about what was figured with the pair of switches per key. Also found an Octapad SM with it (piezos for each pad/ 2 for the plastic frame below them).
                            -Take Care
George
PS- It just occurred to me that I was thinking of all that output message code as if it were all in one or two places. I've got a nasty feeling that some of the "post-compile" patch edits, bank data, etc. would need to know about some part of the "alternate message" thing. ???Â
-
I've got many too many myself. ???
I'm looking at getting some of the "mini" ones, if anyone runs into a bunch for cheap. I think mine are around the height of your 15mm ones, just duals. I'm also in need of "lens" material if anyone's got some (like the red or green tinted plastic in a clock radio). Friends introduced me to a guy named "Neon Charlie" recently who works with it and is going to leave me some, but I don't want to bug him.
                                 -George
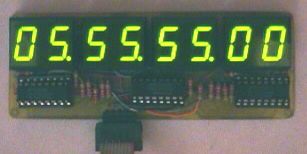
PS- I think I may have become obsessed with trying to see how small a space I can smush TK's time display into. Legend has it there's a unit out there that's only about .3" tall. ::) ::)Â I've got a seven digit seven segment here from an old car phone, but I think I remember it using some weird matrix setup or shared pin that I was too dumb to figure out how to work with. :'(
                         Â
 <---- The bulk of mine are actually red ones
 -
when the 3003 gets here I'll know if it's significantly different than the freebie scrap piece I've been using
Believe it or not, it showed up this afternoon and looks about the same. May even have a slicker finish than what I had, but I'll probably be sanding anyway.
-Wish all the eBay'ers were that fast. :)
I promised someone I'd check some toner transfers with a new Reynolds Wrap, so it may take me a couple days to try to put anything on this aluminum, but I'm guessing (hoping) that it won't be any different than the last.
-George
-
SounDuke,
Sorry for the stupid suggestion, but I'm guessing you did check the individual segments for the LED you're using beforehand didn't you? I've got duals here in green and red and the pinouts are totally f**d-up between the two.
-George
-
Ysv,
I just re-read your question on the MIDI keyboard guts. I've got a full-sized Roland controller here (MKB-200 maybe) and I've had to open it to clean a dirty key years ago. I've got the service manual too. From what I remember, it was simpler than you'd expect. I think each key had one or two of those regular matrix style contacts under a long multi-key rubber membrane. I think there may have been more than one per key (top and bottom). I'm not sure, but it could have measured time differences between two switch closures to get the velocity (I think I've seen that somewhere), or it might just have the global piezo thing. I got a really good deal on it used, and it was a pretty nice controller for a "non-keyboard player", so I guess whatever method they used was an acceptable common one.
For what you're planning, you'd have the benefit of being able to use the much nicer, more reliable, single PCB mounted switches, if Thorsten or someone here can shed some light on the pressure/velocity issue.
Sorry my memory isn't all that great on the keyboard guts. I'll try to remember to check the service manual tonight, but I wouldn't dare to open it again. The one thing I definitely DO remember is that it was one of those "jack-in-the-box"/"snake in the nut can" type things where all the parts jump out in your face when you open it, and you can't figure out where they all came from. >:(Â
                                           -George
Note----> Just saw Kokoon's post on the time difference thing. Now I'm pretty sure that's what it uses.
-
Does anyone have an idea how I can make this thing velocity sensitive?
FWIW- I ripped open an SR-16 drum machine a while back and noticed that it really only uses 2 or 3 "global" velocity zones and all the buttons are just a cheap matrix of contacts on the PCB. I guess the piezos on the board are giving off the recent pressure on the whole thing and tacking it on to whatever note message just occurred, so maybe if you whacked the plastic case while you lightly hit one of the keys it would give off a full velocity or something. :o
It does seem to work pretty well regardless of how they're doing it. There could be some type of "crosstalk"/false-trigger detection happening between the piezo group. I know my Roland PAD-80 (Octapad) has individual piezos under each pad, but then a few additional chassis piezos assumed to be for something like that.
That does look like a really unique idea, and practical for many. Definitely different and possibly better than the miniature single-octave key sections you see on some of the portable sequencers and drum machines. I'm actually a drummer, so not having the sharps and flats in their usual "in-between keys" locations wouldn't bother me at all. It may even make it easier to find the correct notes. A controller with a vertically linked or duplicate harmonic relationship from row to row would also help in that regard.
Good luck! (and don't let Behringer see it ;D )
                                         -George
PS- I'm finding more and more actual "individual" momentary switches in computer keyboards, etc. than I used to suspect were out there. It's the PC/PS2 stuff that never seems to have them. I've got a dissected electric typewriter here with fine looking black Cherry switches, and it appears that most of the older beige ADB Mac keyboards have them (the Classics up thru Quadra's and Beige G3's).
- I knew I had that big pile of old Mac crap in the basement for something. ;)Â Â
-
Hey guys-
I went ahead and bid on this giant bag of some diamond dental burrs, figuring some of you could get a good deal on the surplus.
I saw them recommended for PCB work a long time ago and had been using a Dremel brand version for a long time, until I drilled something too hard and dulled it or something. I bought a second one a couple weeks back and busted the ball off after five minutes with some careless side-to-side pressure. :'(
The Dremels were a tad too big anyway (2.5x the size of these) and were running me 5 or 6 dollars a bit.
I'll probably keep 25 of these, as I don't know if they last as long as what I've used. If they do, I'll have way too many. :D
You can get them for an exact percentage of what I paid ($26 USD). I don't have any idea how "parts sale" offers usually go in the MIDIBox world, and I don't want to risk leaving anybody out that needs them, so I'm guessing selling them in quantities of ten or twenty would be fair (suggestions??). That will only run $2.60/10 or $5.20/20. I suspect this guy is sending them in a regular postal envelope, as he didn't charge shipping. I've gotten a lot of help in here, so if I can mail them out with stamps like that, I'll gladly pay the US postage, and maybe the overseas if it's not drastically higher. PayPal would probably be the simplest for the bit cost.
                                             -Happy Holidays!
George
PS- Be warned --> These are suspiciously inexpensive. They are said to be top quality, just bulk with no brand name, and he's got 643 feedback hits, all positive. I hope that's an accurate description, but they might be carved out of toothpicks. ;) Â
-
No problem. :)
I'm going to push myself to try to count up my better surplus parts ASAP, so I can see what I can safely part with. There are some much nicer fully capped pushbuttons in there, and it sort of sucks to have them collect dust while someone here might be shopping for the same type.
BTW- Which style were you actually looking for? I've thought about trying those wonderful black ones I like, or the dirt cheap style you see behind panel switches on modern consumer A/V equipment, along with a method of making a rubber (or rubber coated) button membrane to cover them, like in a cheap handheld remote.
If there are already good tips/pictures here or elsewhere, by someone who managed to pull that off, please let me know. It seems like I've already seen it in someone's step-by-step construction pictures.
                                    -Take Care
George   Â
-
John,
Thanks! That's a good chart to have on hand. I think the 5052 is the more expensive one that I ran across while shopping. Hopefully, when the 3003 gets here I'll know if it's significantly different than the freebie scrap piece I've been using. I don't know what this stuff is, but I like it a lot. If the eBay sheet is a different grade and doesn't work as well, I'll ask my friend for another piece of this.
Strength probably won't be an issue, but your link does mention that the 5052 is known to take finishes well. ???
-George
PS (Subatomic)- Those pans here have endured some heat, so that may have something to do with the twists and flexibility I mentioned. I can't remember what they felt like new. The eighth inch stuff feels ideal for a panel. I'm not sure how much thinner you could go, unless it was a laminated panel or would be supported or reinforced in places. It was also a fairly common thickness when I was shopping. Looks like that comes out around 3mm. I too wondered how thin I could go when I was looking into panel material and dug up a cool looking 1970's GLi DJ mixer I had. It uses that same thickness of raw colored aluminum for the face, and has a thinner steel body for the other five sides (like a shoe box). The face protrudes beyond the left and right sides of the body by a couple inches on either, has the rackscrew holes milled into it, and has no additional reinforcement there. I think it may have a standoff support brace or two between the panel and the back, around the mid section, but I can't remember. Looks like it's at least five rack spaces and was built to withstand PA/club duty, so I'd guess that thickness would be a safe choice. I believe it's also the thickness of the anodized blank rack filler panels at the studio, and they have absolutely no reinforcement. Â
-
FWIW-
I was recently impressed by finding that Nuendo has similar capabilities, even with my "non-LC" MB64 intentions. It will spit out the current channel and plug settings and parameters via MIDI as you move around within the software, even when using a non-proprietary generic connection.
These are the sort of fantasy systems Digidesign promo literature bragged about when I bought my "first generation" ProTools rig (yes, I'm old as Dick's hat band). Looks like the day has finally come and it made it to me via TK, open source, and no help from Digi. ;D
-George
-
Hey again,
I just went ahead and grabbed a piece of 13.25"x48" for $28.80 with shipping from this guy to keep me from wasting too much time shopping-
He looks to have a bunch. I figure I can slice off a 19&1/8" side of it for several spaces worth of rack crap and have about 2'x2' left for all else. Should hold me a while.
There's also some 24"x24" for $39 total here, which might be about the same cost as the mcmaster 12"x24" depending on how much you need-
It just started snowing here. Maybe someone will hit a good stop sign or something. ;) (-I wouldn't actually hope for that)
                -George
PS- I really don't know what those "composition numbers" mean to us, but I guess they have a lot to do with the cost. Mine is supposed to be that 3003 type.
-
Moebius,
Are they anything more than just the "batch" of source files that went with the project? I usually just open the main.asm and/or any other source files I'm interested in and compile via MPASM. I've imported the full list of source files in MPLAB before, but usually don't work with "projects". It would seem like if he opened an alien mcp and it worked just the same, there wouldn't be much point for our purposes, but I barely know the full MPLAB IDE.
I've wanted a way to see and trace the connections between Thorsten's files and get a better idea of the program flow, but figured it wasn't possible when there was supposed to be hardware, interrupt, and user interaction involved.
Maybe that's it. ???
               Thanks!
-George
-
www.mcmaster.com
1/8" 12x24 3003 aluminum $27. Plus shipping of course.
I checked www.mscdirect.com and they are a few dollar more.
Thanks! That does sound like a good affordable price. I thought the eBay sheets I had seen were around that width, but quite long (like maybe 4'). I'll probably go back and check before I need some.
-Take Care
-
Subatomic
Yeah, that would be cool if it's the same stuff. My mother's got a couple that look like the ones on those links. They almost seem like more than one layer though, and are more "wiggly" than the raw panel I have here. They may not be as thick.
I hadn't considered the dent factor on the built up panels with flashing, but it would seem that it would have a lot to do with the substrate, if the metal is the same stuff we like. Good tempered hardboard (Masonite), like the rich chocolate brown color is hard as a rock, as would be certain composite materials and other cheap metal sheets if they backed the aluminum. It would be cool to be able to flex into inside curves to make a traditional, angled, multi-panel type console, like Axel's giant LC board in the gallery, or to wrap around larger outside curves on front edges, like a rolled, postformed countertop. If your chassis included a hard substrate for the control areas, you might be able to turn small corners with no backing without too much "dent risk". I've also gone with rounded (routed) wood, or readily available quarter round moldings to support and aid wrapped edges on plastic laminate. Another cool thing might be using a metal laminate over something that looked good and allowing cutouts or holes around control areas, where the underlying material (or light) could show through, or an inverse with the aluminum around those inset areas showing through cutouts in a contrasting top sheet.
Just a thought. None of that is probably what either of us are trying to design right now :-\, I'm just so into this material that I may try some experimenting if time permits. I've got two fairly new rolls of that mill finish stuff (12" and 24") which I used to shield some cabinets here.
Not to encourage any type of vandalism, but a friend here also mentioned that highway and street signs are likely that same thickness and material that we're seeking. ;D
                                -George  Â
-
Drin,
My sincere apologies. I was sick most of the week and have been trying to catch up online over the past day (I just saw this).
I went up and looked at what I have. It may have been a bit of an exaggeration. I have a bunch for one guy, but I'm not sure it's enough to not just get them from the same places I did on eBay. They're always so darn cheap, even regular mail postage is probably 2 or 3 times the cost of a hundred or so (these aren't fancy ones).
It appears that two of the three types I have came from the same guy. His name was David and his eBay ID is dakro69. He's good to do business with. He seems to have tons of the items he sells and usually still has whatever you've seen him sell in the past.
The switch I like is this-
                           http://tinyurl.com/9vjga
It has a cool, solid "click" feel and the actuator is hard glossy black plastic, which is large enough to be used as a button and could even protrude through a round panel hole with no caps. It does however, have a small hole in the center. I wonder if a colored "MasterMind" peg or some kind of tack would fit that hole in the top.
The other one I got from him is this-
                           http://tinyurl.com/ddzoh
(no, I didn't buy 10,000 of them :-X )
Those look like the inspiration for that ridiculous JL Cooper mini-desk 32 thing. I didn't notice how small the shaft would be, as it looks just like one of the standard square ones. It's actually like 2.4mm/.1" or something, with a really small circular indentation on the top. Looks like I've got 100 or something.
The last is from fisher-88 on eBay-
                          http://tinyurl.com/alrqy
It looks like only 30 or 40 of them. They're weird- 12mm four-pinned body, with a 7mm tall/3.9mm round actuator with a hole in the center with about a 1x1mm "rib" running down opposite sides of it. (like an "o" with a "-" stuck through it)
If anyone should know what cap fits on either of those last two, I'd be interested.
And Drin- I like the 1st ones, so I'm not sure how many I could let go, unless I find a bunch of other dakro69 stuff and can order some more. I bought a couple packs (4 tubes of 10 per pack for $3), and I've already eaten almost half on "test boards". Look through the rest of his stuff if you go. He'll combine shipping as well. BTW- I just noticed the "good" switch that I got has a different color button than the one up now (new one's gray, mines here- http://tinyurl.com/dm3rk ).
I think some of the pots, knobs, keyswitches and number displays are what might actually be worth splitting up and selling here, but I'm such a pack rat, I've convinced myself that I've got projects for all of them, so I'm afraid to let certain ones go. I'll be sure to post here when I figure out what to get rid of. It was all from really good deals, so a percentage of that should be well worth it to someone.Â
                              -Take Care
George
-
I'm coincidentally looking for a chunk too right now :)
Someone sent me to:
I mainly went to see how much it ran. Unless I looked at the wrong type, it was a bit high, like $60 would get you 1 or 2 feet by 2 or 3 feet or something (around the size I'm seeking). Ebay, surprisingly, had decent prices. There's a sheet metal section and a sub-category for aluminum. It looked like 30-50 dollars will get you something a bit larger on there, even with the U.S. shipping.
Eighth inch is great panel thickness for that, and relatively easy to work. That's what I've been using here. A friend here has a bunch of 1'x2' pieces and gave me one. He's offered me another, but I felt guilty :'(Â I'll probably go with eBay.
                              -Take Care
George
PS- I was also wondering about making multi-ply panels with aluminum faces. I wonder if you could do a sandwich of thin aluminum with a thicker, cheap core, like tempered hardboard or thin plexiglass. The stuff builders use for flashing is cheap as crap, and looks the same as the thick stuff. I've bonded it to plywood before, using a "J" roller and contact cement, just like with plastic countertop laminates, and it hasn't budged since. If you had it screwed in or supported from underneath, you wouldn't even need to cover the back to keep it from warping. I think you can get a nice long roll of that for 10 or 20 bucks.
PSPS- As nice as it is to cut, the nibbler most likely won't handle eighth inch.
PSPSPS- Was just thinking, that flashing stuff would also have the ability to be bent or curved around a frame or chassis. I used to sell it in lots of colors too. Beige, brown, white, black and plain mill finish are common.
-
It's probably been brought up already, but it would be cool to have the ability to use one or more numeric value indicators, sort of the way the LED rings are being used now. An ideal setup would be with a user defined "range" for the standard 0-127 value. Like to sweep an EQ knob and see your Hz/kHz value across a few digits or have an X.X dB numeric display for levels (still wondering what those digits on Francois' nice-a** console do...).
I had originally wondered about getting the user defined value range happening on the LCD, as it would make more sense than the standard range, but it would be even nicer to have a separate readout closer to where the actual control was.
-George Â
-
Thanks! (and SMIDIRIN, thanks for the luminance reply too)
There was a metal cover holding the main glass lens on the buzzing LCD. It didn't look that hard to take off. It's just got those flat metal tabs that they push through slots on a PCB or something and twist them a bit on the other side. I may look into the foil replacement, but I don't know how much time this unit is worth. It's only a minor annoyance. The EQ itself is built like a tank (or a 16bit version of a tank). I've got an old Mix magazine where they reviewed it and it was a few grand or something way back then and may have even been used in some mastering, so it probably didn't have the buzz when it was new. I never got enough use out of it to notice when the noise showed up.
                             -Take Care
George
-
Yeah, there are two big solder globs on the edge of the board for it. They just trace over to two of the 21 pin row (hardwired to one of the main boards).
Can you manually light any of these things from the side or with a replacement light? Pinouts are about the only thing I've ever had to learn about LCD's.
-George
-
And fifty years later......
Just realized I hadn't looked at that "how to connect 32 buttons" PDF in ages. I kept referring to the dinx4 schematic when I was building.
It may be worth a note somewhere (unless I overlooked it) for others who might do their layout from the dinx4 schematic or use an odd number of buttons/registers. The orientation of the inputs in the diagram, as well as the J3-J10 and resistor numbering sequence might give them the wrong idea.
They're actually all going 11,12,13,14,3,4,5,6 (I did get it right THAT time didn't I? ;) )
Tip Grinding (again)
in Tips & Tricks
Posted
Hey,
I was told in a thread a little while back that the copper tips were the grindable ones. I've been doing that a while, and have been spinning them in a drill press to shine them back up with xfine sandpaper. I still get that charcoal gray look after they're heated up and haven't seen one get to where I can "flood" the tip with hot solder and spread it around the tip. It usually beads off. They're not the worst, but they're not like the shiny, evenly solder coated tip, where everything always flows exactly where it's supposed to. Solder rolls around on the ends sometimes too (instead of jumping to the target joint).
Is that not good enough, and is there a step I'm missing or something? I usually get them as smooth and shiny gold as I can and then attach them, flux them and let them heat, at which point, I'll try to apply some solder to them. They're usually a dull black a couple minutes after they heat up.
                              -George ???Â