rosch Posted January 8, 2009 Report Share Posted January 8, 2009 hi! i'm planning to build now my MBSID V2. i already have those 10 SIDs from WILBA and an original PSU from a C64 with a 8580 inside,so it should be the right PSU for my chips. but there are some questions i'm wondering about:-is it possible -without reprogramming any software for i can't (at least now)- to gain ctrl over all MBSID V2's parameters from its frontpanel?(i think of 1 enc for 1 parameter) for i don't care about saving rack space it could be 4 or 5HE high, that wouldn't be a problem. but i assumeone would have to implement the new displays with software which would move this idea to somewhere in the future. but i think it would bevery nice to adjust every parameter as you like and then save the setting to a bankstick but without scrolling through menues.-i plan to build it the WILBA way, with 8x 8580s in the same configuration. i'd just make me some other panel. would it be better to useWILBA's PCB design (not ctrl surface of course) on which all chips find place on one PCB or should i do it all modular (which way I would prefer,but i don't know if it's really the better one)-and i'd like to get as much bankstick memory as possible mounted internally. and of course i very much like the idea of having CV outputs todrive filters etc (which PCB-bulk orders i seem to have missed this time...)so, i don't know more to ask for now but i'm sure as soon as having posted it the next wave of questions will appear...thanks, roger Quote Link to comment Share on other sites More sharing options...
chimchim Posted January 8, 2009 Report Share Posted January 8, 2009 4 cores and 8 sid modules is a lot of wiring, personally i would rather solder one PCB. Quote Link to comment Share on other sites More sharing options...
nILS Posted January 9, 2009 Report Share Posted January 9, 2009 -is it possible -without reprogramming any software for i can't (at least now)- to gain ctrl over all MBSID V2's parameters from its frontpanel?Of course. Even the Step A CS does that.(i think of 1 enc for 1 parameter)Um, this is not gonna happen. There's a LOT of parameters. Quote Link to comment Share on other sites More sharing options...
rosch Posted January 12, 2009 Author Report Share Posted January 12, 2009 ok i'd prefer keeping it as modular as possible so i think i'll buy core & sid modules from mikes shop. but WILBAs MBSID6582 in my opinion really is the best SID SYNTH design ive ever seen and probably i'll try to build one some day. but for now i'm a beginner and i think it's better to start in small steps.as far as i understand i can also add analog filters to it so a rackmount case would be best for my needs.do i understand that right? to have additional control over more parameters i could e.g build a midibox64 and do it in realtime via sysex by routing a few encoders / knobs to desired functions of the MBSID V2 ?and please could someone give me a hint about a good book / software in german which i could buy to learn C right from the beginning. i just did basic as a child and some pascal at school but its not worth talking about...thank you for your opinions so far!roger Quote Link to comment Share on other sites More sharing options...
Wilba Posted January 13, 2009 Report Share Posted January 13, 2009 If you ultimately want 8 SIDs, it is actually easier and less chance of error to use the MB-6582 base PCB, since all the wiring between modules are done on the PCB, you do not need to make PSU and bankstick boards (i.e. convert schematic to veroboard), and there are a lot of other people who have build this PCB to help solve any problems. In contrast, if you do it with modules, there is more chance of making a mistake somewhere and much harder for people to help you fix it.I'm not trying to say that the MB-6582 PCB is the only way to build MB-SID, it's just one way, but I disagree with newbies thinking it's too hard and that modules are easier. The size and complexity of the board doesn't make it any harder to solder, it just takes more time to solder than one Core and one SID module. You can solder it in stages also... get the PSU section working first, then get one Core working with LCD, then get one SID module working. When you have gained experience with that, you can finish the other Core and SID modules, so even easier than using separate module PCBs, since there was no wiring and no PSU board to make.As for rack mount - other people have adapted the common switch/LED matrix of the MB-6582 control surface to their own control surface design. Once you have designed a control surface, you can build this on veroboard. Switches and LEDs do not have to be in the same positions in the matrix as the MB-6582 control surface - you can move things around to make wiring easier, and then change the firmware to match. Quote Link to comment Share on other sites More sharing options...
Smithy Posted January 13, 2009 Report Share Posted January 13, 2009 Um, this is not gonna happen. There's a LOT of parameters.Does anyone know off hand what the limit is to the amount of encoders and switches you can have with a MIDIbox Sid?For the seperate modules, not the MB-6582 pcb. Quote Link to comment Share on other sites More sharing options...
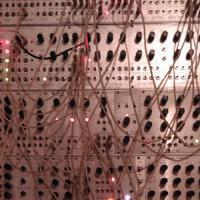
nILS Posted January 13, 2009 Report Share Posted January 13, 2009 Without any added magic you can have digital 128 inputs. You need 2 per encoder, one per button. You also get 128 digital outputs for LEDs.The total number you'd need for all controls is approx.:Encoders: 210Buttons: 580LEDs: 800Which means roughly 1000 inputs and 800 outputs.Um, this is not gonna happen. There's a LOT of parameters. Quote Link to comment Share on other sites More sharing options...
Futureman Posted January 13, 2009 Report Share Posted January 13, 2009 I'll see your 210 encoders & raise you another 50... Quote Link to comment Share on other sites More sharing options...
Smithy Posted January 13, 2009 Report Share Posted January 13, 2009 Without any added magic you can have digital 128 inputs. You need 2 per encoder, one per button. You also get 128 digital outputs for LEDs.The total number you'd need for all controls is approx.:Encoders: 210Buttons: 580LEDs: 800Which means roughly 1000 inputs and 800 outputs.*kisses* Quote Link to comment Share on other sites More sharing options...
nILS Posted January 14, 2009 Report Share Posted January 14, 2009 [me=nILS Podewski]hides under desk[/me] Quote Link to comment Share on other sites More sharing options...
Goblinz Posted January 14, 2009 Report Share Posted January 14, 2009 [me=nILS Podewski]hides under desk[/me]Aaaww, look at you being all coy. Going for the "hard to get" approach. Quote Link to comment Share on other sites More sharing options...
stryd_one Posted January 14, 2009 Report Share Posted January 14, 2009 Coy? What exactly do you think he's doing under smithy's desk? Quote Link to comment Share on other sites More sharing options...
rosch Posted January 15, 2009 Author Report Share Posted January 15, 2009 If you ultimately want 8 SIDs, it is actually easier and less chance of error to use the MB-6582 base PCB, since all the wiring between modules are done on the PCB, you do not need to make PSU and bankstick boards (i.e. convert schematic to veroboard), and there are a lot of other people who have build this PCB to help solve any problems. In contrast, if you do it with modules, there is more chance of making a mistake somewhere and much harder for people to help you fix it.according to the demo videos i just have to build the 8 sid version. i already have the sids from megasale#5.so i would just have to order from SmashTV everything but the control surface pcb which i'll have to design for my own 19" needs on veroboard.i have 1 question about the lcd: on your wiki page the 6582 is shown with a 4x20 lcd but on toneburst's pictures i saw he uses a 2x20 lcd. so can i still do it with 4x20 or will i have to change some programming then? furthermore i hope there's no reason not to position the pots from the backside of the 6582 to the front panel of the rackmount. i think i'd like everything but power and midi connectors accessible on the front.and then change the firmware to match.i hope that doesn't require being a C programmer, which i'm not...i'm also wondering whether i should use the original 6582 frontpanel (in case Doug Wellington's sale's not closed yet) so i could easily use the control surface pcb too. on the one hand i would still have to add the plugs and knobs from the backside to the front but on the other the whole case would become quite flat. and there'd be some room for possibilities in the future, e.g. perhaps an analog filter or similar...thanks for your help! Quote Link to comment Share on other sites More sharing options...
Wilba Posted January 16, 2009 Report Share Posted January 16, 2009 i have 1 question about the lcd: on your wiki page the 6582 is shown with a 4x20 lcd but on toneburst's pictures i saw he uses a 2x20 lcd. so can i still do it with 4x20 or will i have to change some programming then? I think toneburst is only using a 2x20 for testing. You can use any size LCD for MB-SID that is 2x20 or bigger (4x20, 2x40). You only need to change some settings in the .asm file and recompile (not really "programming").furthermore i hope there's no reason not to position the pots from the backside of the 6582 to the front panel of the rackmount. i think i'd like everything but power and midi connectors accessible on the front.Those pots can go anywhere - Each pot has six wires that connect to headers above the SIDs.i hope that doesn't require being a C programmer, which i'm not...There is no actual programming involved. If you're able to edit a forum post and quote me multiple times, you have enough skill to edit the .asm file to reconfigure the firmware to your specific needs. :) Quote Link to comment Share on other sites More sharing options...
toneburst Posted January 16, 2009 Report Share Posted January 16, 2009 ...on toneburst's pictures i saw he uses a 2x20 lcdAs Wilba said, the 20x2 is just for testing. I happened to have one lying around already wired, and was having trouble stripping the ends of the ribbon cable for my new 20x4 (I kept cack-handedly cutting through the entire cable, rather than just the insulation, so it was getting shorter and shorter!), so I plugged in the old one just to see if my Cores and SIDs were working OK.a|x Quote Link to comment Share on other sites More sharing options...
Recommended Posts
Join the conversation
You can post now and register later. If you have an account, sign in now to post with your account.