m00dawg
-
Posts
1,404 -
Joined
-
Last visited
-
Days Won
16
Content Type
Profiles
Forums
Blogs
Gallery
Everything posted by m00dawg
-
Sure does! Thanks for the info! I know a few people I might be able to get an empty syringe from so this might be very doable for me as well. Hopefully I can get to this soon, but either way, I'll post an update once I'm past this point. Maybe there should be some sort of contest for who's method of putting on JB Weld is the best :)
-
I assume you put it into the syringe post mixed? How exactly did you get it in there?
-
Didn't you say your wife was a pastry chef? Yeah, I gotz no cookins skillz :) Doesn't look too bad, but is something I'll probably have to practice a bit first. The screwdriver didn't fair too bad, actually. I assume it's roughly similar to a flat toothpick or skewer that Wilba mentioned. First things first, though, and that's to wait. I still have 12 hours before I can take everything back apart. That means I won't be able to do the second round of welding today. Oh well. As Wilba suggests, the wait is worth it!
-
Those pics were really helpful, thanks! I ended up using something very close to your solution. I didn't have a flat toothpick, so I used a small screwdriver. I flipped it screw-side up,smeared JB Weld on the 4 screws, then flipped it over and made sure there was enough on the sides. Seemed to work well, although I guess I will know in 24 hours :) I dunno what people are using to mix the JB Weld, but I found the plastic packaging that it came in worked well.
-
Awesome! That's what I figured, but it's good to know I was on the right track. I still need to get some clamps but once I grab those up I should be ready to go! Thanks for the clarification, Wilba!
-
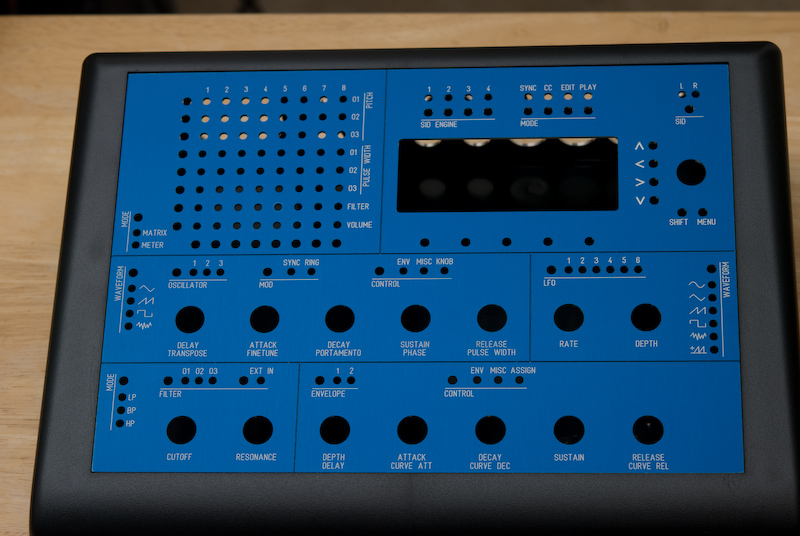
Thanks all! I really like it because of the interesting light/dark look. The actual colors are Blue for the panel and Gentian Blue for the dividing lines (these are Front Panel Express colors). Depending on how light hits the panel, though, either it or the lines can appear to be light/dark blue. So it's a pretty neat effect! As for the knobs, orange would look awesome! Admittedly I haven't put a whole lot of thought into the knobs yet. There's always the Waldorf's but I'm going to look around and see what else I can find first. Just in case I find any gems online. Nice thing about knobs is that they are easy to replace. Speaking of the knobs, though, do I have to remove the detents or is that just preference? I got my knobs from Mouser and they seem soft (easy to turn) with the detents such that I don't really mind them being there unless they had some other purpose. Finally, for attaching the four screws to the panel, I'm guessing I clamp everything done, put down some JB where the screw will go, and then screw it up onto the panel? Looking at Wilba Flickr pictures off the Wiki ( ) that seems to be the case, but I didn't want to make any assumptions here :)
-
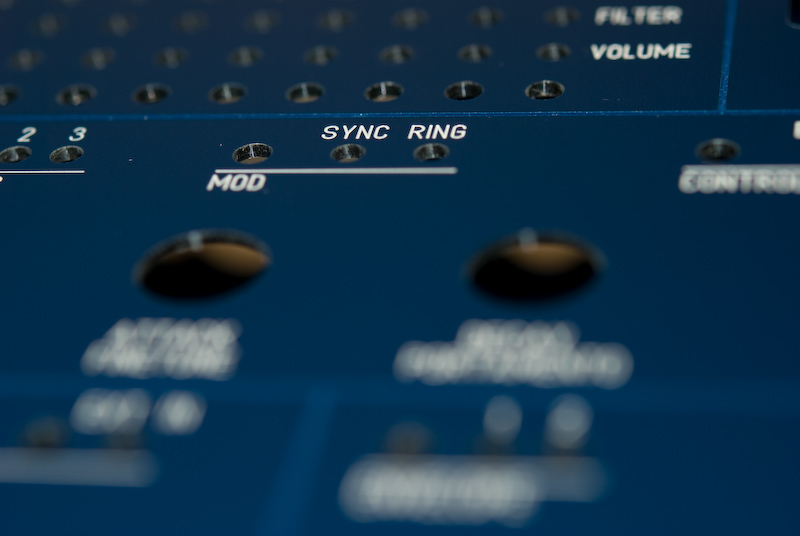
Pictures!
-
Yeah I've since grabbed one up. I think I got mine at Altex, but it might've been Frys...
-
I'll take a few over the weekend :) Dunno when I will get to start building the control surface itself. The mainboard is complete except for the headphone jacks, but hasn't yet been fully stuffed (still running into lower voltages on the +5V). If all goes well, I hope to at least do the JB Weld stuff.
-
BTW, the parts came in a few days ago. I got my extra SIDs from Wilba (thanks!), panels, and hardware from McMaster all in the same day. Panel looks awesome! I too got some gummy bears with it. I went with a dark-blue/light-blue combination and am going to use amber/yellow LEDs. Anyways, I haven't put anything together yet, but thought I'd point out that FPE, Wilba, and McMaster did an awesome job! Now the only thing I have left to buy is knobs and print a board for my power module (which is external to the PT10 case.
-
I thought so too, but it was very nice to be able to buy everything in one go. So much time and energy seems to be spent finding parts. I'm eager to be able to start building my control surface so for me the cost was worth it. *shrug*
-
Haha that's awesome! Pictures of that would be great! I haven't yet decided about whether or not I should use a fan. I'm using an external power-source so there will be no regulators inside to get hot. The SIDs tend to get warm, I know. I was going to heatsink them and also cut slits or holes on the bottom of the PT-10. I didn't want to do a fan initially due to concerns over audio noise. But we'll see :) I can always add one later I suppose. If I do, I'll definitely keep your advice in mind! With all the work going into this thing, I certainly don't want it to look "ghetto" because of the fan mounts :)
-
Dude thank you very much! These parts are awesome! And, correct me if I am wrong, but it looks like I can order the spaces from McMaster as well: http://www.mcmaster.com/#92080a415/=1sskgz Looks like the same things Mouser has. You weren't kidding, either. These puppies are back-ordered by a month at Mouser. Wilba, maybe you should add this to the wiki page?
-
fuzzy: Out of curiosity, where did you get the bolts/nuts, etc.? I thought I'd ask since you're in Texas as well. I'm hoping Hope Depot or Lowes has most of what I need in terms of screw hardware?
-
I live in Texas too. Curious how long it took from ordering the panels to getting them at your doorstep?
-
No, but I certainly will agree that Tina Fey is pretty hot...
-
Nope, just hugs! World peace could very well happen because of hugs for all we know :P
-
Good think we weren't in a bar drinking. I get almost uncomfortably huggy when I've been drinking :)
-
*hugs* Well I certainly appreciate you handling these sales, Wilba! I'm sad to see that this is the last one since it means that SIDs will likely no longer be as easy to find. So, I'm sure I speak for a vast majority of us, when I say thank you very much to handling all these orders! I myself have been very happy with my 6582's!
-
Thanks Wilba! That's just what I thought it would be! Sorry to derail the train to off-topic land :)
-
I'm guessing that means you don't recommend we mix LED colors in the LED matrix? I was wanting to do a VU meter type of thing (green, yellow, red) so that the VU meter mode would look cooler :) I'm not very familiar with how the matrix functions with the current sinking stuff, but I'm guessing I could use different resistors on one of the 74HC595's?
-
A definitive +1 there. That probably wasn't a very fun couple of months. Good to know he's feeling better!
-
Using standard PT-10 panels for MB-6582 front panel?
m00dawg replied to m00dawg's topic in MIDIbox SID
Haha man I had no idea Sharpies were so versatile :) Thanks for the help Wilba! I guess I will try to hunt some of the hardware down first then. I had planned on sticking with the recommendations as much as possible for most everything, except, of course, using regular screws over JB Weld. Well, that and I was thinking about trying the 90 degree pin-headers since, eventually, I may stuff the mainboard into a C64 case. -
Using standard PT-10 panels for MB-6582 front panel?
m00dawg replied to m00dawg's topic in MIDIbox SID
Oh hrmm didn't realize the panel wasn't anodized. Well that does change things a bit. I originally wanted to use it because of the screw holes. FPE may have allow me to create those types of holes, but basically my plan was to use black, flat, screws to mount the panel instead of going with the standard JB Weld option. I think it will be easier for me to work with, but actually, I think it will end up being a nice look :) -
Using standard PT-10 panels for MB-6582 front panel?
m00dawg replied to m00dawg's topic in MIDIbox SID
Actually, if anything I thought the panel might be too thick as it looks like it is at least 1.5mm (which is what Wilba recommends) but might actually be 2mm. Getting it done locally might be an idea, but I don't know anyone in town that would do a one-off like that. And I did want it painted, etc.