FantomXR
Members-
Posts
1,035 -
Joined
-
Last visited
-
Days Won
22
Content Type
Profiles
Forums
Blogs
Gallery
Everything posted by FantomXR
-
I tested it with an external power supply. But as I said: How to go on? How can I assign the LPK to the MIDI ports?
-
Any news on this?
-
Hey, I didn't get it yet: I tried to connect a AKAI LPK25 to the STM via the micro-port and I used the adapter you posted in the first post. But whats next? I power the core via the mini-USB-port. How do I route now the signal of the LPK to one of the MIDI ports? Thanks! :-)
-
Hey, I'm afraid no. I used the official KB and NG release from ucapps. It's a strange behavior. Any other ideas? I can make some photos of it tomorrow. Thanks, Chris
-
Hey, I have a problem with a 76 key organ keybed. This is my configuration: KEYBOARD n=1 rows=12 dout_sr1=1 dout_sr2=2 din_sr1=1 din_sr2=2 \ din_inverted=0 break_inverted=0 din_key_offset=10 \ make_debounced=0 \ scan_velocity=1 scan_optimized=1 note_offset=9 \ delay_fastest=25 delay_fastest_black_keys=15 delay_slowest=1000 The right half is completely out of tune and I'm not able to adjust the starting key with din_key_offset. It doesn't matter which number I choose for this parameter. The notes will stay the same... Any help on this? Thanks, Chris
-
Debugging my core STM32f4 + diomatrix + fatar keybed
FantomXR replied to aurel33's topic in Testing/Troubleshooting
You did a mistake in the wiring. You need to put the analog input on the other side of the resistor. You should read the documentations which are provided by TK more carefully. This will save you a lot of asking and you will get more quick better results.... so please read through this side again regarding using AINSER8 with KB: http://ucapps.de/midibox_kb.html -
Please read the documentation on ucapps. It's all there. You can approach this by using NG instead of KB.
-
Debugging my core STM32f4 + diomatrix + fatar keybed
FantomXR replied to aurel33's topic in Testing/Troubleshooting
You don't need diodes to check this. You can use a simple jumper cable. //edit: I just read TKs post again. So it seems that you would need diodes. Anyway: could you post pictures of your complete setup including the pcb of the keybed? -
Debugging my core STM32f4 + diomatrix + fatar keybed
FantomXR replied to aurel33's topic in Testing/Troubleshooting
Ah. Okay. I misunderstood your post. -
Debugging my core STM32f4 + diomatrix + fatar keybed
FantomXR replied to aurel33's topic in Testing/Troubleshooting
Nord does modifications on the keybeds respective let them produce in a special way from Fatar. That explains the problems you have. -
Debugging my core STM32f4 + diomatrix + fatar keybed
FantomXR replied to aurel33's topic in Testing/Troubleshooting
Which keybed do you use? -
Debugging my core STM32f4 + diomatrix + fatar keybed
FantomXR replied to aurel33's topic in Testing/Troubleshooting
When I created the PCBs I didn't put any attention on the notches of the sockets. So the orientation is random. And again: You need to twist the cable. Why do you use still a straight cable (last picture you posted)?!? TK gave also exact informations... Anyway... it seems that you need a more in depth-explanation. Here it is and forget about the cable relief for now: 1.) Put the core and the DIO on a table 2.) Place the DIO to the right of the Core so that J8/9 and the input of the DIO face each other 3.) Take a 10pin ribbon cable, which is about 10cm long 4.) Put an IDC connector on the left side of the cable with the notch facing the core (red cable is on the top) 5.) Turn the cable by 180° 6.) Put an IDC connector on the right side of the cable with the notch facing the left-border of the DIO-PCB (red cable is on the bottom). 7.) Connect the core with the DIO and it should work. 8.) Use STRAIGHT cables for connecting the adaptor to the DIO and NOT twisted cables (like you did in the pictures above). -
Debugging my core STM32f4 + diomatrix + fatar keybed
FantomXR replied to aurel33's topic in Testing/Troubleshooting
No, the cables on the picture are not twisted. Again: Please check the link that I've posted above. There is a picture of how the cable has to be made. -
Debugging my core STM32f4 + diomatrix + fatar keybed
FantomXR replied to aurel33's topic in Testing/Troubleshooting
Dear aurel33, I already wrote you a message, that you need to twist the cable, that goes from the core to the DIO. Did you test it with a twisted cable? Look here: http://ucapps.de/mbhp_dio_matrix.html and also I wrote you that you need to use straight cables, that go from the adaptor to the DIO. It will not work with a twisted cable. -
of course not! you have to check it with the schematic of your keybed. Normally an 88 boards need the mk10-03 and bk10-04 to be soldered.
-
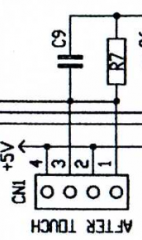
I never checked out aftertouch deeply. But as far as I know you need only three of the four pins. 5V, GND and the analog input signal. Search the forum. Someone gave some great informations about it here in this thread if I remember correctly. And the reason why you have two of those strips is that the black and white keys have separate aftertouch strips.
-
Connect the tip to 5V and the shaft via a 1k resistor to GND. Put the analog input of the AINSER right before the resistor. 5V -----/ ---- 1k-----GND I ---> A0 BTW it doesn't matter if the tip is connected to 5V or the shaft. You can easily invert the values inside NG (should work in KB too) if the pedal works the wrong way around.
-
I'm interested in this too. I tried the USB-Host-Mode two weeks ago with two different devices and I was not able to get it working... As far as I know the STM automatically boots into Host-Mode, if a usb-device is connected to the mini-usb. But how do I make f.e. routings? f.e. where do I set the midi ports the signal of the device is send out to. The core was not reachable via the micro-usb, if a device was attached to the mini-usb.
-
Yes, but this is not what I wanted to achieve ;-) My goal was to set the range of the KB:1 via a button... like a "learn lowest note" and "learn highest note".... But this is on another agenda...
-
Today I tried a bit to work with it but I was not able to get any results. I'm missing something. I have my keyboard: EVENT_KB id=1 type=NoteOn chn=1 key=any use_key_number=1 range=0:127 ports=100011000000and I know that ranges can be set via a NGR script to a fixed number. But I have absolutely no idea how to set the range based on the key that is pressed because the set_min command requires a value after the ID... I overlook something. I might be able to get it working with a lot of if-commands in the NGR. Than I would add an if-command for every key... but I don't think that this is the right solution. I also tried to work with the MidiLearn and LearnEvent metas... but I was also not able to get it working. Any tips? Show me the part that I overlook... :)
-
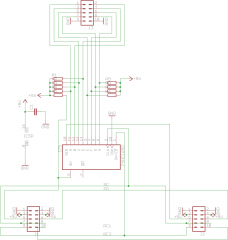
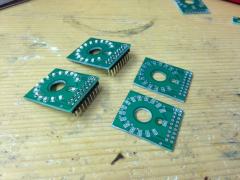
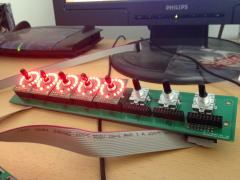
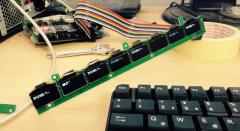
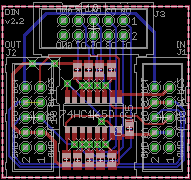
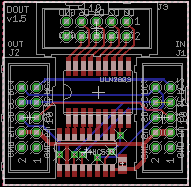
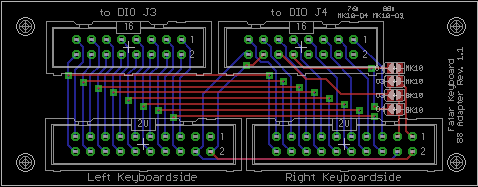
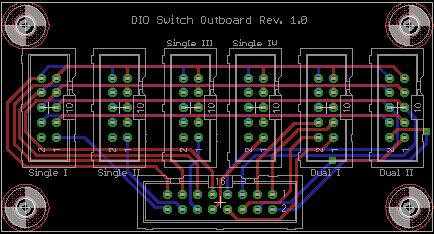
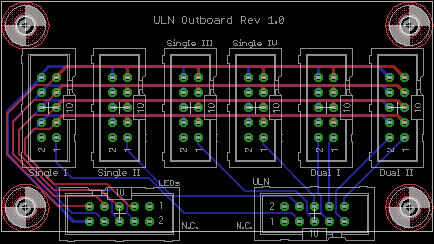
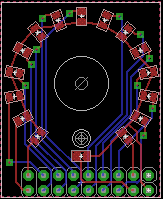
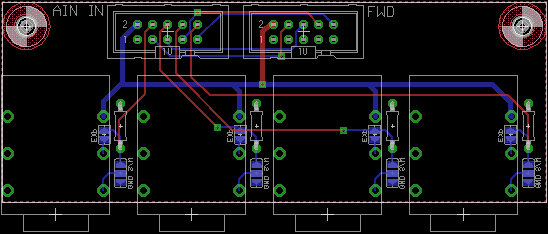
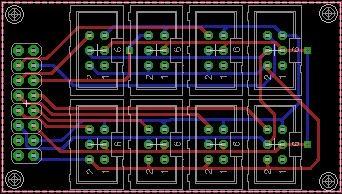
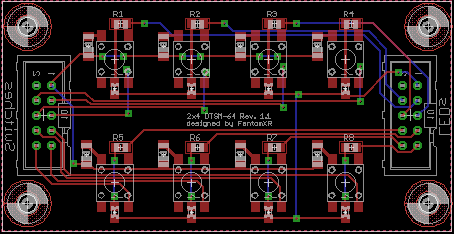
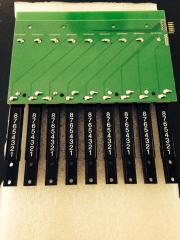
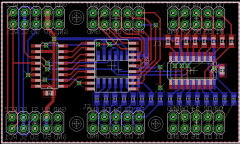
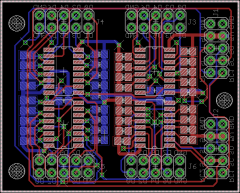
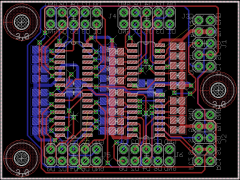
Hey people, as I'm an active member of this community for quite a long time and I really appreciate the help that one gets here, I'd like to share the PCBs with you, that I've created over the last two years. I already created a wiki-entry a while ago but I think this might be overlooked and maybe I can give you some inspirations with those PCBs. The layouts are tested but there might be a few mistakes on the silkscreens. If you found out, somethings wrong, please do not hesitate to contact me. Also I didn't take time to make a clean schematic.... so this might look sometimes confusing ;-) But as I said: It's all tested and should work. I will not share the PCBs I recreated from TKs schematics, because you can get the PCBs either at SmashTVs shop or the *.brd-layout on ucapps and I don't want to compete with Tim. So let's start. If there is something in the layout that needs to be explained, I will add a little description to them. In general regarding the SMD-layouts: They can be soldered by hand with a good solder iron. There is no need to have an reflow oven or similar. 1x DIN (SMD): Description: No mounting holes due to a small size! 1xDIN.zip 1x DOUT (SMD):Description: The package, that is labled with ULN2803 can be either used for of course an ULN. But the footprint fits also resistor-array (f.e. bourns 4816-series). No mounting holes due to a small size! 1xDOUT.zip 8x Encboard (SMD):Description: This is an pcb that can be directly equipped with ICs and than be attached to the core without any other DIN modules. Distance between encoders: 29mm (fits the DTSM-64 distance layout (see below)). 8xEncboard.zip Fatar Adapter:Description: This adapter can be used to connect an 76 or 88 keybed to a DIO-module. You need to solder the jumpers as needed. Fataradapter.zip DIO-Breakout:Description: This adapter is used to split the pins of an DIO-module into more usable pin-headers. See my switch-boards below. DIO-Breakout.zip ULN Breakout:Description: Same as DIO-Breakout. ULN Breakout.zip LED Ring (SMD):Description: This LED ring is made for 0805 LEDs. Good soldering skills needed. LEDRing.zip Neutrik-jack PCB:Description: This PCB can be used to attach easily sustain- or expressionpedals to an AINSER8 module. Solder jumpers as needed and don't forget the 1k pull up resistor when using it for sustain-pedals / switches. Neutrik.zip OLED Breakout:Description: The module can be directly connected to J15A/J15B of the core. You can then connect OLEDs in conjunction with the display-board directly to the core without soldering any wires. OLED Breakout.zip OLED Displayboard:Description: You need this pcb in conjunction with the OLED Breakout above. This pcb will be soldered directly onto an OLED which you can get for good prices on ebay or aliexpress. Pay attention, that this will only work for OLEDs which have 7 pins single-header connectors. OLED Displayboard.zip 2x4 DTSM-64 (SMD):Description: You can connect this PCB directly to the DIO- / ULN-Breakout board (see above), but it should work with classic DIN/DOUT modules too. Switches are DTSM-64. 2x4DTSM.zip 8xDTSM-64 (SMD):Description: You can connect this PCB directly to the DIO- / ULN-Breakout board (see above), but it should work with classic DIN/DOUT modules too. Switches are DTSM-64. 8xDTSM64.zip 8xDTSM-64 distance (SMD):Description: Distance between the switches: 29mm. You can connect this PCB directly to the DIO- / ULN-Breakout board (see above), but it should work with classic DIN/DOUT modules too. Switches are DTSM-64. 8xDTSM_distance.zip 16xDTSM-64 (SMD):Description: You can connect this PCB directly to the DIO- / ULN-Breakout board (see above). Won't work with classic DIN/DOUT modules. Switches are DTSM-64. Distance: 29mm. 16xDTSM.zip That's it for now. This list will be updated if there are any news.
-
Look at this: it's turned by 180°
- 7 replies
-
- mios32
- midibox kb
-
(and 1 more)
Tagged with:

