latigid on
-
Posts
2,524 -
Joined
-
Last visited
-
Days Won
149
Content Type
Profiles
Forums
Blogs
Gallery
Everything posted by latigid on
-
Cool, getting closer then! The components to check on transmute8 are probably related to the second inverting stage, so pins 5,6,7 of IC4, 8R33 (maybe), 8R41, 8R49, C29 and R57. Check if any of these parts are connected to 0V (ground). Only pin 5 of IC4 should be. Do you measure voltage on R57? Best, Andy
-
Hello, IN4 will fit a DIN5 as well as a DIN8, but the pads are not connected to avoid potential conflicts when using a BLM and questions of "where's my 5th MIDI in??" If you want to do it anyway, you can add solder bridges here: Shouldn't need a special cable, but to be honest I've not played around much with the OTG stuff. Did you route the MIDI anywhere, set the channels up etc.?

-
For testing tranmute8, you can start with no other boards connected. Verify no shorts on the power rail, though if your rack powered up that's likely not an issue. After connecting the Eurorack power cable, you should measure +12V/-12V on pins 4/11 of the op amps. Check that the op amp orientation is correct with pin 1 near the IC1/2/3/4 label. C3/4 seem to be correct. I think you should still get some output even with nothing connected to the op amp inputs. Outputs on J3 should each be at -5V. You can verify your octal board with a working binaire board.
-
I think you need to test piece by piece. First disconnect everything. The ribbon cables should have the IDCs mounted with the notches/nubs oriented the same way relative to the cable (e.g. both pointing down along the cable). http://ucapps.de/mbhp/mbhp_aout.pdf shows the connections of the DAC. For the midiphy superDAC, we use the modern pinout, so CS = RC1 on pin 10, SI = SO on pin 6 and SC is on pins 7/8. Before powering up, ensure +5V is not shorted to 0V (ground). Check polarised components are properly oriented (seems good from the photo). Connect a known good cable to J19s. Not J19A! You should measure +5V on pins 3/4 of the IDC pin header and on pins 7/14/20 of the 525/5500. After initialising in the SEQ, you should be able to measure voltage on the J1 pin header outputs: 0V at min setting and 2.048V at max setting. Out 1 is on the right by the J1 label, then going left, outs 2/3/4, 0V, no connection, 0V, then 5/6/7/8.
-
I'm not sure if you initiated the DAC. If you choose a track on the AOUT port but no module is configured, you won't get any change. The menu page I'm talking about is here: CV Configuration Page This page allows to select the AOUT/AOUT_LC/AOUT_NG interface, to configure CV channel and gate parameters, and to configure the DIN Sync Clock output. CV: selects the CV channel (1..8) Curve: selects the output curve: V/Oct, Hz/V, Inverted SlewR(ate): allows to configure a slew rate (slack) in the range of 0..255 mS SusK: activates the "SusKey" function (also known as "fingered portamento"): the slew rate will only be activated if at least two notes are played. This allows to use the glide function to enable slew only on demand. PRng: sets the pitch range for pitch bender events (normally 2, use 12 or 24 to sweep over one, resp. two octaves) Gate: sets the gate polarity (positive or negative) Calibr.: allows to force different output voltages for calibration (Min/Middle/Max/1V, 2V, 4V, 8V) Clk: selects 1 of 8 clock outputs (available at a dedicated DOUT shift registered which has been configured with the CLK_SR parameter in the MBSEQ_HW.V4 file). Each clock has an individual clock divider, or can optionally be used to output a Start/Stop signal Rate: defines the output rate of the selected clock output (1, 2, 3, 4, 6, 8, 12, 16, 24, 32, 48, 96, 192, 384 ppqn and Start/Stop) Width: sets the pulsewidth of the clock output signal (1..255 mS) Module: selects the AOUT module which is connected to J19 of the core module (AOUT, AOUT_LC or AOUT_NG) Did you reach this page and set the Module type to "AOUT"? Thereafter you should be able to "Calibr[ate]" volts in steps from 1-10V and min/mid/max. This is also how you can fine-calibrate the channels. Best, Andy
-
MAX525 should work too. You should be able to control/calibrate the AOUT channels from the config page. What AOUT config are you using? The LEDs will indicate the approximate voltage, but will only be off at around 0V as there is an offset present. Photos of the boards so I can check if anything looks off? RC jumpers on the superDAC PCB not connected maybe? Correctly assembled cable attached to J19s?
-
I'm glad it was an easy fix! For setting up the analogue channels, press Exit until you get to a list of menus then scroll through them with the datawheel until you get to CV configuration. The module type should be AOUT (probably AOUT_NG for non-midiphy boards). Changing the module type will always reset the data; useful if it gets corrupted and no power cycle is required. The CV menu is where the outputs are calibrated and the clocks are configured. For setting up the DOUT chain, count the number of 595 shift registers: JA 1,2 lemec_L 3,4 lemec_R 5,6,7; 8,9 so the first gates/clocks module will be at SR 10. Probably we should push the git update for a properly configured HWCFG file. # CV and Gate/Trigger/Sync Setup ################################################## # CV and Gate/Trigger/Sync Setup ################################################## # AOUT interface now selected in CV Configuration Menu and stored in MBSEQ_GC.V4 file # please scroll through the menu to find this page! # the 8 CV gates can be assigned to a shift register (0=off, 1-32: number of shift register): # - 1st CV Gate available at DOUT SR output D7 # - 2nd CV Gate available at DOUT SR output D6 # - 3rd CV Gate available at DOUT SR output D5 # - ... # - 8th CV Gate available at DOUT SR output D0 CV_GATE_SR1 10 # and DIN Clock Outputs can be assigned to a shift register as well (0=off, 1-32: number of shift register): # D7..D0 will output individual clock or start/stop signals which can be configured in the CV configuration page CLK_SR 11 # additional gate triggers are available on common digital output pins of the # DOUT shift register chain - they are assigned to AOUT channel #16 (Note C-1, C#1, D-1, ...) # define the shift registers which should be used here (each provides 8 gates) # Note that SRs assigned to this function cannot be used as LED outputs (exclusive function) # Allowed values: 1-32, 0 disables the function, all other values invalid and not allowed DOUT_GATE_SR1 12 DOUT_GATE_SR2 0 DOUT_GATE_SR3 0 DOUT_GATE_SR4 0 DOUT_GATE_SR5 0 DOUT_GATE_SR6 0 DOUT_GATE_SR7 0 DOUT_GATE_SR8 0 # if set to 1, the additional DOUT "gates" will send 1mS pulses # useful for analog drums DOUT_1MS_TRIGGER 1 # should J5A/B/C outputs be enabled (0: no, 1: yes, 2: yes, but in open drain mode)? # - the 6 first AOUT gates will be forwarded to J5A/B # - the remaining last 2 AOUT gates are available at J5C.A10 and J5C.A11 (LPC17: J28.WS and J28.MCLK) # - DIN sync clock will be forwarded to J5C:A0 (LPC17: J28.SDA) # - DIN sync start/stop will be forwarded to J5C:A1 (LPC17: J28.SC) # - if open drain mode enabled (option 2), external pull-ups have to be connected to J5 pins # (advantage: pin levels can be pulled to 5V) # # NEVER USE THIS TOGETHER WITH ANALOG POTS - IT WILL CAUSE A SHORT CIRCUIT! J5_ENABLED 0
-
Directly connected means no line transmit board? How long is the cable? What happens when you unplug J8/9 from le mec_R? Are any ribbon cables improperly assembled (shorts etc.)? Can you exit this menu? Do you notice strange DIN events with MB_NG loaded?
-
The clock pulse can be varied in ms steps, but the triggers are either gate or 1ms. Does it work to use "gates" instead? Often a trigger input will react on the rising edge. If it's the falling edge though, then a gate wouldn't help. I had a quick look through the code, but I couldn't find an obvious solution. Clocks are different to triggers, as the timing is always consistent relative to the master tempo.
-
Thanks for the info!
-
Hello, There is no power switch, as you should typically ensure a stable power rail before connecting data and the solution to that was a bit to complicated. Imagine if it was already connected to your computer with data being sent but no power rail because it was switched off. I'm honestly not sure if this would be a problem for the SEQ or the computer. But if you would like to try, maybe something like this? You would need a USBA-USBA cable. https://solarbotics.com/product/19068/ Or a USB B with a switch on it: https://www.amazon.co.uk/Snowball-B-Male-Switch-Printers-devices/dp/B07GGT9XGT If you would like to drill a hole in the case, how about interrupting the +5V line from the USB board to the Core? This assumes that you haven't used the Molex power headers on the USB board. Simply wire an SPST switch to reconnect the +5V.
-
Ha, you're right, the +5V plane is connected on this revision. Don't worry, we'll sort you out with a replacement. Peter will be in touch.
-
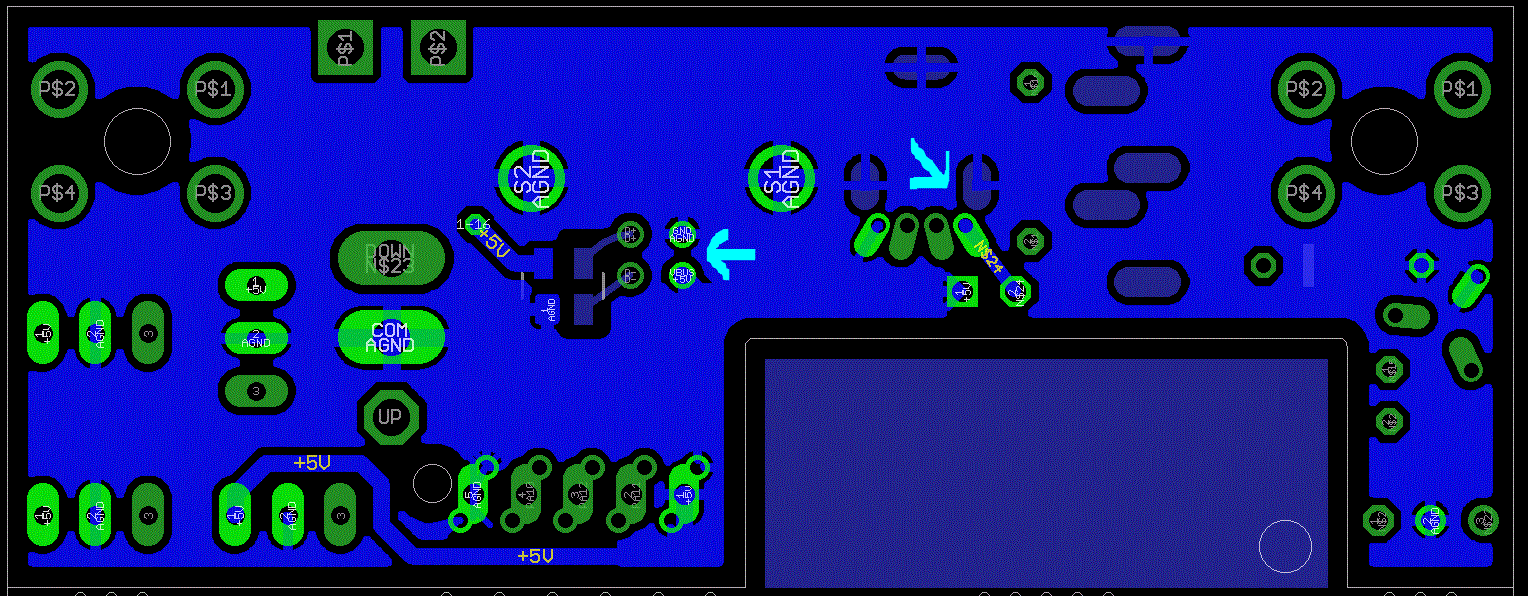
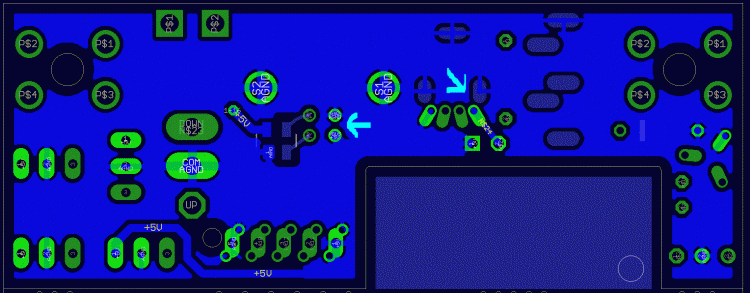
Please check the locations I mentioned and post a photo of your soldering. Don't worry, the pours are not connected otherwise nobody's board would work...
-
Can you post a picture of the soldering? The most likely place is on either of the two USB connectors. This is the bottom of the board with the +5V and 0V connections highlighted.
-
RME Fireface should work. You can also change IDs through MIDI: I'm not sure if it's possible to change IDs if they're all connected in the MB-6582 with the same ID. If it doesn't work, consider removing all but one PIC when changing. How is J11 set? Select the ID in MIOS Studio as follows:
-
I'm not sure if CC is implemented for note steps. The encoders are also responsible for the UI in general. It would also be a lot of data to poll/update. But yes, _NG with AINSER would be the right direction. You can also get high-speed UART by removing the optocouplers. The connection is more fragile of course.
-
Sometimes you forget to socket the optocouplers, or they are faulty somehow. Could be an incompatible MIDI interface (is it on the blacklist?). Are you aware of the different device IDs for the PICs? They need to be configured in MIOS Studio.
-
Maybe we should have a new thread for module things? Regarding depth, note that it would be doable to squeeze things tighter with shorter headers or even direct soldering. Right-angled IDC headers would also help. For panel files, at least at the beginning I prefer to keep them closed. We might offer different colours in the future (e.g. black panels). But if you really would like to do your own, just put a note in when you order and I can give you the dimensions. It wouldn't be difficult to measure either :).
-
I noticed the same thing: the switch action removed the 0V rather than +V. It can be confusing when the MB-6582 "receives" 0V from somewhere else. From memory, it would not be so significant if the bridge rectifier was still there.
-
If the MAX525 chips are SSOP, then you could substitute them. If they're DIP, then it won't work. I use an LED driver to indicate CV activity. You would probably exceed the current limits of an op amp plus run into loading issues just placing them in parallel.
-
@lukas412 looking great! We are indebted to Adrian for his awesome work on the case @knochenfabrik I figured, but thanks for the clarification. When the rack ears are ready it should work to mount directly that way, but nicely done with the hack/workaround!
-
Indeed! The line drivers would actually "buffer" the SRIO a bit, but as long as the cables are short it should still be okay. The other option of using line drivers (if required) is to omit the DB-25 connector and use the IDC instead. The ribbons would take less room.
-
Well that's an awesome photo! Presumably you had to remove the rails/threaded inserts? But sure, everything should fit in 3U. There's been promise of ears for 19" rack mounting for a while but those are still on the way. Not long until the modules are ready. But summer holidays can result in a slowdown sometimes. Btw. with everything in the case like this, probably you wouldn't need to use the line drivers at all. Just connect J8/9 and J19 to the respective digital and analogue expanders.
-
Or TME?
-
I would recommend Reichelt but check the shipping price to France. Otherwise, just order (I think) 60€ worth of parts and the shipping will be covered from Mouser.