-
Posts
1,184 -
Joined
-
Last visited
-
Days Won
30
Content Type
Profiles
Forums
Blogs
Gallery
Everything posted by Altitude
-
Correct me if I am wrong since my memory isn't as good as it used to be, but I dont remember a provision on the MB6582 to run both 9V and 12V SIDS at the same time (i.e. 6581 and 8580, 12V and 9V respectively), AFAIK it is one or the other
-
Man, I have to talk to you about the cymbal decay, mine is still super short. I have some TR-808s come in for service and that was the first thing I noticed when I A/B them to the MB808. with the 808 forums completely wiped out now, I dont have any reference for fixing it. I went with the Hammond case as well, it is a perfect fit and you cant beat it for the price I also have a neat solution for dealing with the heat from the 7805, I'll post something abut this later today
-
Yeah, http://xlargex.xl.funpic.de/ has them and board layouts as well for each of the voices.. I have built the kick
-
yep, those are the ones. I lost mine as well and replaced them with socket head 1/2"
-
They are 4-40 UNC Threaded btw
-
i dont really see anything in there that I would be remotely interested in, they look like all they make is NEMA rated cabinets for industrial use
-
Do they have a catalog? Hammond is stocked at Mouser and their selection is HUGE so I really have little reason to look else where
-
Yeah, I use that elpac for my MBCV. Works great, hard to find though :(
-
Nice! at least Kenton should know what they are doing vs these iPhad clowns
-
Very easy, just design the file with their software, send them the case and they do the rest. There is a $14 clamping fee here (may be different with Schaffer) for weird shaped parts but they can do pretty much anything. Another member here got the back of his case (the same case as I used) done at FPE and it only added $30 to the total.
-
here are my work files in case someone is interested in using this case: My link
-
Yup, real simple. I find a piece of metal and machine a round on it a hair smaller than the OD of the hole in the panel, then I drill it out about 1mm smaller diameter than the OD and chamfer a sharp edge on it using a chamfer tool or boring bar. I apply the sticker, flip the panel around and punch it from the back. The little ones go by hand easily but the bigger ones I tapped with a hammer. Both we done on a soft cutting mat underneath. Here is my 3mm tool (I used a long bolt) Hula girl is on order btw
-
Its an inkjet printable, waterproof vinyl sticker paper. I have the link in the first post but it is very cool stuff. I used it to redo the faceplate on my MB6582 as well and it can be printed solid black (it comes white) no problem for white on black text
-
I'll get the files together for the wiki since I mounted both the SD card and the Core32 in a novel way that other people might be interested in..
-
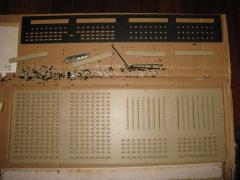
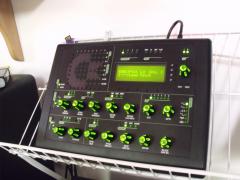
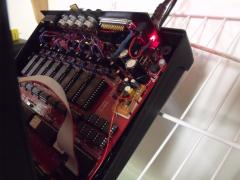
So here is my build based on a Hammond enclosure. Labels are inkjet printable vinyl sticker paper from Paplio (http://www.papilio.com/inkjet%20waterproof%20adhesive%20film%20media.html). It took a while to get a good formula for this stuff since it comes out VERY matte out of the printer and is a pain in the ass to cut. Thankfully it is pretty cheap so screw ups are not too big of a deal, down the road I may go with the 11x17 and do the whole thing instead of islands (I only had the 8x11). The adhesive is brutal on this stuff and I had no problem getting it to stick to the painted case. I used their clear coat spray with very light coats to give it a textured appearance that has a little bit of sheen to it. This vinyl is pretty soft so it absolutely needs something on top. They have a laminate for it but I have not used it yet. I made a set of punches (punched from the back) for the round holes and did the rectangular holes by xacto and straight edge. The case is the standard one available at Mouser and was $49. The CNC work was done by FPE and came to $95 so the case was pretty reasonable. I machined the back myself. The wood sides were laser cut at Ponoko and that is the 5mm double sided veneer walnut. A couple coats of polyurethane and some sanding is all it took and the pics dont really do them justice, they came out better than I had hoped and the burned edges can be left as is IMHO. Best of all, 3 sets of those was $20. Power wise I opted for a small toroid (3.2VA 7VAC) for power which can be switched out for a 9V one down the road if I decide to go with a AOUT at some point. I also plan to resurrect my 4xIIC board since more midi outs are definitely in order. Pics:
-
-
hehe, that's the trick right? What I came up with was to make on the lathe punches that have the OD a hair smaller than the hole diameter and that have the cutting edge on the inside. Think of it as taking a tube and sharpening the inside edge instead of the out side surface. Then I just apply the sticker to the machined panel, flip it over and punch out the holes from the back, the little ones go very easy and even the big ones (like the 14mm ones in the MB6582) can be done by hand. Results are SUPER clean holes. Rectangular stuff is a little trickier since you have to either do it before hand with an xacto and straight edge or cut it after you apply it. The latter is pretty rough since this stuff does not like to be cut like that and it is easy to mess it up. I'll have my walnut sides for my seq4 tomorrow so i'll do a full write up on the procedure then (with pics of the tools etc)
-
There is this thing: http://www.iconnectmidi.com/?q=specs But it just seems ridiculous that these days people have accepted USB Midi and bitch about something NOT having it so no we need something like that thing (which has gotten poor reviews from what I hear) to convert midi over USB BACK to DIN5 midi
-
the only thing I did recently was to crack it open to start work on seppo's vcf but more importantly, it was a test vehicle for trying out inkjet printable vinyl sticker paper and that worked out very well. I'll be post more on that shortly since I used it for my SEQ also and it turned out really well (this stuff is a $1 a sheet btw, dirt cheap)
-
-
-
-
From the album: Altitude's pics
For Smithy: LM317 adjustable power for clear knob backlights -
From the album: Altitude's pics
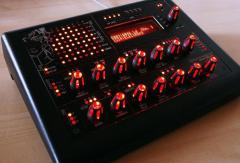
My MB6582 with new DIY inkjet printable vinyl label -


