Hawkeye
-
Posts
3,636 -
Joined
-
Last visited
-
Days Won
36
Content Type
Profiles
Forums
Blogs
Gallery
Everything posted by Hawkeye
-
Wonderful ;-) A lot of knobs and probably some discussion with the gurl ahead :-). Thanks for your work! Many greets, Peter
-
Hola, Johey, no SID sound in this one, but missed the MB6582, gotta make a new patch soon (and admittedly, that process alone is a lot of fun :-)). Arkay, great to hear that it works now! Many greets to Downunder :-)! Bye and hoping to hear new music from other MIDIbox members in this section soon :) Peter
-
Hi and welcome :) Maybe some high quality pics (high-resolution, good lighting, not blurry) of the baseboard top and bottom will help others to locate the problem(s). Best thing to do would be to isolate problems, e.g. swapping sids between the four integrated MBSIDs, e.g. to validate that the output stages are working correctly. Have you made sure, that the correct voltages are applied to the specific SID chip type (8580 = 9V, 6581 = 12V)?. Many greets, Peter
-
Thanks, y´all :smile: This one was a bit mainstream maybe, but what can you do, when the synths sound like that :-D Arkay - that is typical youtube mysteria, I experience that too sometimes, especially from videos from geographically far away, which is really strange... hope, it works by now! Many greets, Peter
-
After too much work and a very long time without firing up the synths, finally :-D Hope you enjoy it, the Polivoks filter is still marvelous, as is the fantastic MBSEQ V4 as a live sequencer. And the bavarian alps are always good as background video footage - parts of the video were filmed using an FPV plane :-). Thanks for watching and listening, hope you enjoyed it! Many greets, Hawkeye
-
What a nice read, covering the 808 Cymbal, the roots of MIDI, C64, Atari STs :-) http://www.theverge.com/2013/1/30/3932574/how-the-808-found-its-cymbal-musical-tales-namm-geeky-underbelly
-
Yeah, thanks for your hard work, Martin! Also the possibility to pay via bank transfer is really nice! Everyone, refill your knobbery, you never know when the next bulk will happen! :-) (J: agreed on the Soundwell encoders, someone has got to buy a thousand in China and redistribute them :smile:) Many greets, Peter
-
Extended front panel design - what to do with two extra buttons?
Hawkeye replied to ilmenator's topic in MIDIbox SEQ
Nice board, nice PCB color, nice SMD shift registers and resistors - can´t wait :-) Many greets, Peter -
Extended front panel design - what to do with two extra buttons?
Hawkeye replied to ilmenator's topic in MIDIbox SEQ
Great news, looking very fine so far! Sorry for the additional workload, but better to test first! :-) Many greets! Peter PS: When its done, your SEQ will be onehelluva SEQ ;-) -
Extended front panel design - what to do with two extra buttons?
Hawkeye replied to ilmenator's topic in MIDIbox SEQ
Cool! Maybe really my DOUT pins were wrong at the connection point, but better be safe than sorry ;-). Another thing, I hope the luminance of all LEDs will be high enough for you - I ended up direct driving them all (no resistors) - which is not a nice design choice, but even with 50 ohms resistors, the brightness was a bit low otherwise. This was probably because of the quite short duty cycle, as the number of digits was expanded from 3 (classic BPM) to 7 (4x BPM, 3x Step Display). Maybe a kind of LED driver similar to the one on the new LED-Ring boards would be nice, but this is already outside of my knowledge area (which is software), so I cannot give further advice ;-). Many greets, Peter -
Extended front panel design - what to do with two extra buttons?
Hawkeye replied to ilmenator's topic in MIDIbox SEQ
Please test the LED digit schems before ordering any boards, you may hit me with an arctic snowball, if I am wrong ;-), but if I remember things right, the segment order was messed up when testing the official schems - that´s why I got garbled digits on my 1-digit bpm board at first. It only worked after wildly rearranging spaghetti on the breadboard ;-). Ah yes, and it is highly unlikely, that the problem was caused by the few cables in the blurred part of the picture ;-). Many greets, Peter -
Willkommen ;-) Eigentlich ist es ganz einfach und Du brauchst kein Eagle - auf der Platine hat jedes einzusetzende Bauteil eine Bezeichnung, z.B. "R" für Widerstände, "C" für Kondensatoren und so weiter. Jetzt schaust Du einfach in die Bestückungsliste, welches Teil wo eingesetzt werden muss. Vorsicht, bei manchen Bauteilen, wie Elektrolytkondensatoren oder Dioden (und natürlich auch ICs) gibt es eine Polarität, die beachtet werden muss, ist aber dennoch nicht schwierig ;-). Normalerweise lötest Du von flachen Bauteilen (Widerstände, die haben auch gleich den Vorteil, dass Du die Polarität nicht beachten musst) zu höheren Bauteilen, so dass Du die Platine jederzeit umdrehen kannst, ohne dass die noch nicht gelöteten Teile herausfallen. Viel Erfolg und viele Grüße, Peter
-
 Nice job, man! :-)
 -
Extended front panel design - what to do with two extra buttons?
Hawkeye replied to ilmenator's topic in MIDIbox SEQ
Hi ilmenator! Great, am really looking forward to it - the PCB will be attached to my "mobile" SEQ, a bit of bling is necessary all the time :smile:. Also, I guess other MBSEQ users would love to have one, but let´s get it up and working first :smile: That´s the only suggestion I have, please test that LED segment/digit wiring as well - i am not 100% sure, the official schematics fit with the currently active code, which would not be so bad, if there had not been people out there also deducing the wiring from scratch (also testing on breadboard - the most notable user is the MB9090 project), so we should make sure, that we all share the same hardware wiring, which helps to reduce complexity in software. Best of luck and thanks for your efforts! Peter -
Extended front panel design - what to do with two extra buttons?
Hawkeye replied to ilmenator's topic in MIDIbox SEQ
Hi ilmenator, great, that the project is continuing! The first look looks good :smile: But I do not remember exactly how the digits and the LED matrices were connected, so I can´t say anything, other than speculate right now... I would really recommend to test it out on two DOUTx4 boards and put the LED digits and the LED matrices on a breadboard before ordering a PCB. As murphy says, likely some wires are wrong, I experimented on breadboard until everything worked and the LED digits displayed "sane" numbers... then soldered it up, unfortunately not taking notes, how the connections were done... So, it is great, that you were not as lazy as me and have created nice schems now, if you update it with any errors found, many others will benefit from this! :-). Regarding your other questions... ... the push-to-accelerate bus is simply an additional (encoder-)switch, that is connected between GND and the FAST2 DIN pin of the standard MBSEQV4, you can wire up many of these switches and accelerate the SEQ by pressing any of them, but you would probably need only one, for the BPM encoder. ... the pinning of especially the digit segments cannot be changed in software (as of yet) - it would be nice, to get the digit segment wiring "right" in hardware, so that it is compatible with other implementers of the SEQ V4 BPM displays, e.g. the 9090 SEQ project, that uses BPM digits as well... that´s why, it needs to be tested on breadboard, first. Note, that the track-position-display code does not support "four" matrices (red1, green1, red2, green2) as of yet. I´d therefore recommend, that you test the four matrix wirings with the existing code: just configure different matrix anode out shift registers and cathode shift registers, and see if all hardware wiring works as expected, i.e. the right LEDs light up for every of the four combinations! If those four matrix connections work as intended, the support can be done in software, after the PCBs are produced. We´d need to extend the SEQ v4 TPD configuration by a little, e.g. it needs to be defined how many matrices and colors are connected, and which shift register numbers they have. I´d like to do that with physical hardware present, it is just a hell of effort to remote-test that ;-). Many greets! Peter Edit: by the way, when we invest in those PCBs, i´d recomend to split costs and send one to TK. as well, so he has it in his hardware repository :smile: It will be handy! :smile: -
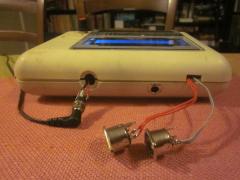 Nice project! Maybe you can hotglue the metal lids of the MIDI connectors to the inside and just drill a circular hole for the MIDI plugs...
 -
Very nice and refreshingly different sounds :-) Great to hear your MB6582 in action :-) Many greets, Peter
-
I like it very much! Good quality cuts! And with the thickness of the wood you managed to cut, I am quite sure, it would work on aluminum or thin carbon fibre plates, too! The best thing is now, that you can reinforce parts of your CNC with its own self-made parts, if you think it is necessary... a self-improving machine - skynet is online :-). Would you give us a short list of parts, ie. stepper motors/control logic kit used in your CNC? Many greetings! Peter
-
Also not to forget the inherent SID chip noise, that also depends on the active patch (e.g. filter) settings... Many people use a noisegate to get rid of it when the SIDs are not playing. When they are playing, their awesomeness renders it all but inaudible :-D
-
 I´ve seen this too late - very nice! I like that form factor a lot, maybe it will be possible for the 808, too :) Many greets, Peter
 -
Shuriken, that looks mighty fine, please keep us posted - still looking for a bigger display module :)
-
nothing good came off LSD, besides BSD, but that is a different story *scnr* :smile: How did you blow the LCDs? Backlight or Logic blown? Was there some magic smoke/smell release or is there just no display? Did you check the contrast pot? Many greets, Peter
-
Absolutely agreed. At some point, I will just have to measure the SID heatsink temperatures in my case with eight 8580s, without fan, but with a good amount of ventilation slots...just out of pure interest, not to put oil in the fire :)
-
 Very nice! Good job! :)
 -
@J: going for trans, they look good even without backlighting :) sorry for OT :)