Search the Community
Showing results for tags 'diy'.
Found 21 results
-
From the album: LoopA
Finally, after 4+ years of development! :) https://www.midiphy.com/en/shop-details/139/69/caseless-loopa-essential-kit Hope you enjoy! Best regards, Peter -
From the album: LoopA
Finally, after 4+ years of development! :) https://www.midiphy.com/en/shop-details/139/65/loopa-acrylic-case-essential-kit Hope you enjoy! Best regards, Peter -
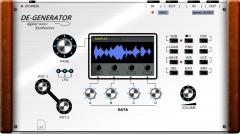
 DE-GENERATOR Midi Sampler/Synthesizer English blog: http://mutable-instruments.net/forum/discussion/2504/shruthi-synthesizer-and-my-wave-1#Item_1056 German blog: http://www.cczwei-forum.de/cc2/thread.php?threadid=5878&page=29&sid=bf325d3654a16989e2b0aee1f7045039
 -
 This is the DEGENERATOR Motherboard and CPU-Board
 -
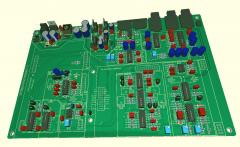
 This is the Motherboard PCB of Degenerator. More Info in my Blog: http://mutable-instruments.net/forum/discussion/2504/shruthi-synthesizer-and-my-wave-1#Item_1002
 -
 This is the Motherboard PCB of Degenerator. More Info in my Blog: http://mutable-instruments.net/forum/discussion/2504/shruthi-synthesizer-and-my-wave-1#Item_1002
 -
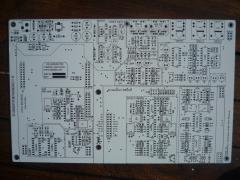
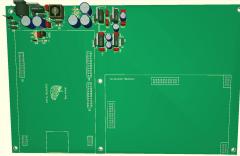
 This is the Motherboard PCB from Degenerator english Blog: http://mutable-instruments.net/forum/discussion/2504/shruthi-synthesizer-and-my-wave-1#Item_996 german Blog: http://www.cczwei-forum.de/cc2/thread.php?postid=91164#post91164
 -
 english Blog: http://mutable-instruments.net/forum/discussion/2504/shruthi-synthesizer-and-my-wave-1#Item_986 german Blog: http://www.cczwei-forum.de/cc2/thread.php?postid=91021#post91021
 -
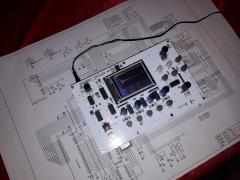
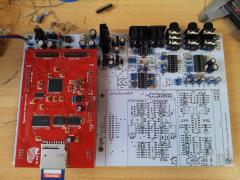
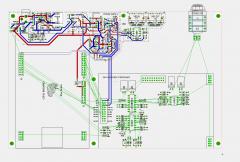
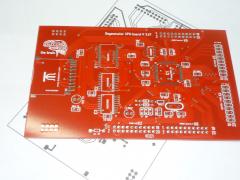
 Motherboard of my DIY Synth "DEGENERATOR" Hi my fiends! Just Andre sent me the first psb-designe from the motherboard of Degenerator. On left top site is the position from power connector and negativ switching regulator P3596. Under the regulator the components of the voltage monitoring. These Components are covered by the CPU board. Right next to the negativ switching regulator position 4 liniar voltage regulators for + 3.3V + 5V + 8V -8 Volt. For the + 5V regulator there will be a heat sink. On the top right site of motherboard are planned the position of the Midi-jacks and the audio jacks. On the free place are planned the delay and VCA circuit. English blog: http://mutable-instruments.net/forum/discussion/2504/shruthi-synthesizer-and-my-wave-1#Item_984 German blog: http://www.cczwei-forum.de/cc2/thread.php?postid=90949#post90949
 -
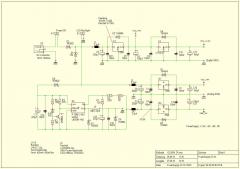 This is the power supply in DE:GENERATOR Link german blog: http://www.cczwei-forum.de/cc2/thread.php?threadid=5878 Link english blog: http://mutable-instruments.net/forum/discussion/2504/shruthi-synthesizer-and-my-wave-1#Item_966
 -
Hi there, I know this a is little bit OT and may be not very contemporary: I have bought an old DX7S and thought about building a RAM-Cartridge by myself. Maybe someone here has some experience with this or knows where to find completed eagle files or a pcb to do this. Best regards, clem!
-
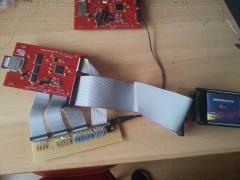 This is the Test Adapter for CPU-Board from DE:GENERATOR
 -
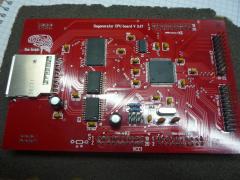 This is the CPU Board from my DIY Synthesizer DE:GENRATOR Blog english: http://mutable-instruments.net/forum/discussion/2504/shruthi-synthesizer-and-my-wave-1/p1 Blog in deutsch: http://www.cczwei-forum.de/cc2/thread.php?threadid=5878
 -
 This is the CPU Board from my DIY Synthesizer DE:GENRATOR
 -
 Hola, it has been a while since the last photo tutorials - I really wanted to do this for some time, but there was always work or some other distraction... but now, there is some time to spend at the solder station :smile:. This will be a documented one-time build for a MIDIbox member, who is an industrial designer and wants to create his own MBSEQ enclosure and frontpanel (thus the non-standard control surface LEDs). Am very eager to see the end result :-). Each step will be photo-documented and contain parts lists, where possible - hope you enjoy the build documentation and that it may be some help to other people wanting to build a MBSEQ, who may yet be intimidated by the amount of parts necessary, the soldering or the software configuration. I will try to structure this tutorial in such a way, that progress is quickly visible - and that you do not need to assemble everything before "turning it on" the first time. The faster some progress is visible, the higher the motivation to continue building... :-) The MBSEQ is the most awesome piece of music gear, that I own - many thanks to TK. and Wilba, who made it possible! Enough talk, let´s get started :-) Many greets, Peter Here are links to other existing photo tutorials: Custom SEQ V4 (DIY control surface, VFDs, ebony wood carrier): MB6582 Control Surface:
 -
 My Blog: http://midibox.org/forums/topic/17207-avr-synthesizer-wave-1/?page=12
 -
Hi, some time ago I made an Arduino based custom control surface for DSI Tetra to control 95 or so parameters (via NRPN), inspired by the Waldorf Blofeld button-encoder matrix. I thought I'll drop the info here too. Here's a video of the basic operation: I also posted DIY instructions & the code on the DSI forum, here's the link in case anyone's interested. Stupid though that you have to register in order to read the forum. http://dsiforum.com/viewtopic.php?f=19&t=6778
-
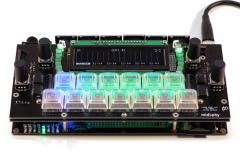
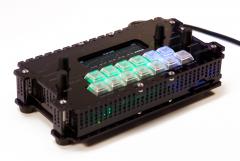
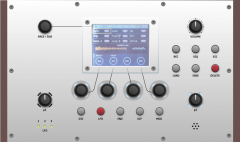
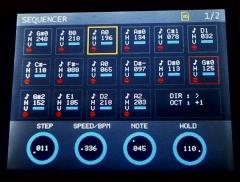 This is the step sequencer in my DIY Synth "Degenerator". Website in english: http://mutable-instruments.net/forum/discussion/2504/shruthi-synthesizer-and-my-wave-1#Item_746 Website in german: http://www.cczwei-forum.de/cc2/thread.php?postid=87430#post87430 Greetings from germany. Rolf
 -
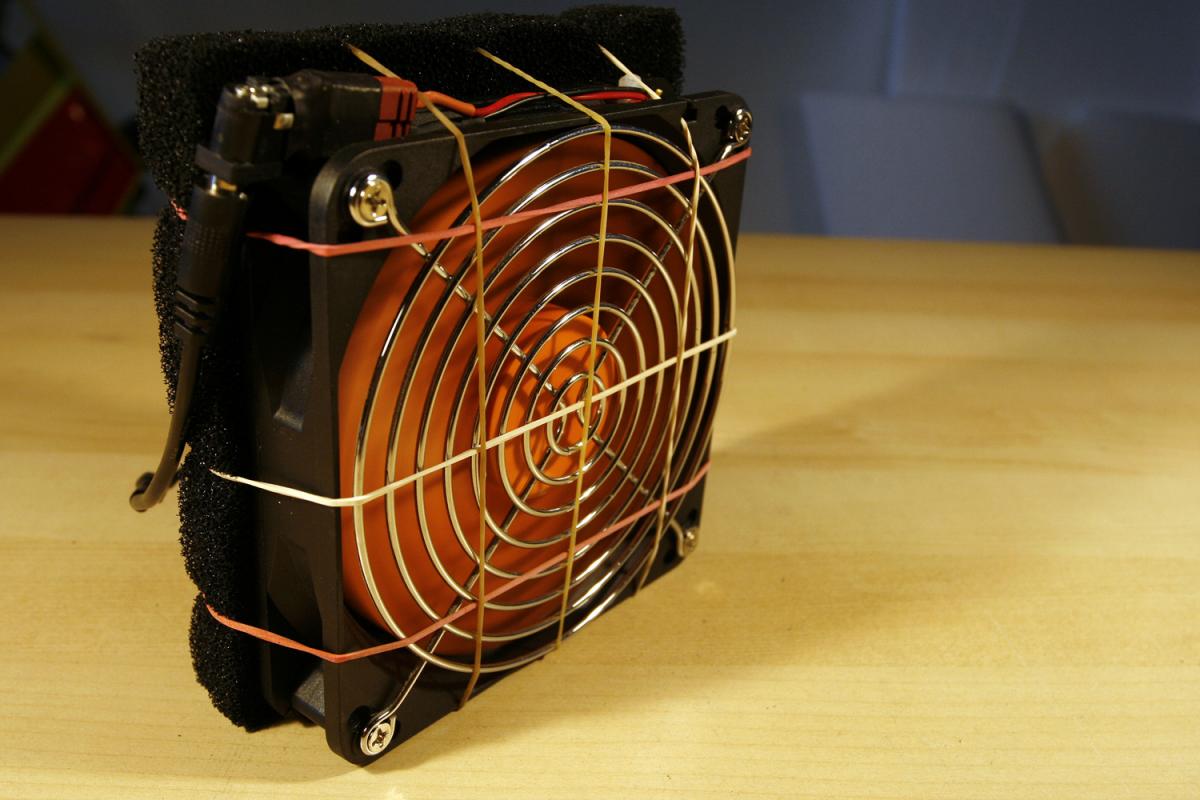
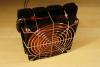
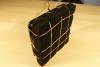
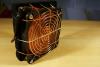
Hola, Will do a bit of MIDIbox soldering (and photo documentation :-)) in the next time, so I thought I´d share a small tip upfront... If you were ever soldering, you probably also experienced Murphys Law, stating that solder fumes, that rise up, are always going to fly directly into your eyes, nose, mouth or other facial parts :-). Was annoyed because of this and had a look around on Reichelt, looking for Solder Fume extractors. I found some in the price range of 30€ - 900€s... The most important part of these were the carbon filters, that will (to a certain extent) bind the solder fumes... You can also buy those filters as spares directly for only ~ 5€... http://www.reichelt.de/Fume-Extraction/FILTER-426-3/3//index.html?ACTION=3&GROUPID=4135&ARTICLE=87380&SHOW=1&OFFSET=500& And if you have any old 120mm PC fan and a 12V power suppy at hand, you are in luck, because it is really easy to build your own fume extractor from these parts - which of course does not meet any industry workplace safety requirements, but will keep those solder fumes out of your face :-). For this project, I strapped two of those filters behind the old PC fan with rubber bands - works nicely and also cleans the air from old pizza scents... :smile:. Further DIY tuning is possible - you could integrate a LED solder-area-lighting, improve the air intake, or build a better footstand (elevate the fan a little bit to improve efficiency). For now, it works well for me - let me know what you think - or post pictures of your own DIY solder fume extractors :-) Hope you enjoyed this quick tip - happy soldering, everyone! Peter
-
Bonjour à tous, Après deux ans d'absence, les Apéros Bidouille font leur grand retour à L'hybride à partir d’octobre 2013, avec, on compte sur vous, des propositions encore plus extravagantes ! Les Apéros Bidouille sont des rendez-vous pendant lesquels on peut venir présenter ses bidouilles. On entend par là des petites réalisations D.I.Y., ébauches et/ou assemblages d'objets, détournements, programmes fourbes, techniques loufoques, qui sont tout frais, ou bien en chantier quelque part, ou à qui il manque encore des bouts (mais c'est pas grave), ou qui dorment dans un tiroir depuis des mois faute d'occasion de les sortir. On a déjà vu un frigo qui distribue de la bière, une balle qui fait du son quand on la bouge, des tourne-disques à larsen, une chorale de voix de synthèse, des concerts de cassettes, une imprimante 3D pour produire des pièces et plein d’autres bidouilles… Ces apéros sont aussi l'occasion de se rencontrer et d'échanger des idées, des projets, des contacts autour d'une bière, voire deux. C'est aussi intéressant pour ceux qui ne bidouillent pas, ils peuvent se moquer des bidouilles qui ne marchent pas ! C'est ouvert à tout le monde, n'hésitez pas à proposer votre bidouille dès maintenant, il faut juste envoyer un mail à honorine@rencontres-audiovisuelles.org L’hybride – 18 rue Gosselet, Lille – www.lhybride.org Retour en images sur l’Apéro Bidouille d’avril 2011 : http://vimeo.com/22285358 N'hésitez pas à partager l'info ! Merci et à bientôt :)
-

Project: Bulding the case - status: Started :-D
technobreath posted a blog entry in TB's MIDIBox Adventures
EDIT: I deleted the old pics from the blog, and replaced them with lower resolution ones, so it doesn't take ages to load with internet speeds I take for granted :P hihi. Finally! :sorcerer: The case build has started! Keep in mind when looking at these pictures: The actual case is going to be cast with fibreglass, and this is only the wood model wich is gonna be used for making a mold. So this is a L O T of work! I have shot tons of pictures during the work, and some of them make it in here :thumbsup: : Drawing up some drafts with dimensions to bring with me to the workshop. Drawing up the bottom plate on a piece of 15mm plywood. A must have tool in a wood workshop - this has served my grandfather before me for many years! Another must have tool in a workshop - as the bandsaw, this has also served my grandfather for many years before me! Drawing currently in use on the wall with the ensemble of screwdrivers :). A must have tool for making stuff like this - for transfering angles. Angle transfered from one side to the other. The bottom panel under the bandsaw - yes I was already finished with it, I just had to shoot the pic of it there, because it looked cool. Sanding the sides. It isn't easy to cut to the final shape with the bandsaw, so, for not spending 10 minutes on each cut, I speed through it and sand it a little bit afterwards. Also, yet another must have tool - not only for acurate measurements (wich is not the case at all working with wood as u don't measure plywood in 1/10 of a millimeter anyway) but also great for transfering measurements quickly! A lesson in: How to cut plywood with a worn-down bandsaw blade? Short story: DON'T! Long story: My brother in law had used the bandsaw for cutting aluminum window shaders to size some days before, and left me with a totally distroyed blade. If I knew, I would have gotten a new one, but none of the shops who has them was open on saturday :angry: The "cable cave" on the back. AND - I had my head under my arm or something, because the first cave-frame wasn't high enough - fixed with yet another layer of plywood. Backside of the case taking form. Inside just thrown together - doesn't matter at all, since it's only support for the mold making process anyway! Setting up some support ribs inside. These also has the right angle for the front panel to just lay on top of them. This way I can easily make the sides and the rest of the case, without having to think about getting all the angles perfect before mounting the front panel plate. Front panel cut to shape - almost. The horn on the front is gonna have a steeper angle, see the 3D drawing. Here, the angle for the front panel is clearly showing. A carved out angle on the bottom front. Used one of those machines you sharpen knifes with to carve this out, and sanded it afterwards to final shape - in lack of a better tool I had to improvise! A final picture together with a lighter, so u guys can see the approx. size of the whole thing. Roughly 20x40x10cm. Hope you like it so far. Will post more pictures when I build more. No more work today on this, as this has taken me about 8 hours of work. A lot of sanding and making sure the 90 degree angles are correct - if they are not, the mold won't release from the model! Have a great evening / morning! Technobreath