Search the Community
Showing results for tags 'synth'.
Found 10 results
-
All about midibox TIA ! Hi everybody, I'm sorry for the wait, some of you would not believe it. But. Here we are! You will find on the wiki all the "Cartridge" completed. Some of you will find their nickname in the bulk order list. If you still wish it, complete the options if not erase your line. And I will calculate final price for each one of you asap. Best regards Antichambre
-
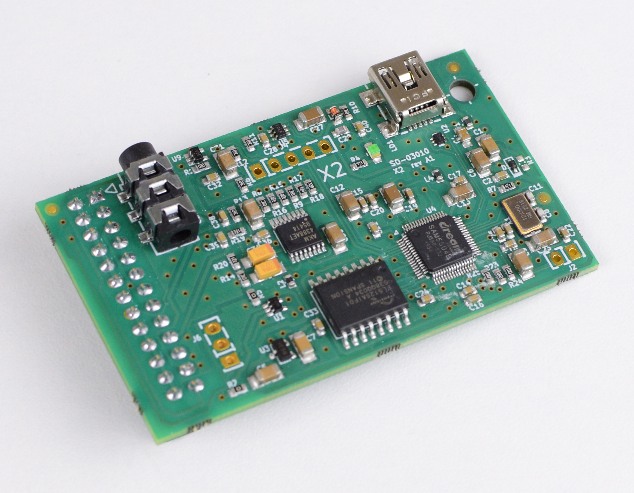
Hi all, my MIDI electronics experiments started long long time ago, with a PIC based MIDIBox... I sometimes peek at the midibox site (I am mostly on vogons forum these days), but now it is really time to post again ... :-) I proudly announce my latest project, a successor for X1 : X2 !! - Small form factor midi PCB : 65mm x 38mm size - Waveblaster compatible connector for use on sound cards and DIY projects. - Dream 5000 series synth chip with 81 voices polyphony - Super low latency <1ms - 64mbyte flash for soundbank data - USB MIDI in (Class compliant midi device, works on Windows XP without drivers) - stereo line out using a high quality 24 bit DAC (3.5mm stereo connector) - Preloaded with a high quality 16 megabyte Dream General MIDI soundbank (http://dream.fr/pdf/Serie5000/Soundbanks/GMBK5X128.pdf) Running very well already with old games, still working on the software to add some features allowing to tweak more. I expect to have a batch of these ready by december :-) I should make some recordings soon. What do you think ?
-
Hi, for the past few weeks I have been looking at development boards as a base for developing audio/music projects. I almost decided on an STM32F7 discovery board until I found out about the MIDIbox NG. This board with its STM32F4 module looks ideal for what I want to do but I have two major questions before I can decide. I'm currently trying to learn as much as I can about MIOS and trying to find related threads on this forum but in the mean time all the help would be greatly appreciated, thanks! 1) Can I use a capacitive touch screen with the MIDIbox NG ? The projects I want to develop will make use of capacitive touch displays from 4.3” up to 7”. Either directly driven from the board or by using an intelligent display like those based on FTDI's EVE or Nextion. But I can't find any example of this, which makes me wonder if it is possible at all ? Would this mean I should write my own driver for MIOS for the screen, or could I use existing drivers and STM32 libraries for this, or even integrate GUI frameworks like µGFX, touchGFX or embedded wizard, etc .. with MIOS ? And how difficult would that be ? Or is MIOS not really designed for this and should I better look into MPU/Linux based solutions? 2) From what I understand so far, MIOS is mainly a MIDI control/processing OS, but how suited is it as a base to develop your own synth for instance? Are there any limitations or can you basically do anything you could do on a barebone STM32 board and thus use all its code examples, libraries, dev tools, toolchain ,etc ? I guess what I'm asking is, how well does MIOS and it's amazing features integrate with your own code or can you only use API functions? How transparent is it and does it impose limitations ? Are there currently projects like these (synths, Eurorack modules, etc ..) that are based on MIDIbox that I could check out to get an idea what is possible? (I've been looking at the MIDIbox gallery and there are some truly extraordinary devices, but most seem to be controllers and I haven't yet found anything with a touch GUI) Thanks!
-
Not using MB hardware but still did some sounds with originall C64.
-
Hi, my plug-on board dreamblaster X1 is finished now. Same pinout as the smaller S1 some use in their midibox, but much more features and larger soundbank. I sent one to Phil in Australia (3 weeks underway in post !), and now he finally made I nice review. Even though it is not a midibox, and closed source (requires NDA to buy their dev kit), I proudly want to show it to you here. I will be starting my next project for 2016, with a dream chip, ideas welcome !! Greetings, Serge
-
Hi all! I've been a midibox dabbler for a few years now, but am looking to put the MBHP to work in a new project. So essentially what I'm building is an organ from scratch. I am building my own cabinet, and am using this organ project as a sound source. http://bolltone.de/Projekte/PropB3/PropB3_US.html I am using 2 of them, each with 17 midi CCs controlling the various parameters. In the style of old lowrey's and such I plan on putting a couple synthesizers inside of the organ as well with CC controls for some of their parameters. I like the look of the MIDIIO128 because it has a midi file player and can support up to 64 potentiometers (i'll be using all 64 inputs for drawbars and various pots for parameters) and lots of buttons. The keyboards I am using for each of the manuals are these mini 44 key casio keyboards in a 4x11 diode matrix. Is a diode matrix possible on a midiIO128? Is it possible to send each matrix to a different midi channel and change this in the menu? Ex Manual 1 on organ sounds on channel 1 and manual 2 on midi channel 2? What types of modules (DOUT, DIN) etc would be necessary to complete the project? My current requirements are: 64 Pots At least 88 key switches, ideally in a matrix to keep the number of wires down. I'd like to have some other buttons for changing the octave, midi channel etc. The ability to change channel for each manual. Sorry for all the questions but the newer midibox platforms have me a bit confused. thanks Nate
-

MB TIA Cartridge 1e Build 1b ... Coming soon ;)
Antichambre posted a gallery image in Members Gallery
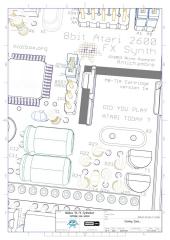
From the album: MB-TIA Cartridge
-
I heard about MIDIbox some time ago from a dear friend. Not realizing its potential at the time, it ended up somewhere in the back of my head. However, now that I am planning to build an analog(ish) synthesizer, I can start to see attraction of the system. My question is this: How much will the CORE_LPC17 board be able to process at a time? Here follows a list of functions: Scan a 49 key keyboard, using a six-bit polyphonic decoder. (Requires six Douts and one Din) Mix note events from the keyboard into the external MIDI stream. An internal clock, with tempo derived from either a pot or tapping. A basic arpeggiator with the following functions: Up, down, up-down, down-up, random, or order pressed modes. Run over 4 octaves. Semibreve, crotchet, quaver, semi-quaver, etc... based on clock input, from either the external input or the internal clock. Gate length (PW) controlled via pot. Output a CV, a gate, and clock pulse (to LFOs) Potentially a MIDI output, combining the data from the original MIDI stream, the keyboard, the internal clock (if being used), and the output from the arpeggiator on a separate channel. I think that is all for now. Shall write back if I remember something else... So, would the core board be able to process all of this simultaneously? Regards, Steve.
-
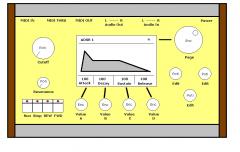 This is my first case-design for my synth "WAVE 1"
 -

Project: Bulding the case - status: Started :-D
technobreath posted a blog entry in TB's MIDIBox Adventures
EDIT: I deleted the old pics from the blog, and replaced them with lower resolution ones, so it doesn't take ages to load with internet speeds I take for granted :P hihi. Finally! :sorcerer: The case build has started! Keep in mind when looking at these pictures: The actual case is going to be cast with fibreglass, and this is only the wood model wich is gonna be used for making a mold. So this is a L O T of work! I have shot tons of pictures during the work, and some of them make it in here :thumbsup: : Drawing up some drafts with dimensions to bring with me to the workshop. Drawing up the bottom plate on a piece of 15mm plywood. A must have tool in a wood workshop - this has served my grandfather before me for many years! Another must have tool in a workshop - as the bandsaw, this has also served my grandfather for many years before me! Drawing currently in use on the wall with the ensemble of screwdrivers :). A must have tool for making stuff like this - for transfering angles. Angle transfered from one side to the other. The bottom panel under the bandsaw - yes I was already finished with it, I just had to shoot the pic of it there, because it looked cool. Sanding the sides. It isn't easy to cut to the final shape with the bandsaw, so, for not spending 10 minutes on each cut, I speed through it and sand it a little bit afterwards. Also, yet another must have tool - not only for acurate measurements (wich is not the case at all working with wood as u don't measure plywood in 1/10 of a millimeter anyway) but also great for transfering measurements quickly! A lesson in: How to cut plywood with a worn-down bandsaw blade? Short story: DON'T! Long story: My brother in law had used the bandsaw for cutting aluminum window shaders to size some days before, and left me with a totally distroyed blade. If I knew, I would have gotten a new one, but none of the shops who has them was open on saturday :angry: The "cable cave" on the back. AND - I had my head under my arm or something, because the first cave-frame wasn't high enough - fixed with yet another layer of plywood. Backside of the case taking form. Inside just thrown together - doesn't matter at all, since it's only support for the mold making process anyway! Setting up some support ribs inside. These also has the right angle for the front panel to just lay on top of them. This way I can easily make the sides and the rest of the case, without having to think about getting all the angles perfect before mounting the front panel plate. Front panel cut to shape - almost. The horn on the front is gonna have a steeper angle, see the 3D drawing. Here, the angle for the front panel is clearly showing. A carved out angle on the bottom front. Used one of those machines you sharpen knifes with to carve this out, and sanded it afterwards to final shape - in lack of a better tool I had to improvise! A final picture together with a lighter, so u guys can see the approx. size of the whole thing. Roughly 20x40x10cm. Hope you like it so far. Will post more pictures when I build more. No more work today on this, as this has taken me about 8 hours of work. A lot of sanding and making sure the 90 degree angles are correct - if they are not, the mold won't release from the model! Have a great evening / morning! Technobreath