mongrol
-
Posts
241 -
Joined
-
Last visited
-
Days Won
5
Content Type
Profiles
Forums
Blogs
Gallery
Everything posted by mongrol
-
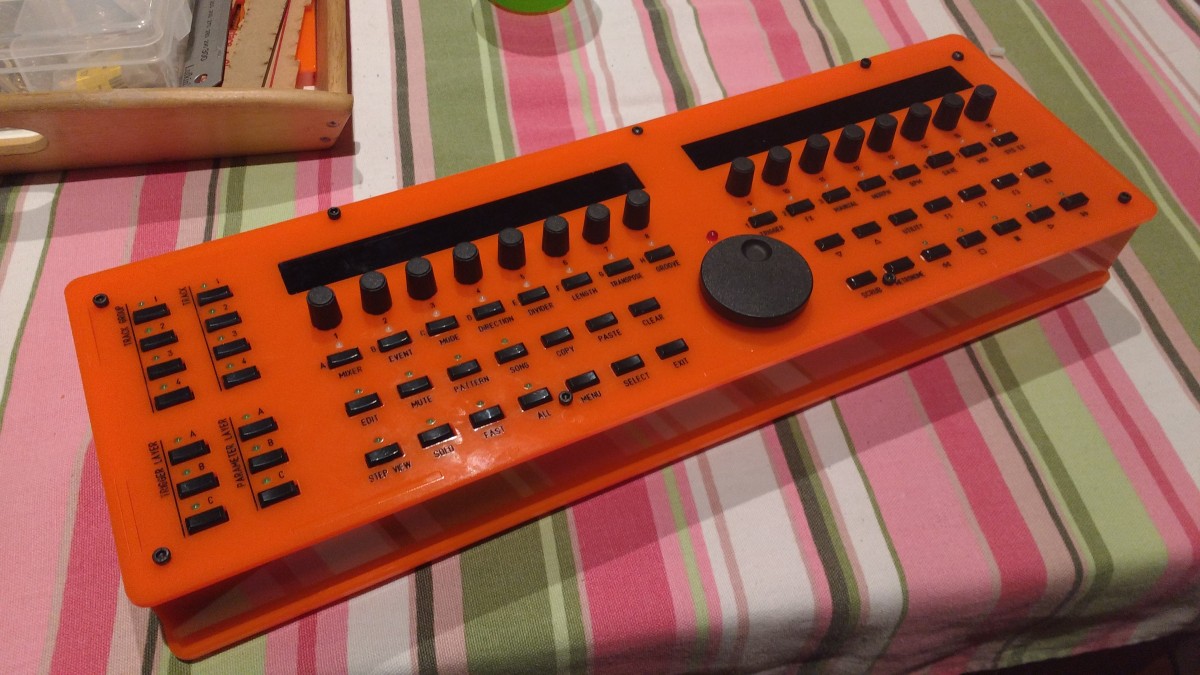
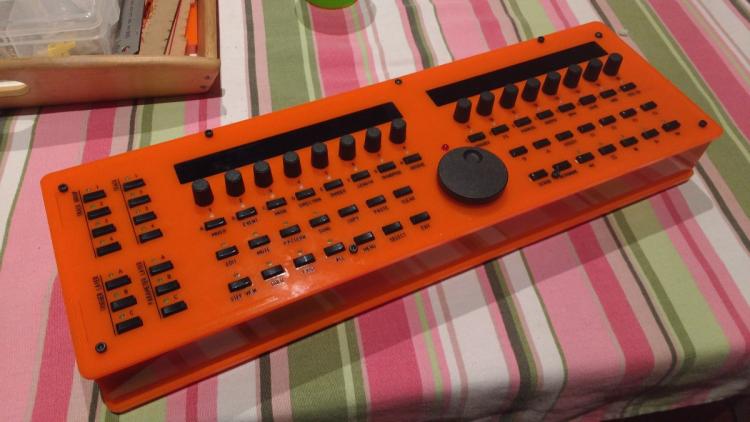
#6 Finished Here's the finished result fully assembled with dark grey tinted glass inserted. I don't gig so these just sit in instead of gluing with acrylic glue. I've tweaked the glass template so future cuts may snap in tighter. OrangieBoomTish! Thanks go to some named person who I've still neglected to credit properly in all my threads for the initial Ponoko panel template. :)
-
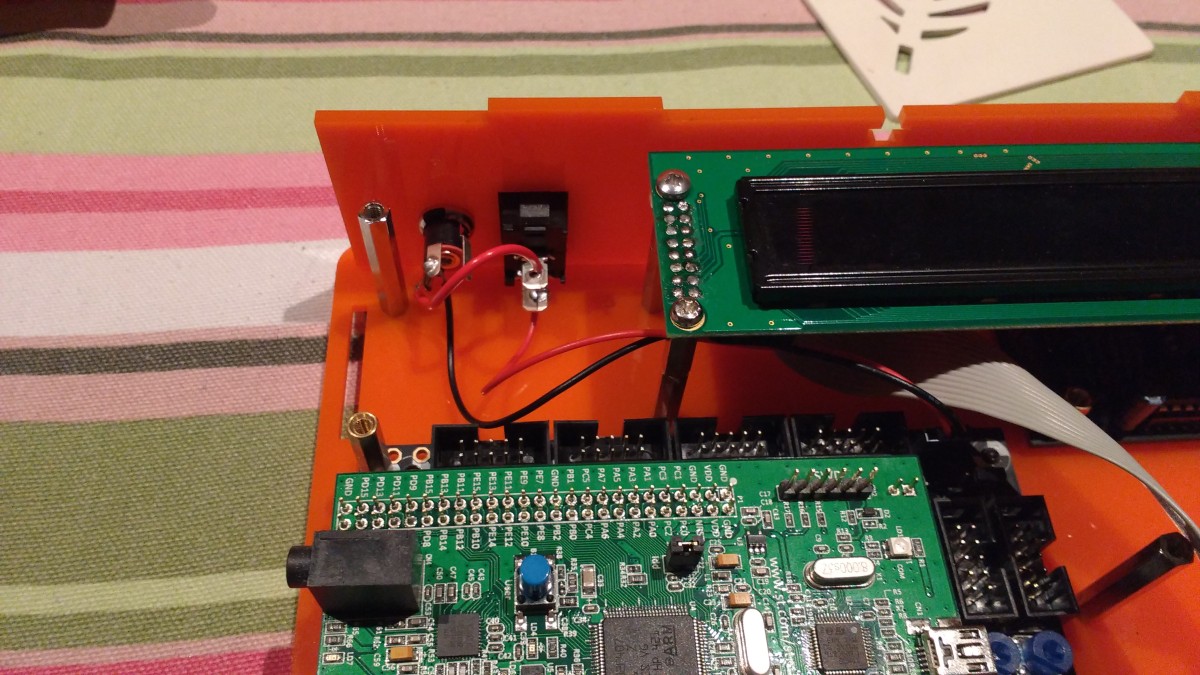
#5 Power Socket and Switch teUSB power for the SEQ is rubbish. It ties up a socket that could be driving a synth (more synths!!!) so Mongbox comes has a back panel option with switch and DC socket holes. These are fairly standard 6mm DC jack and a 19x13mm rocker switch. Make sure you remove the USB power jumper Ensure your external power supply is 5v only. STFM04 won't take more. Get the polarity round the right way. Route the positive through the switch.

-
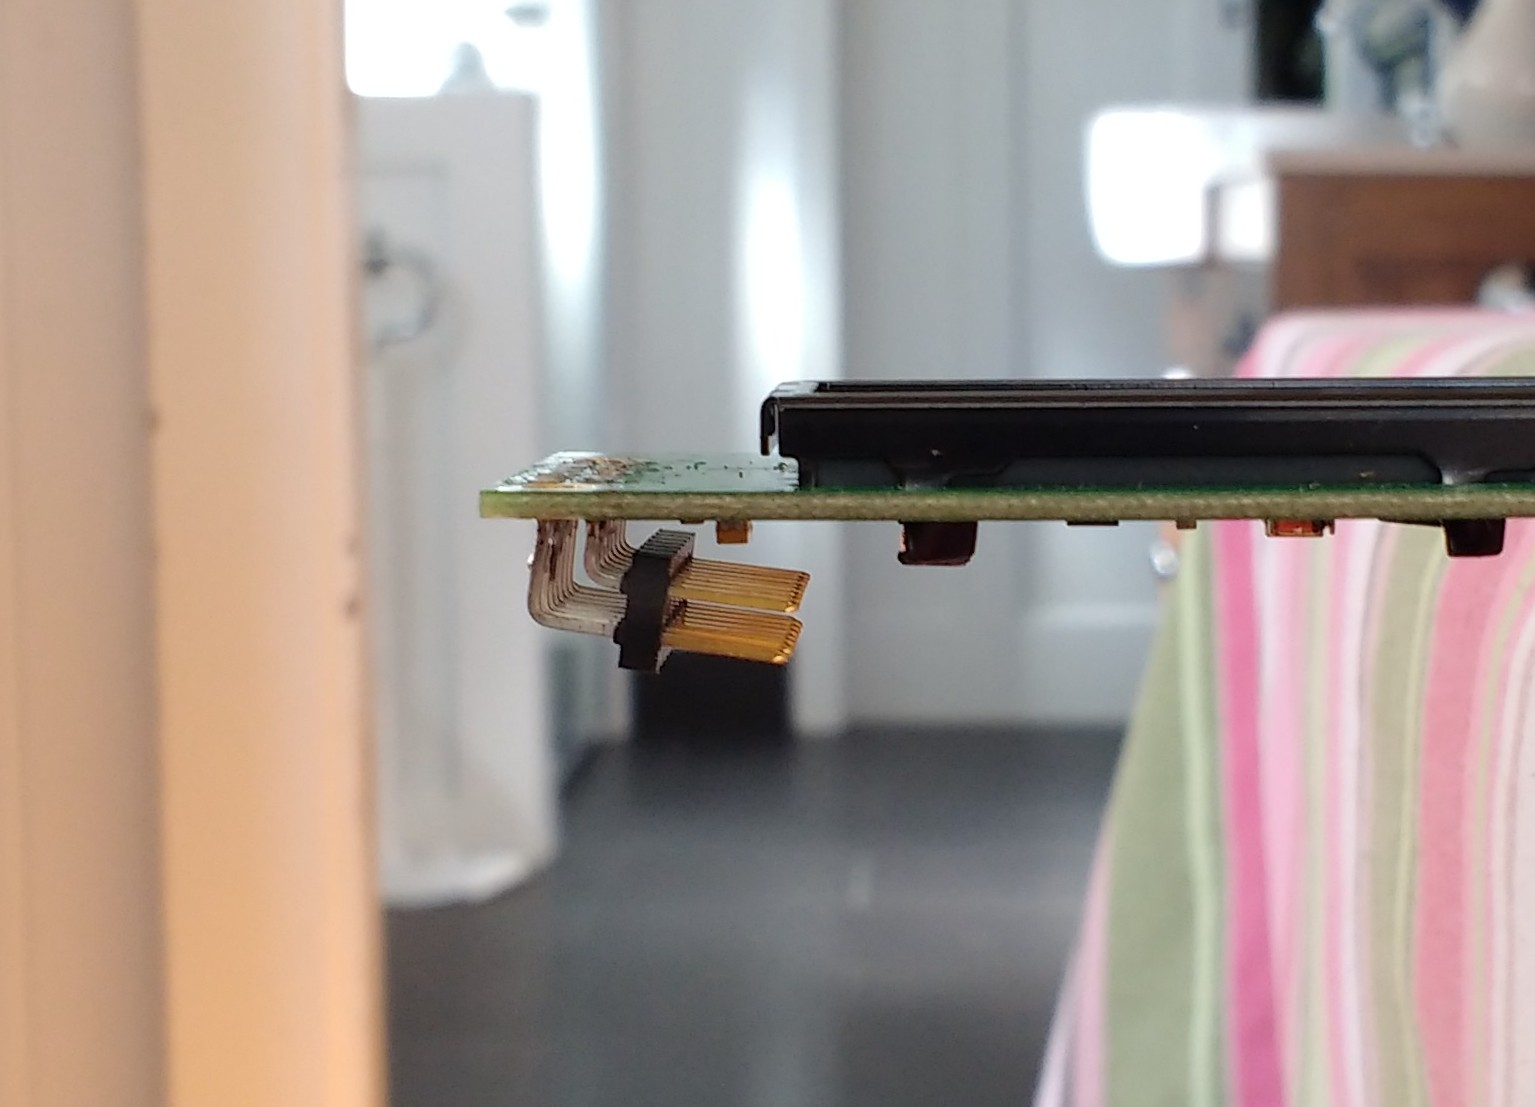
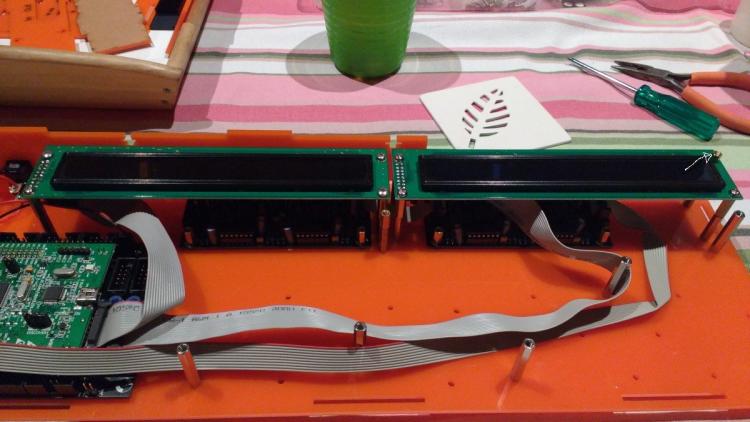
#4 Displays This is where a custom part comes in. The displays sit on top of 35mm stand offs in order to not having any bolts on the top panel. However, this means the standard vertical IDC connector can't fit between the standoffs. So we need to fit an angled one, and it needs to go the right direction. These are just as common as vertical ones and can be picked up at mouser or any leccy store. Observe the angle of the pins. They aren't quite right angled but point down a little. The is to allow the IDC female socket connector space to fit between the pins and the PCB which sometimes has little springs or other components. Tips Solder the pins in place with a female socket connector on the pins. This ensures proper clearance from the display PCB If desoldering existing vertical pins be GENTLE and SLOW. Oled's especially DO NOT LIKE HEAT. Snip the pin array into little separate pins and desolder carefully. Here they are mounted. Note the 5mm standoff on the back right corner.

-
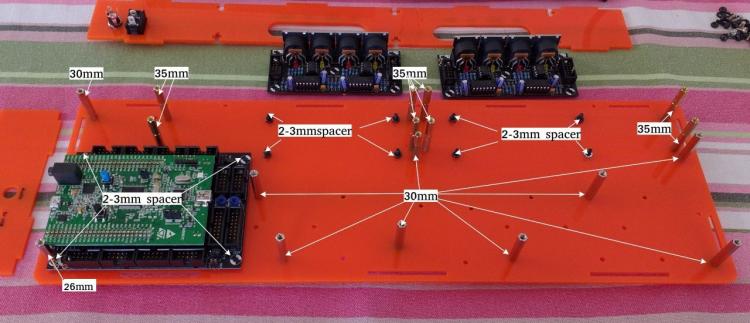
#3 Base Layout and Standoffs The core sits on the left with the 2 MIDIIO's underneath the displays. The top panel only has holes for the corner standoffs and 2 along the long sides (rear panel are keyhole nut/bolt style). All the other holes can be used to hold the Wilba CS upwards without being exposed on the top panel. I only use the ones in the picture below but there are plenty spare if you like that extra structural stability. You can use a 30mm to CS then 10mm (male downwards) standoff to top panel. This gives good rigidity without needing more holes in the top panel. Recommended if you're a gigger. Fixings detail The Core and MIDIIO's are on 2-3mm spacers. I use m3 nuts. All CS standoffs are 30mm with the exception of.... ...the front left standoff on the core is 26mm (3mm spacer + 2mm core + 1mm washer + 25mm standoff + 2mm CS + 10mm = 42mm) From the CS to the top panel you need 10mm standoffs. This gives nice clearance for buttons. You can experiment here. The displays sit on 35mm standoffs. The back right display corner needs a 5mm standoff/spacer to the top panel. This is a corner bolt. Other Notes The sides are 43mm high. All my standoffs are female both ends with the exception of the 5mm LCD->Panel which is male downwards. Plastic spacers can be used instead of hex standoffs but are hella tricky to insert. Ensure everything is tight. You have multiple parts screwed end to end. A middle one could come loose and spin leaving you stuck on the outside.
-
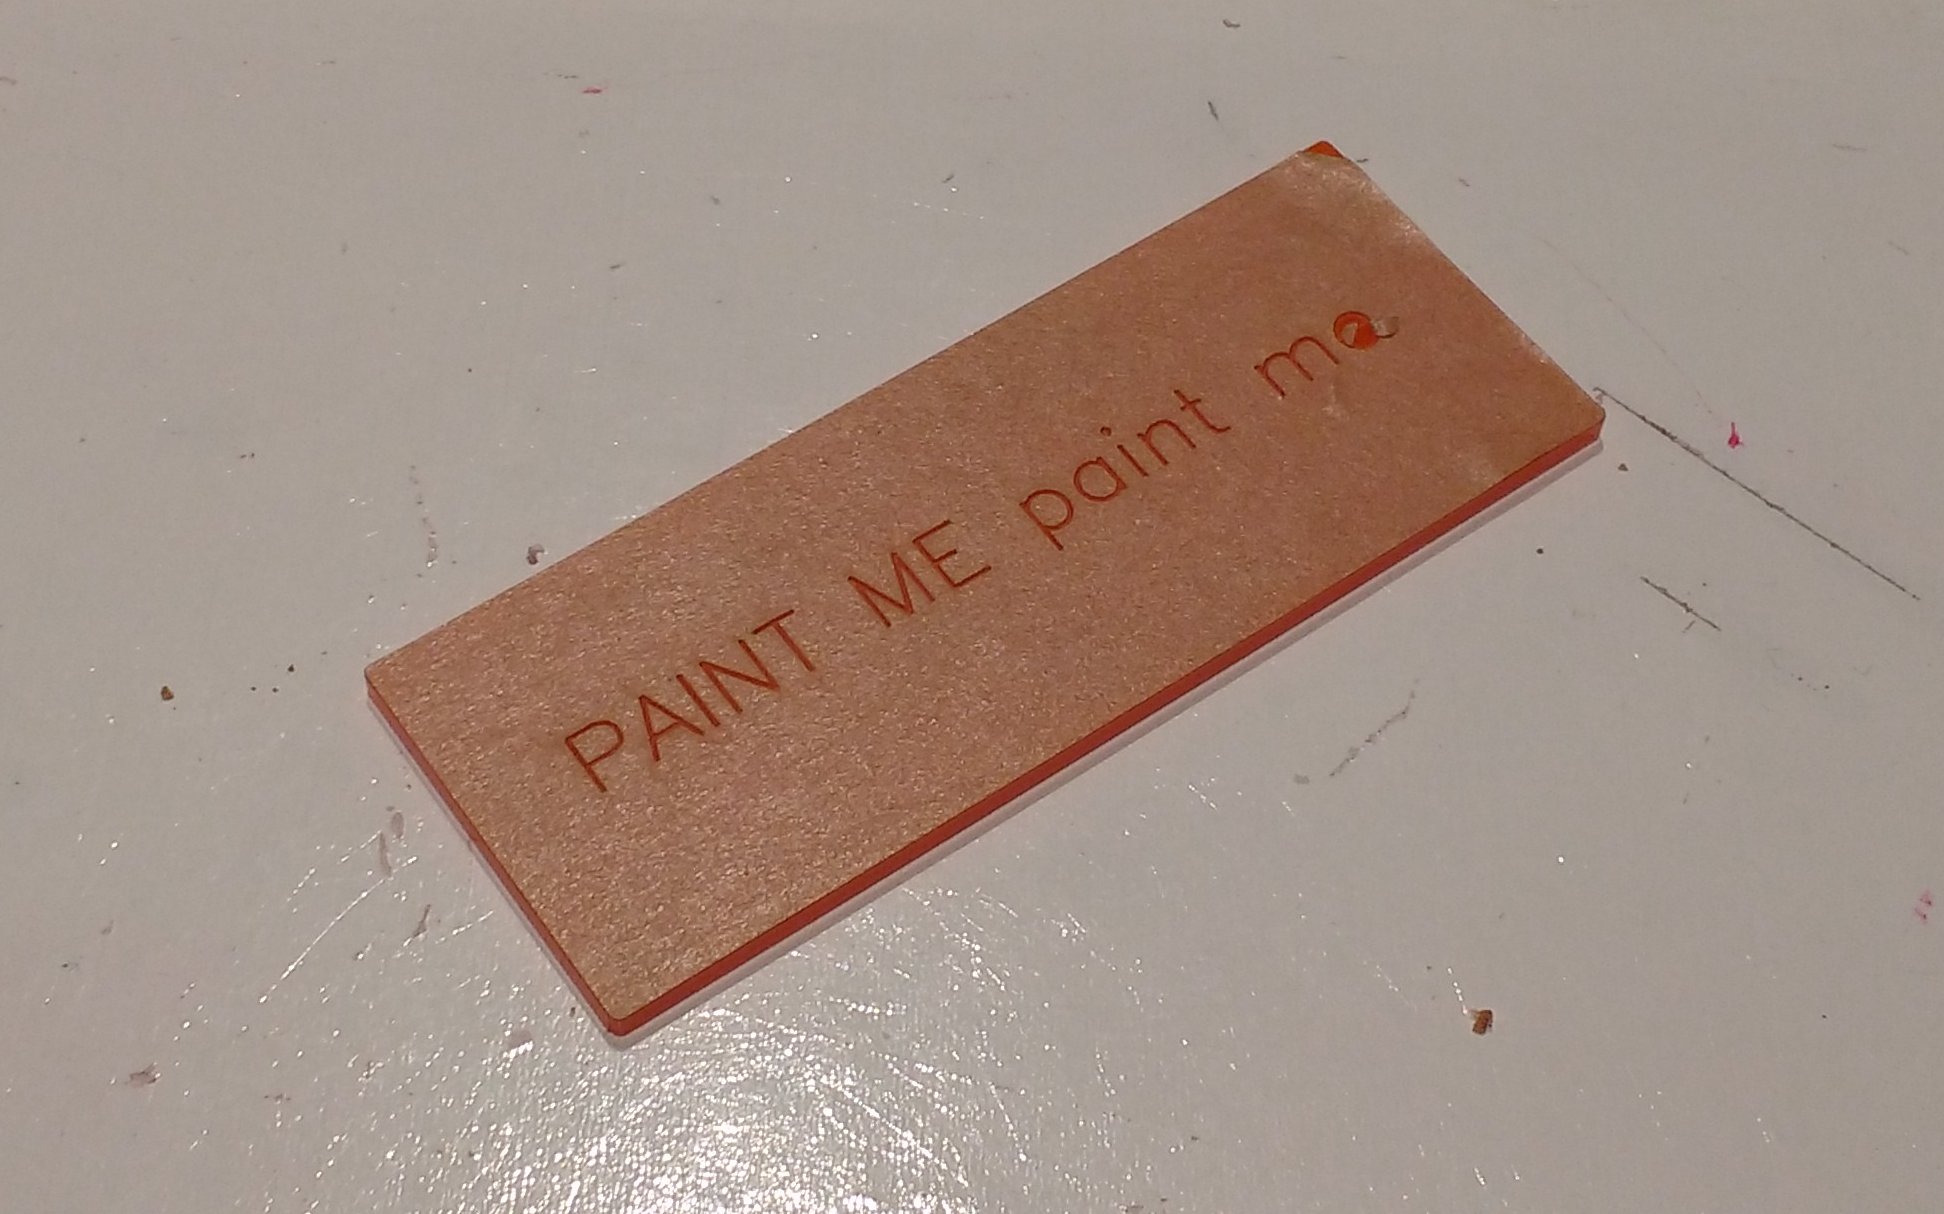
#2 Painting The template includes a handy "Paintme" piece for you to practise painting the engraved labels. The last time I used hobby enamel paint and it worked great. Paint over the engravinga, wait a minute for it to dry a little then wipe over with a nail polish remover (acetone) on a soft cloth. Generally you need to do this about 3 times to get a good fill. I've tested painting with both paper on and paper off. The results are almost identical but the process with the paper on is so much faster. Don't be afraid to dollop the paint on. It'll dry in and you'll have a good fill. Peel the paper off and scratch off the little letter loop paper dots with your nail. Borrow someone with nails if you don't have any. Children are good for this. Afterwards you'll probably find little artifacts where the paint is thin. Paint over these, wait a minute then wipe off the excess with some paper towel and nail polish remover (acetone).


-
COMPLETE Hi All, In my build thread I designed and built a Ponoko enclosure and promised to make it public with a proper thread on it. That enclosure had some bugs which prevented me doing so until I'd revised and verified the design. So here it is. Nearly. This enclosure is designed to reduce the amount of screws exposed on the top panel as much as possible without deviating too far from the original Wilba/Midibox design. To make it fit you will need some extra parts listed below. It comes with an option for rear panel power switch and socket cutouts. Also included is a "Paintme" piece for testing label painting. Parts Required All screws, spacers and standoffs are m3 (3mm thread) 10mm screws and nuts. I like black hex socket heads. 1x 25mm standoff (f/f) 1x 5mm standoff (m/f) Many 10mm standoff/spacers If using 10mm spacers beneath top panel you'll need 20mm screws to reach the standoffs under the CS) 4x 35mm standoffs 2x 10pin angled IDC male connectors Note: You can make up standoffs from smaller lengths. Buy a kit from ebay around 200 pieces for <$10 SVG's on Github https://github.com/mongrol/mongbox_enclosure

-
Thanks jjonas, somehow I missed that bit in your guide. Note Save & Take over patterns enters the current pattern set (and saves it) in the pattern mode slots, A1, B1, C1 etc. and it enters it in the same song slot (A1, B1, etc). It's not the same as "Take Over Patterns" which enters it in the currently selected song position. I've just tested the ToP and it's very nearly a Snapshot as it correctly copies the mute states into the selected song slot. The following long would enhance it even more. Advance song position to next blank position (End position?) If mixer map has changed from previous create entry with current mixer map Advance song position Take over patterns to position. A default loop x option would be handy which sets the song slot to play X number of times. Thoughts anyone? I'm trying to make a song workflow that gets a start to end song draft down as fast as possible with minimal interruption to the creative flow. Also hopefully with minimal development effort.
-
I've noticed in the Song mode there's already something existing that's almost Snapshots but not quite. Pressing SELECT in song mode brings up a utility menu with options on the right screen called "Takeover Patterns" and "Save & Takeover Patterns". I can't figure out what takeover patterns does as the manual doesn't elaborate it but "Save & takeover patterns" save's the current mutes, mixer and patterns into one of the bank slots. It's not quite snapshots though as you only have 16 bank slots and a manually written song sequence could be much longer than that. This function could be tweaked a bit to provide a more fluid workflow. I shall read and think and come back.
-

[success] Project: MidiBox SEQ V4 with Standalone LaunchPad Pro as BLM
mongrol replied to sylwester's topic in MIDIbox SEQ
Cool. I presume this uses the Pro's open firmware API that was released? Did you reuse any MIOS BLM code or have to reimplement from scratch? (Now how to we scrape the labels off teh round buttons and light them up? :) ) -
Check the data sheets of your caps and knobs to see what size button and pots are needed. Also with knobs they will be Spline, or D-shaped. Then find the pots and buttons you like and check their datasheets to ensure your caps and knobs will fit. With knobs check the depth/height of the stem as well as the diameter.
-
I don't know why the data wheel is involved in this. I'd rather use the data wheel on select step but for some reason I need to have it on select page(?) in order to do ramps beyond 16 steps. Would be nice if it was decoupled entirely from this functionality.
-
What is your BEST DIY synth? (open DIY project)
mongrol replied to DCO's topic in MIDIbox User Projects
Currently my own Mongiloti but I've yet to get the best out of it. And really it's just a midi controller with an Axoloti inside. I also have an Ambika with 2x4p and 4xSMR filters sitting in a box waiting to build. Really look forward to that but need to finish other projects first. More time... MORE TIME!!!! -
No. Mutes are set as an "action" in the song structure. See the manual under "Song Page" for possible actions. Basically you add a "mutes" action, set your mutes then add a x1-16 action to play the designated patterns x times. http://ucapps.de/midibox_seq_manual_m.html
-
Social Entropy's Engine sequencer has a nice tool called "Snapshots". Snapshots are an entity type (along with Patterns, Chains, Songs etc) on their system that gives a pretty fast way to generate song structures. Simply, you get a loop running with whatever track configuration you like and press "Snapshot". It then saves all the track config, mute states etc in a "Snapshot" object. Tweak away, change some mutes, or track config (channels, FX, etc) and press Snapshot and you get another save point. You can recall these snapshots back again and it instantly recalls the track config states. Handy... To me the real magic, though is in song mode. There you can recall snapshots as song patterns and chain them together. It's a fast way to play live, take snaps on the way then quickly chain a song together. Now, I don't want an Engine when I've just bought a Midibox. So how could we get similar functionality? The Seqv4 doesn't have a concept of Snapshot, and probably doesn't have the memory for it either, but we could fake or borrow the concepts to do something to make song generation easier. Knock up your tracks in phrase mode, set your mute states, feel the groove and press "Save <something" Seq saves a pattern Seq adds a song step of current mute states Seq adds a song step of x4 and the current pattern groups (x4 is defineable to other lengths) Tweak your loop, mute states, FX, up that groove big daddy'o! Press Save and GOTO Step 2. That could be doable without Seqv4+ and would be a much faster method of song generation without taking you out the zone.
-
https://www.kickstarter.com/projects/paulstoffregen/teensy-35-and-36 I'm a big fan of Teensy but this one somehow sneaked past. I was reading the cryptically named K66 Test thread on the PJRC forum but I haven't seen an announcement anywhere. Anyhoo. Nice bump in specs for the wee maker marvell.
-
Hmm, thats quite different from me. I've been influences by the midi channel numbers of my synths andkept the tracks with roughly the 1-16 channels. Tracks 1-4 A-90 Piano (4 part multitimbral so channel 1-4) Tracks 5-8 5 - Volca Keys 6 - Microbrute 7 - Axoloti Tracks 9-12 9 - Micromonsta 10 - LXR So really I have 3 active patterns at one time and tend run them sequentially. Use a few unmutes then roll everything over the A2 for next song section. Then A3 for another sections. (I don't hold with verse, chorus etc it boxes you in) So if we look at the pattern sequence with mutes it could be something like this; Start with piano and drums. o*** **** *o** **** 4x A1, A1, A1, A1 oo** oo** *o** **** 4x A1, A1, A1, A1 oooo ooo* *o** **** 8x A2, A2, A1, A2 **oo *oo* *o** **** 4x A2, A2, A2, A2 etc.... I find patterns groups a bit confusing. Hopefully SEQv4+ has enough ooomph to do away with them. :) P.S. I realise my channel alignment is silly. I can't be bothered changing it. P.P.S. I sequence drums on the LXR and use program changes to drive pattern switching (Brendan Firmware) and use MB for one shots, rolls etc.
-
Thanks TK.
-
Hi, I've noticed that CC tracks, once enabled send the CC layer value every step that has gate enabled. This means that whenever you enable a step you have to adjust the CC to the value you want, even if it's the same as the previously set value. This is a bit disruptive to workflow but may be mitigated a bit by using ALL to set an initial value for all steps in the track. However, it also does this with PrgCh's which isn't what you want at all if you have a slow changing synth. If these tracks had a default position of Null meaning don't send data unless specifically set to a value, instead of the current situation it would help a lot. I had great fun forcing my A-90 piano to prgch to a random patch every step for 256 steps at 200bpm. :)
-
Welcome Mr Hubbard. I'm not going to comment on whether that all fits within specs, someone more knowledgeable can do that. It kinda looks ok me. Nice to see you're pumped but I will say the usual disclaimer. Midibox building is a journey, it takes time and patience but is very satisfying. There's lots of hints and tips on the forum (check the build threads in Hints and Tips) to get you round all the little intracicies you'll encounter during the build as part choices come and go and forum posts stay frozen in time. Here's some tips; Read everything you can in recent build threads Research part choices carefully. One forum post may sing the praises of something then 2 months later there's a gotcha. (e.g. Encoder choices, buttons etc) Beware of feature creep. Some tiny little mod later in your design can have huge impacts and set you back weeks. Cases are expensive. This can easily be 50% of your time. Oled's are great but expensive and don't like heat (talking from experience). Muse on Plancks length and solve problems quicker than Watson[IBM] while soldering. Have fun!
-
Is there a knurl shaft version of those encoders? Looks great bit a odd with D shapes and no tops.
-
Ah sussed it thanks. My Datawheel option was set to Cursor instead of Stepview. As soon as I changed it I could do ramps outside of 16 steps. Looks like there's a bug with Cursor as when you try to move outside the 16 steps, even using FF and twist a step, it only changes the original 16 steps even though the view indicates your somewhere else. With stepview enabled the All ramping works perfectly.
-
Hi Folks, I really need some help doing fades (ramps?) on the SEQ as I find the current methods quite clunky and unintuitive. Take a simple volume fade-in. The way I see it I could map the LFO to CC7 (in my case) and do a one shot. I really struggle with this getting the parameters right, offset, step etc. I always end up with a fade in then fade back out. I could also use the CC track. But this means manually creating the fade every step which is awful if your track is longer than the visible 16 steps. This way also means the fade resolution is per step. Not good. My ideal method would be to set a CC step at teh fade start, then a CC step at the fade end and have the SEQ automatically calculate the fade on the fly between the two points and at substep (ppq?) resolution to smooth the fade. It could also have a number of different slopes (linear etc). I keep thinking I must be missing something obvious as the current methods are so clumsy to me as to be almost unusable. How do others do it?
-
Some virtual mapping layer defo seems like the way to go. The world can never have too many API layers.