dwestbury
-
Posts
274 -
Joined
-
Last visited
-
Days Won
26
Content Type
Profiles
Forums
Blogs
Gallery
Everything posted by dwestbury
-
To the best of my knowledge, the only relevant analog aspect of the SID is its filter. https://en.wikipedia.org/wiki/MOS_Technology_6581 "...Each voice may be routed into a common, digitally controlled analog 12 dB/octave multimode filter..."
-
@Rio I totally agree. it seems that Martin from Retrocomp is really looking out for Midiboxers with a solution like this. I've just learned that there's a special ARM2SID firmware in beta testing for use with synths like the MB-6582. Apparently it will support even faster chip addressing for performance and it completely disables the auto-dual-mono-switch, which doesn't make sense for synths which require full time stereo (e.g., dedicated left and right SID channels). I've asked for early access to it, so I hope to find some time to test it out. Cheers,
-
Hello @6040 ... The measurements on your panel design look correct when I use the caliper in KiCAD's PCB tool, so you should be good to go. You may also want to connect with @Manu29 since he's gone ahead and produced a panel set based on this design already.

-
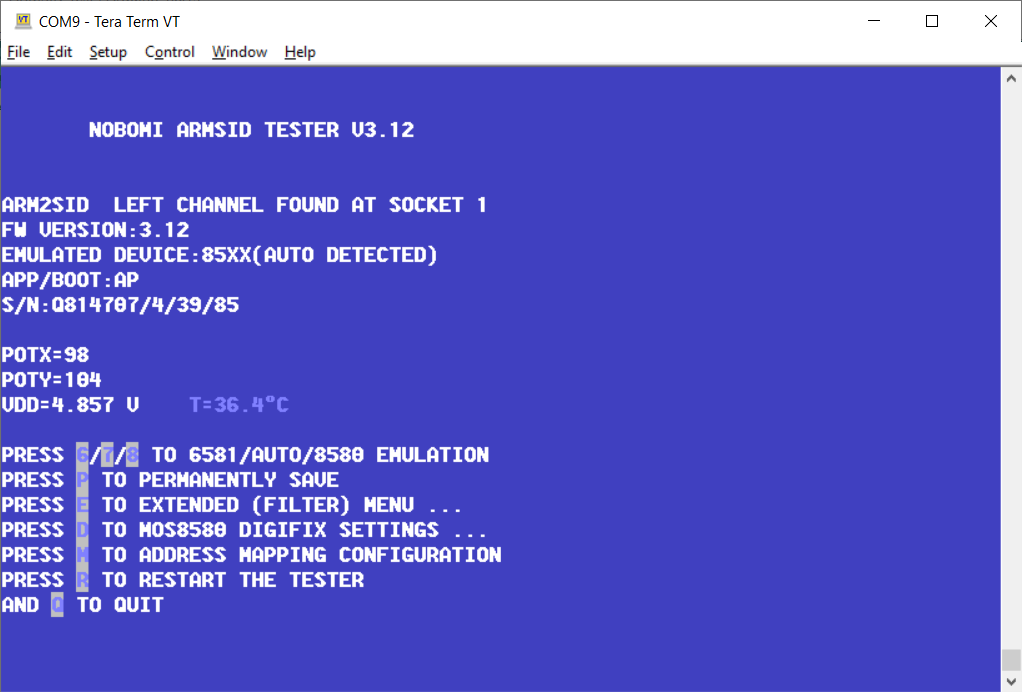
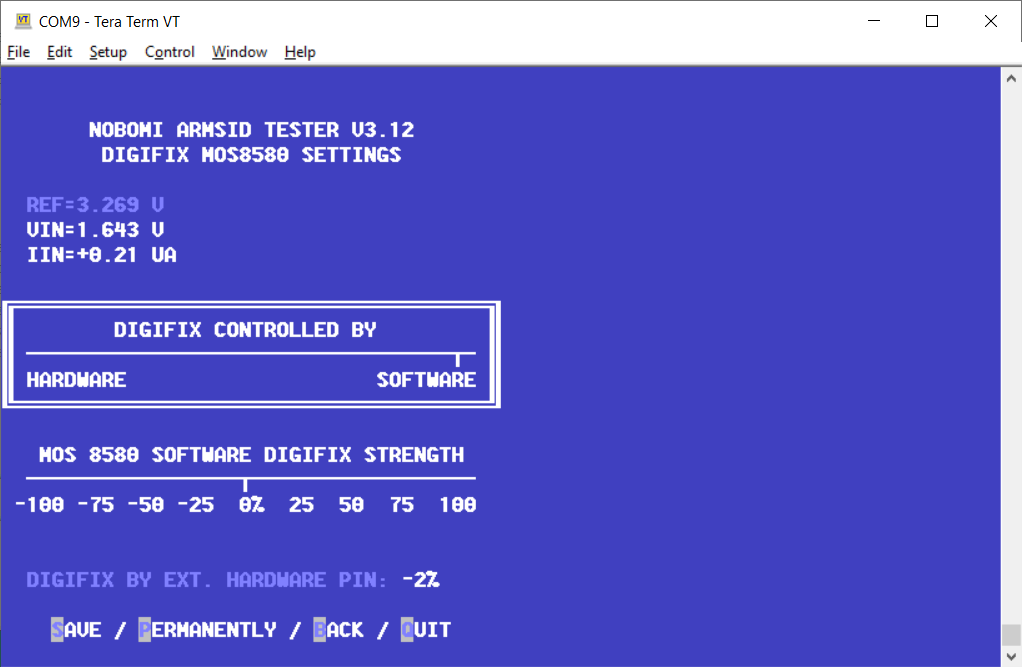
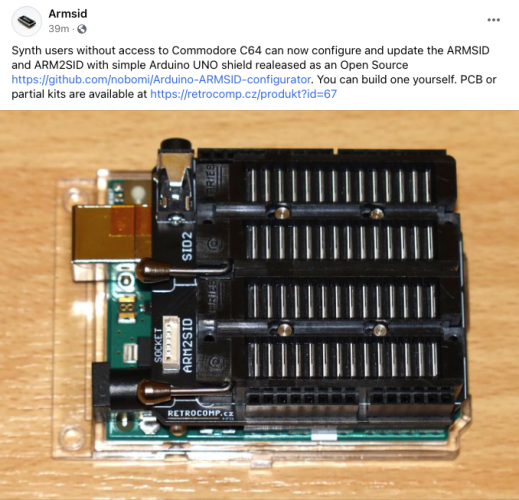
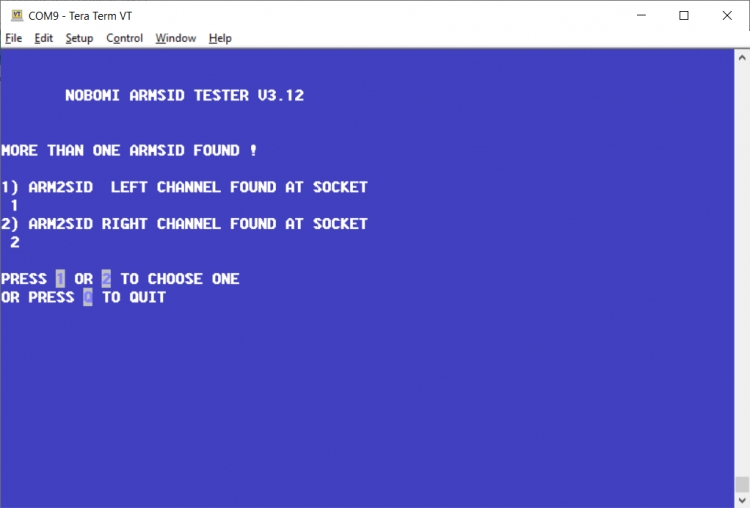
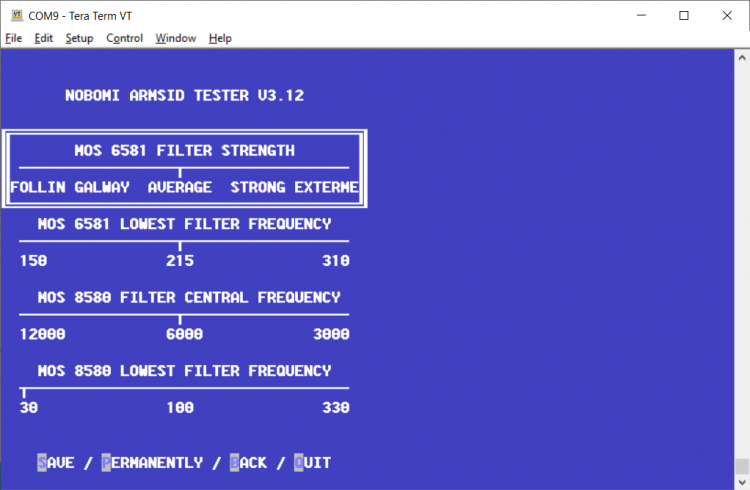
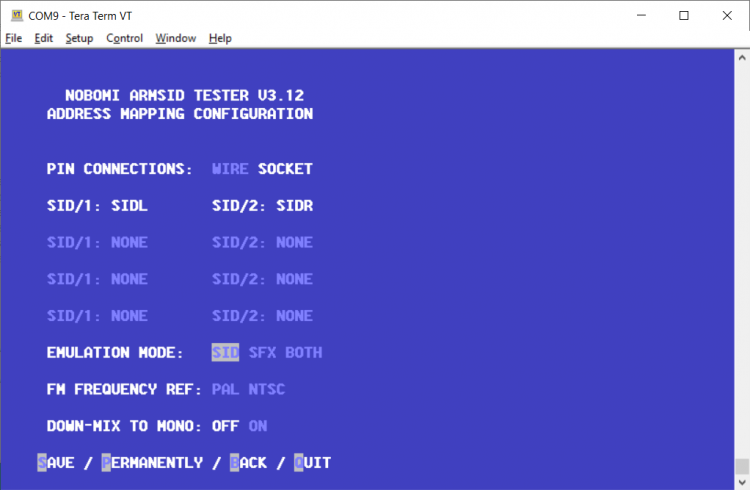
For anyone that's been considering the ARMSID or ARM2SID, but didn't want the headache of having to maintain a working C64 to configure them, the guys at Retrocomp have come up with a novel solution for you... It's basically a DIY Arduino shield that enables you manage the whole configuration process through a simple terminal Source code available here: https://github.com/nobomi/Arduino-ARMSID-configurator Partial kits available here: https://retrocomp.cz/produkt?id=67 I don't know about the rest of you, but for me, the SID Clone wars are over and the clear winner is ARMSID. 1. The sound is very close to the real deal, in either 6581 and 8580 mode. IMHO, it's even better than the SwinSID Ultimate (listen to examples above in this thread) 2. The design is by far the cleanest and sleekest, all the way through to packaging, delivery, quality documentation, vendor support, etc. 3. The size and form-factor are very close to a real SID, so it will fit anywhere a SID does, unlike some of the clunkier clones 4. It's jumper-less and auto-detects the correct SID emulation mode, depending on the input voltage It receives. The mode can be overridden however, using the aforementioned config editor (imagine an 8580 in a Breadbin or a 6581 in a C64c / G). 5. The price for an ARMSID is absolutely reasonable and you can save a few $$ if you need dual SID pairs, by going with the ARM2SID 6. It provides support for analog paddles if you happen to have a real C64 And NO, I am in no way affiliated with Retrocomp or the ARMSID, but I just think these guys have done a terrific job on this... Kudos...


- 88 replies
-
- 2
-

-

-
- sid replacement
- sid clones
- (and 4 more)
-
Just sent you a PM
-
 There are very few "kits" out there these days, because Nils & Wilba are no longer selling them. There's one guy that occasionally has them on eBay for ~$230 USD + ~$30 shipping. Then you need to account for the cost of SwinSIDs (the cheapest option) or another alternative, and factor in the build time (approx. 7-8 hours).
 -
I had a couple sammichSIDs posted in the flea market for a while. I sold one of them, and now I have the other listed here: https://www.ebay.com/itm/133688838489 Quick Note: I removed the 8580R5 SIDS that I was originally selling this with, because I'm using them in my MB6582 now. The instrument will sell with two SwinSIDs
-
Congrats on building the momentum and seeing positive results... It’s an inspiring project for sure. Good luck with the remainder of your build. Looks like you have the original (Red Color) SmashTV Base PCBs? By the time I got around to doing my builds (last year) the only boards available were from Modular Addict (in signature Black). Cheers
-
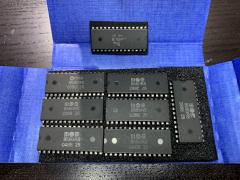
For anyone that happens to be based in the US, I still have plenty of extra ICs, including pre-programmed PICs. Shoot me a DM if you're interested...
-
Hi @rolfdegen. Thanks for sharing. Overall this project looks good and sounds cool! The Teensy v4 is clearly a capable MCU with it's fast ARM Cortex-M7. I'd be curious to hear about what motivated you to get started with this project and to build off of the Electrotechnique TSynth v4 foundation (http://electrotechnique.cc/)? You also chose to use a minimal control surface, so I'm guessing you're envisioning more of a sequenced, MIDI CC message type of interaction, rather than a live, interactive performance? Cheers
-
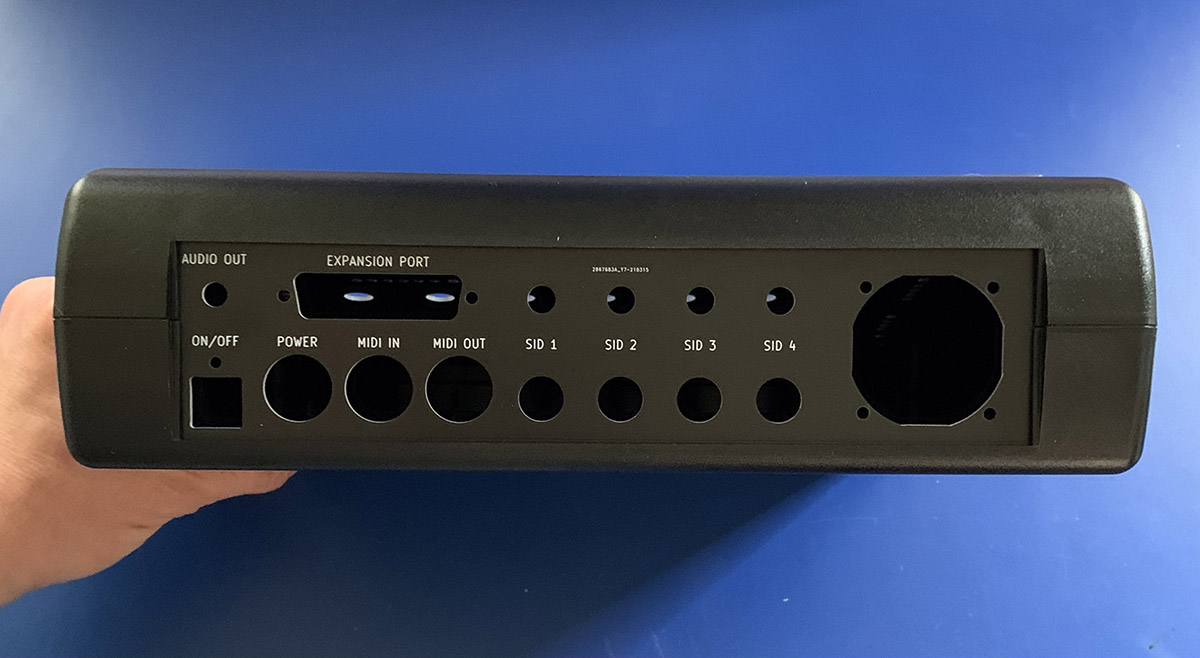
Since you're looking for recommendations, I would suggest using Power supply Option E: http://www.midibox.org/dokuwiki/doku.php?id=wilba_mb_6582_psuopte IMHO, this is likely to be the simplest to setup, with the fewest parts. But best of all, it enables you to use a standard (and readily available) 12V DC "wall wart" power adapter, as long as it supports at least ~1.5 amps. In terms of the PCB mounted power connector, that option is really up to you, but to keep the retro spirit alive, many have chosen the 7-Pin circular DIN, which is what the original C64 used. https://www.aliexpress.com/item/32981543684.html?spm=a2g0o.productlist.0.0.140c60d5kCwIHg&algo_pvid=feec72e8-76ab-4f5b-b02b-a65975ddf4f1&algo_expid=feec72e8-76ab-4f5b-b02b-a65975ddf4f1-2&btsid=0bb0623316152126363434357e0c5f&ws_ab_test=searchweb0_0,searchweb201602_,searchweb201603_ If you go this route, you'll also need to swap the tip on your power brick with a 7-PIN male DIN receptacle. Rean makes a good quality one that's readily available. https://www.mouser.com/ProductDetail/REAN-Neutrik/NYS323G-U?qs=%2B86TLfaev2%2FQ5iVm8npeOw%3D%3D Best!

-
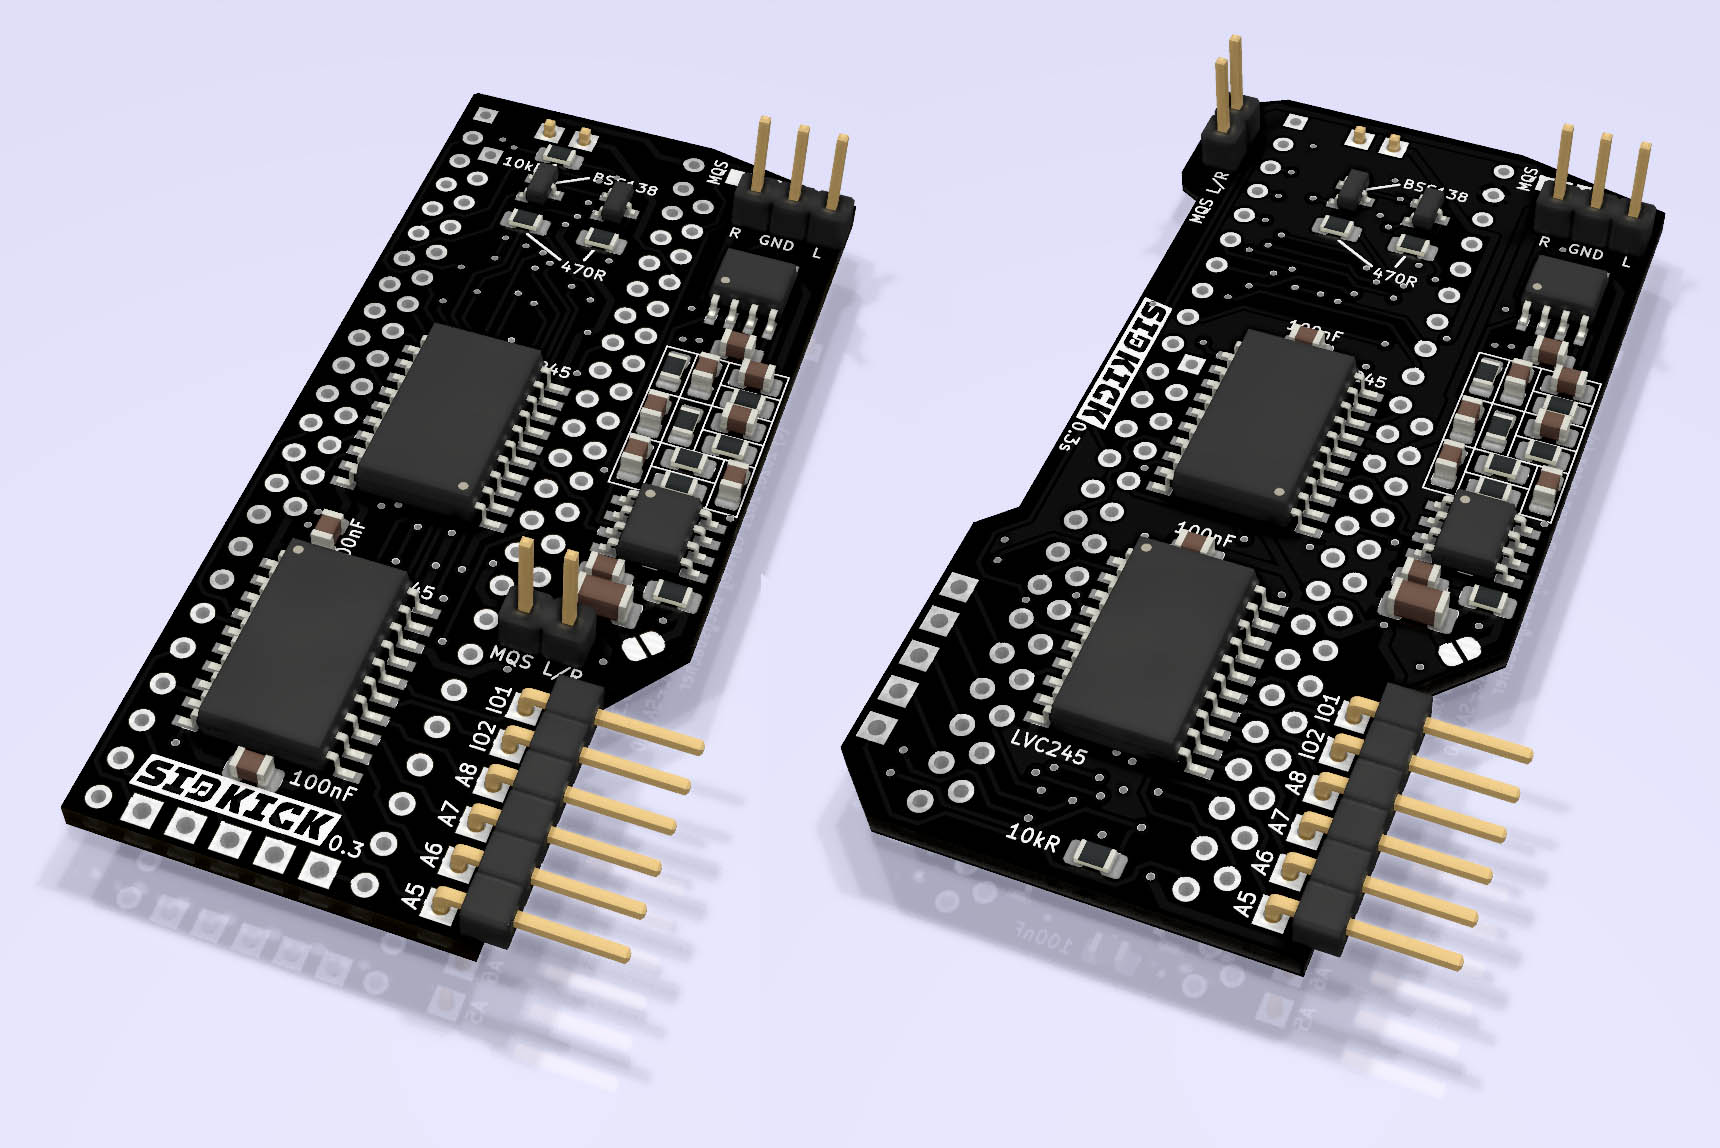
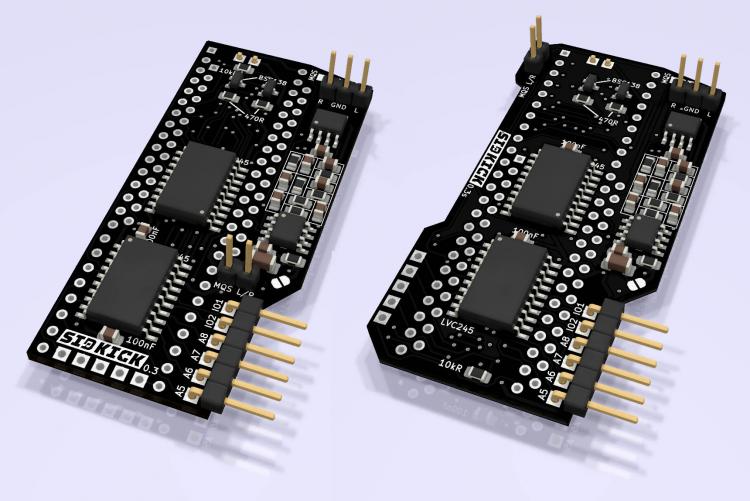
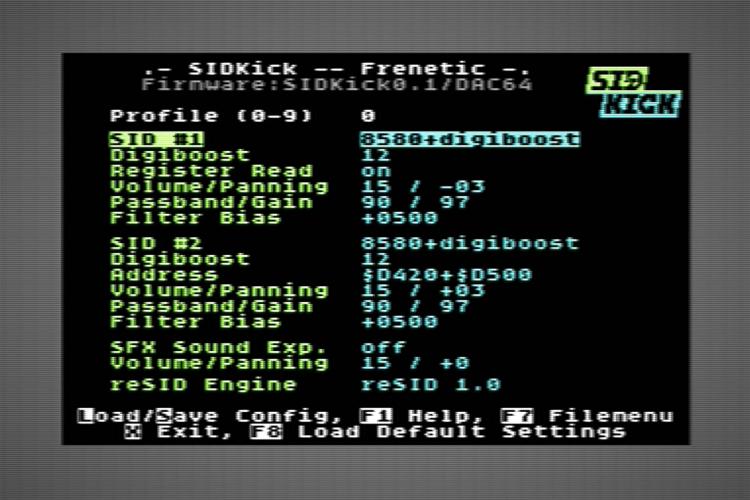
@Noise-Generator Thought you might want to add the SIDKick, Teensy-based SID Clone to your master list. ...From Github: https://github.com/frntc/SIDKick SIDKick is a drop-in replacement for the SID sound chips used in C64s and C128s based on a Teensy 4.1. It is able to emulate two SIDs (6581 and/or 8580) and a Sound Expander (offering Yamaha OPL-based FM sound) at the same time. It makes no compromises with regard to quality: the emulation is based on reSID and fmOPL. It also comes with a few extras. Currently its features include: 6581 and/or 8580 emulation based on reSID 0.16 or reSID 1.0 (configurable) 2nd-SID address at $d400, $d420, $d500, $d420 + $d500 simultaneously, $de00, $df00 Sound Expander/FM emulation based on fmOPL (at $df00) paddle/mouse support built-in configuration menu (launch with "SYS 54301") built-in PRG launcher (via menu) 10 different profiles, switchable on-the-fly via an optional button (otherwise via menu), "SAM" will tell you which you selected sound output via Teensy MQS (PWM) or high-quality using a PT8211/TM8211-DAC, filters, and an operational amplifier output available at connectors (stereo) or routed through the mainboard (mono) I haven't tried this one yet, but I do eventually plan to when time permits...


- 88 replies
-
- 1
-
-
- sid replacement
- sid clones
- (and 4 more)
-
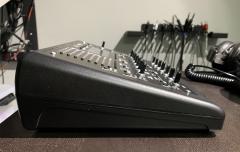 The case closes nicely with the JST-XH PCB connectors tucked neatly in place..
 -
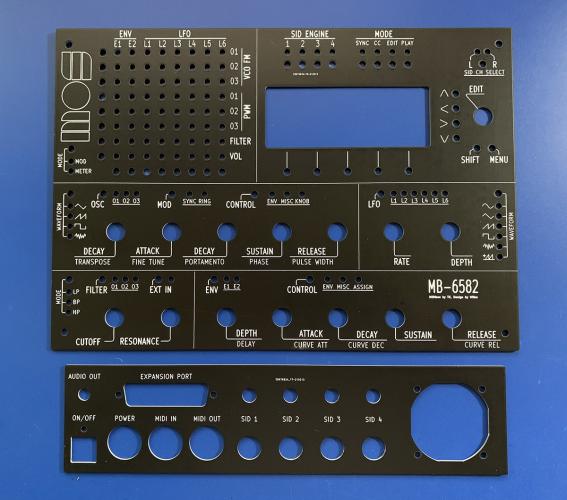
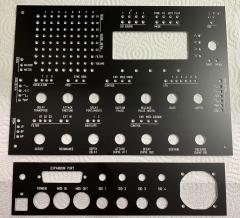 I've also been working on a newer panel design, based on the original art uploaded by @listen202
 -
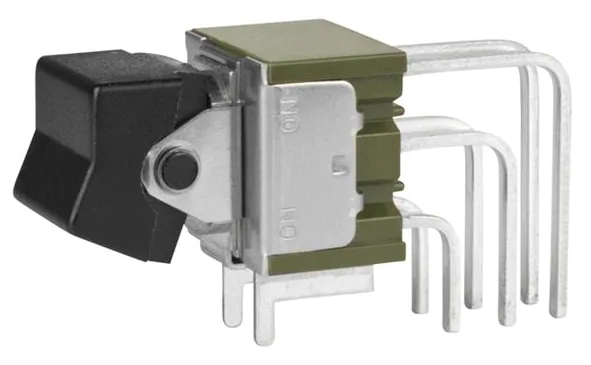
 Early on it was tough to find the right C64-style power switches, but after a bit of research I found quite a few reliable sources.
 -
 There was no second guessing involved for me. IMHO - Nothing beats the sound and character of the 8580. As time goes on and supplies run shorter however, I've found myself growing a real appreciation for the ARMSIDs. Dollar-for-Dollar, it's probably the best clone out there (again, my opinion of course).
 -
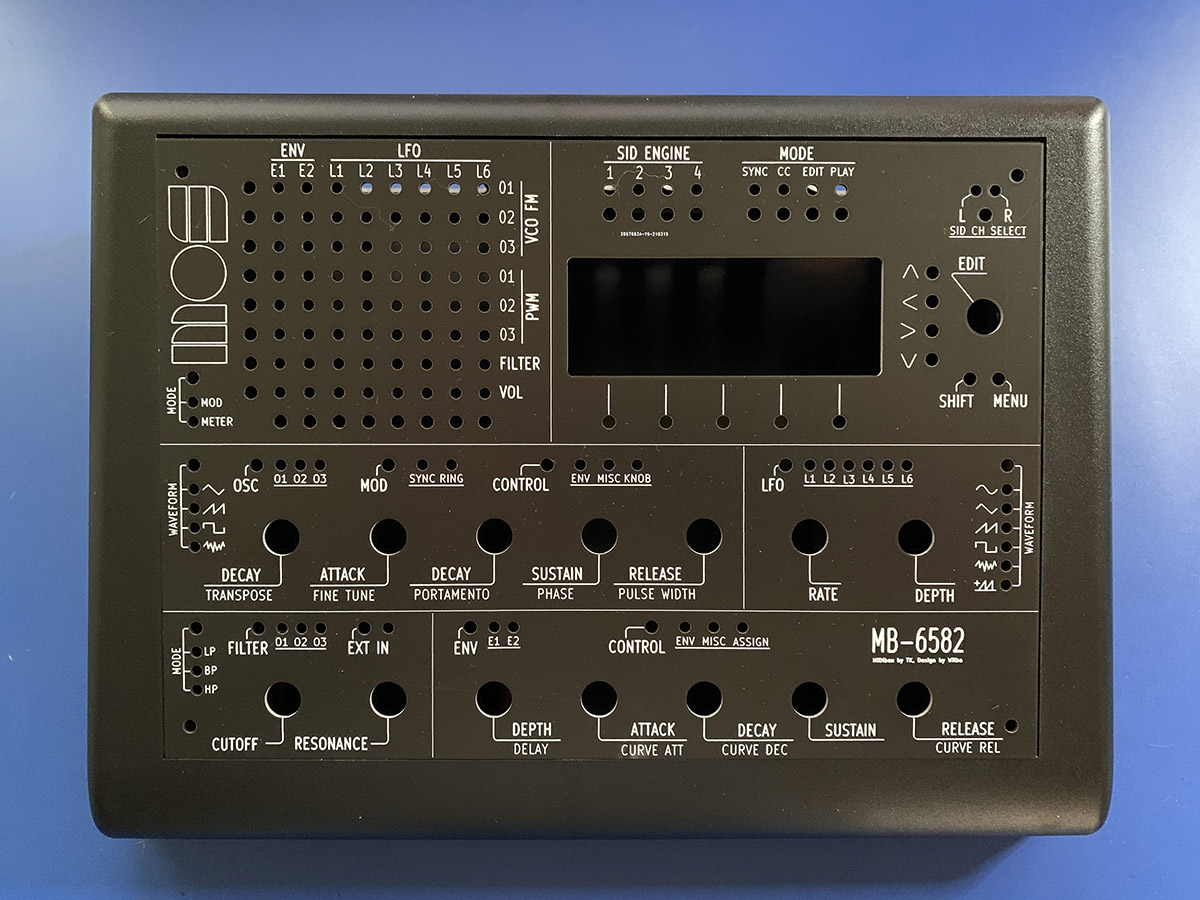
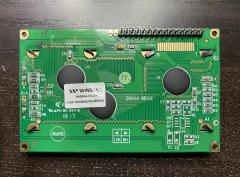 Adafruit sells a nice RGB Character display, which conveniently places power for the RED backlighting on pin 16.. You can wire up pins 17 and 18 as well to mix in multiple color varieties... https://www.adafruit.com/product/499
 -
 These longer 300mm JST-Xh cables turned out to be too cumbersome to work with. I eventually went with 100mm, which are perfect for the job...
 -
I decided to go with 22nf polyester film capacitors, because these are said to be the best match for 8580 SIDs (e.g., "Wilba's favorites", see the analysis in the forum post below)
-
UPDATE: NKK Switches are also making a new part (M2022TXW41-FA) that's very close to the C64-style power switch. Although, the front-facing PCB mounting would need to be trimmed a bit to get a proper, flush mount on an MB-6582 or sammichSID. Both Mouser and Digikey currently have these in stock...So, it's good to have options. https://www.mouser.com/ProductDetail/633-M2022TXW41-FA https://www.digikey.com/en/products/detail/nkk-switches/M2022TXW41-FA/2105635 Cheers
-
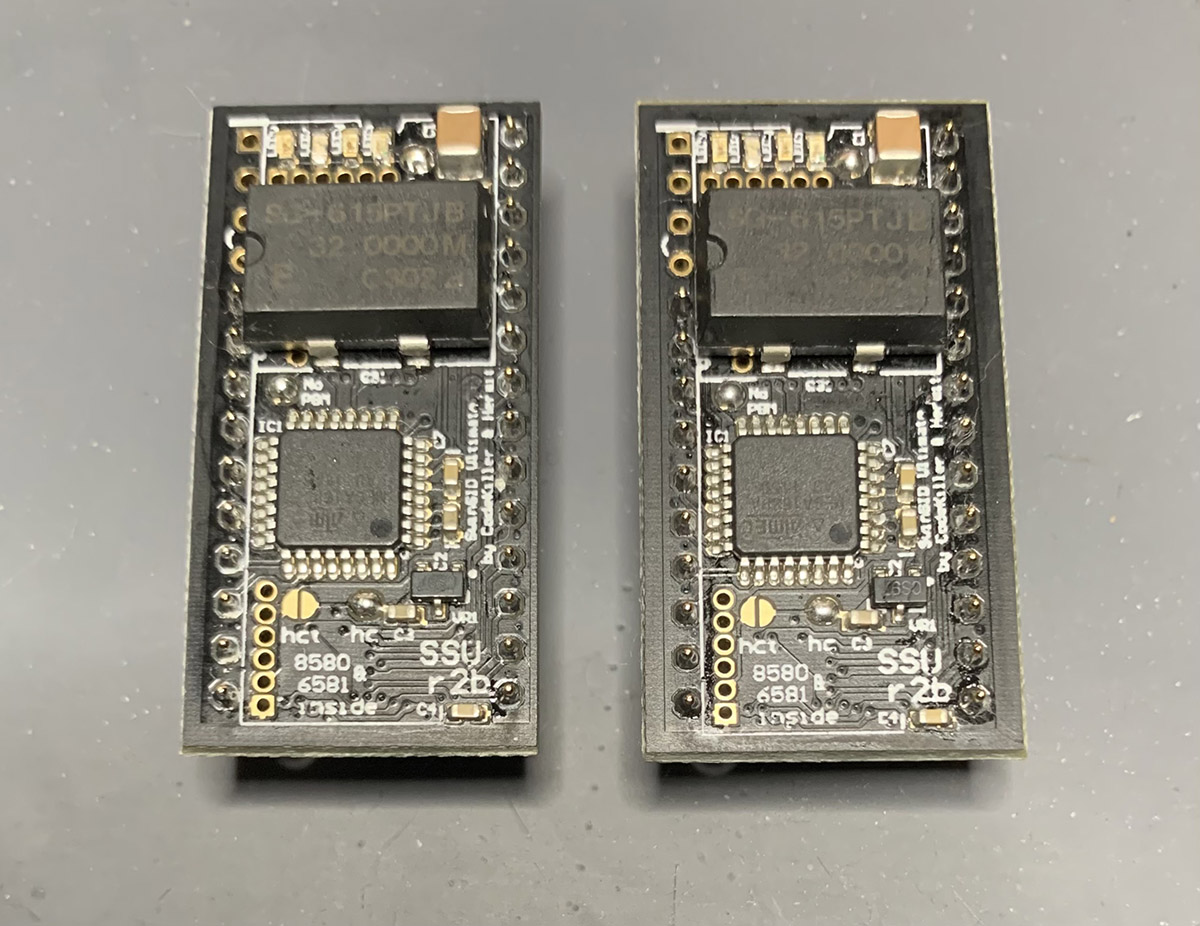
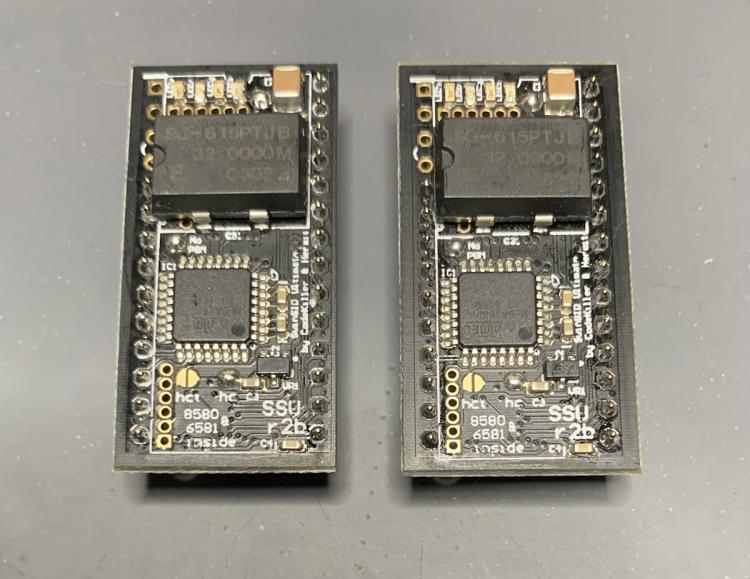
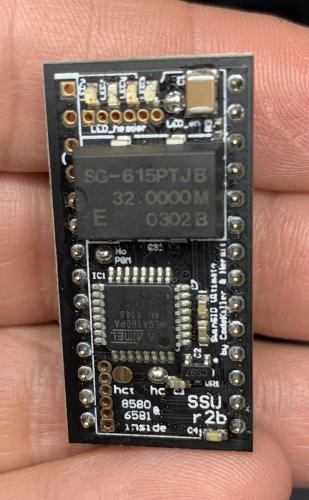
After some CRAZY international shipping delays (>4 months), my SwinSID Ultimates have finally shown up! My first observation was "Jeeze, they've jammed a lot of tech into these bad boys", from the top-to-bottom and on both sides... I count two MCUs (an Atmel Mega 168PA and an ATtiny85), plus a Xilinx CPLD (sort of like a small FPGA). Then there's three LEDs (Red, Green and Yellow - one for each SID voice), and that massive crystal oscillator (the SG615). Visually, they come across as being 'a bit over engineered', especially when you compare them to the elegant and pro looking ARM2SIDs. Given all the parts, they wind up costing ~$10 USD more than the ARMSID (assuming you can even find them). We all know that beauty is only skin deep and looks can be deceiving, so best to dig right into the sound quality... I decided it would be easiest (and quickest) to test these from my Ultimate 64, because it has Zif sockets and an integrated SID player that supports stereo tracks (e.g., all the 2SID and 3SID tracks from the High Voltage SID Collection)... As always, interested to hear any thoughts & comments... Notes: The real SIDs are 8580 R5 The SwinSID Ultimates are both configured to emulate 8580 The ARM2SIDs are cable-connected, in "Stereo Socket Mode", with both configured to emulate 8580

- 88 replies
-
- 1
-
-
- sid replacement
- sid clones
- (and 4 more)
-
I had a drive crash and lost the Kicad project, but I still have the slightly modified DXF file that I worked on, which was derived from Listen202's version. https://1drv.ms/u/s!AtmSvwylfFJagkpl5QlWo9tIUbJ0?e=mamgPG Working with DXF's in KiCAD requires several steps: 1) In the KICAD PCB tool, you'll import Listen202's DXF file into the Edge.cuts layer 2) make sure to size it properly, (approx. 232.3mm x 163.2mm) 3) Delete all of the graphics from this layer, but keep all of the holes and cutouts, since this will act as the drills layer 4) Import Listen202's DXF file again, but this time into the F.SilkS layer (this is the layer for the graphics silkscreen / inlay) 5) Now you'll do the opposite of what you did in step 3 and delete all of the holes and cutouts from the F.SilkS layer, but keep the graphics 6) Next, you need to create the front and back Copper layers (F.Cu and B.Cu), which are basically just rectangles in the correct panel size (again, approx. 232.3mm x 163.2mm) That's really it for the editing, so now you have a choice for how you want to have the panel produced. You can export the individual layers from KiCAD and import them into Front Panel Designer if you want them manufacture your panel. Or, you could use KiCAD to export standard Gerber files that you can use to have the panel produced as if it were a PCB. This works really well because a standard PCB is 1.6mm thick, with rigid copper on the top and bottom for strength, whereas the PacTec-10 aluminum panel is 1.5mm, so only a very small difference. JLCPCB will produce ~5 of these panels for you for about $30 USD, whereas Front Panel Express will charge $250 for the aluminum cuts, drills and inlays... When time permits, I'll eventually get around to recreating the KiCAD project and I'll share it here.
-
Where can I download modern pickit programming software fpr windows
dwestbury replied to Al99's topic in MIDIbox SID
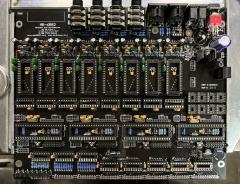
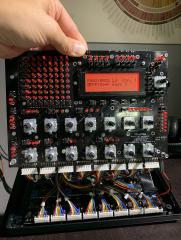
Looks like you're making progress. Seeing the boot-up message on your LCD obviously confirms that MIOS and the SID firmware are active. I ran those PICs in my own MB-6582 for more than 24 hours, with all the SID engines going and there were no hiccups. All the communications test with MIOS were solid (programming firmware to each PIC, multiple test runs of installing patches to the banksticks, etc.). Each core responded well to control surface tweaks and changes as well. It seems unlikely that you would be having issues with the PICs themselves now. Do you mean that you soldered two separate wires to monitor communications (one to the TX and another wire to the RX)? ..Your description seems to imply you shorted the RX to the TX pins together. That would obviously make communications impossible. Assuming you meant the former (two wires), then you can monitor the signal from each pin to get a sense of how they're attempting to talk to the world. A basic logic analyzer can could come in handy for this (https://www.ebay.com/itm/Logic-Analyzer-Device-USB-Saleae-24M-8CH-ARM-FPGA-For-3C-Digital-Support-1-1-16/133471685789?hash=item1f13884c9d:g:BrgAAOSwvIlfGBNy) I took a quick look at the MIDI interface whitelist (http://www.midibox.org/dokuwiki/doku.php?id=midi_interface_whitelist) and can see that the MIDISPORT 2x2 is supported by MIOS, although there's a warning in there about toggling MIDI Thru to off. Assume you've checked that already? -
I'm using power supply Option-E, which is brilliantly simple and clean to implement..
-
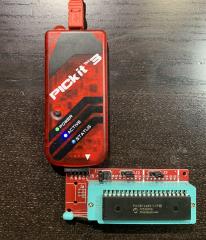 Figuring out how to get my PICs properly flashed was quite a learning experience. If not for the patience and fearless support in these forums, I would surely have many bruises on my head from banging it into the wall ;-)