dwestbury
-
Posts
274 -
Joined
-
Last visited
-
Days Won
26
Content Type
Profiles
Forums
Blogs
Gallery
Everything posted by dwestbury
-
From the album: MB-6582 from Soup to Nuts
-
From the album: MB-6582 from Soup to Nuts
-
From the album: MB-6582 from Soup to Nuts
-
From the album: MB-6582 from Soup to Nuts
-
From the album: MB-6582 from Soup to Nuts
-
From the album: MB-6582 from Soup to Nuts
-
From the album: MB-6582 from Soup to Nuts
-
From the album: MB-6582 from Soup to Nuts
-

From the album: MB-6582 from Soup to Nuts
-
OMG! I'm so sorry for stirring such a painful memory. ...And equally sorry for your losses. I lost a house and everything I owned in a fire some years back, I'm obviously grateful for my health and well being. Good to see you in the forums, hopefully enjoying better times. Best to you. -Darrell
-
Anything left? Oh and nice encoded MSG... ˇ T h a n k s f o r t h e M I D I b o x , T K !
-
Some years later I'm finding this thread about KiCAD, at exactly the time I'm getting familiar with it. I see that the basics section is still up: http://wiki.midibox.org/doku.php?id=kicad and it provides a useful foundation. I also REALLY like the video series from Peter Dalmaris on Udemy: https://www.udemy.com/course/kicad-like-a-pro-2e/ The price on this course varies from time to time, but I managed to get it on a promotion for $9.99 USD, so keep an eye out for that. Switching back to the topic of a MIDIbox library... The suggestions from @Psykhaze make a lot of sense, based on projects I've worked on (e.g., MB-6582). Has anyone made such a library available?
-
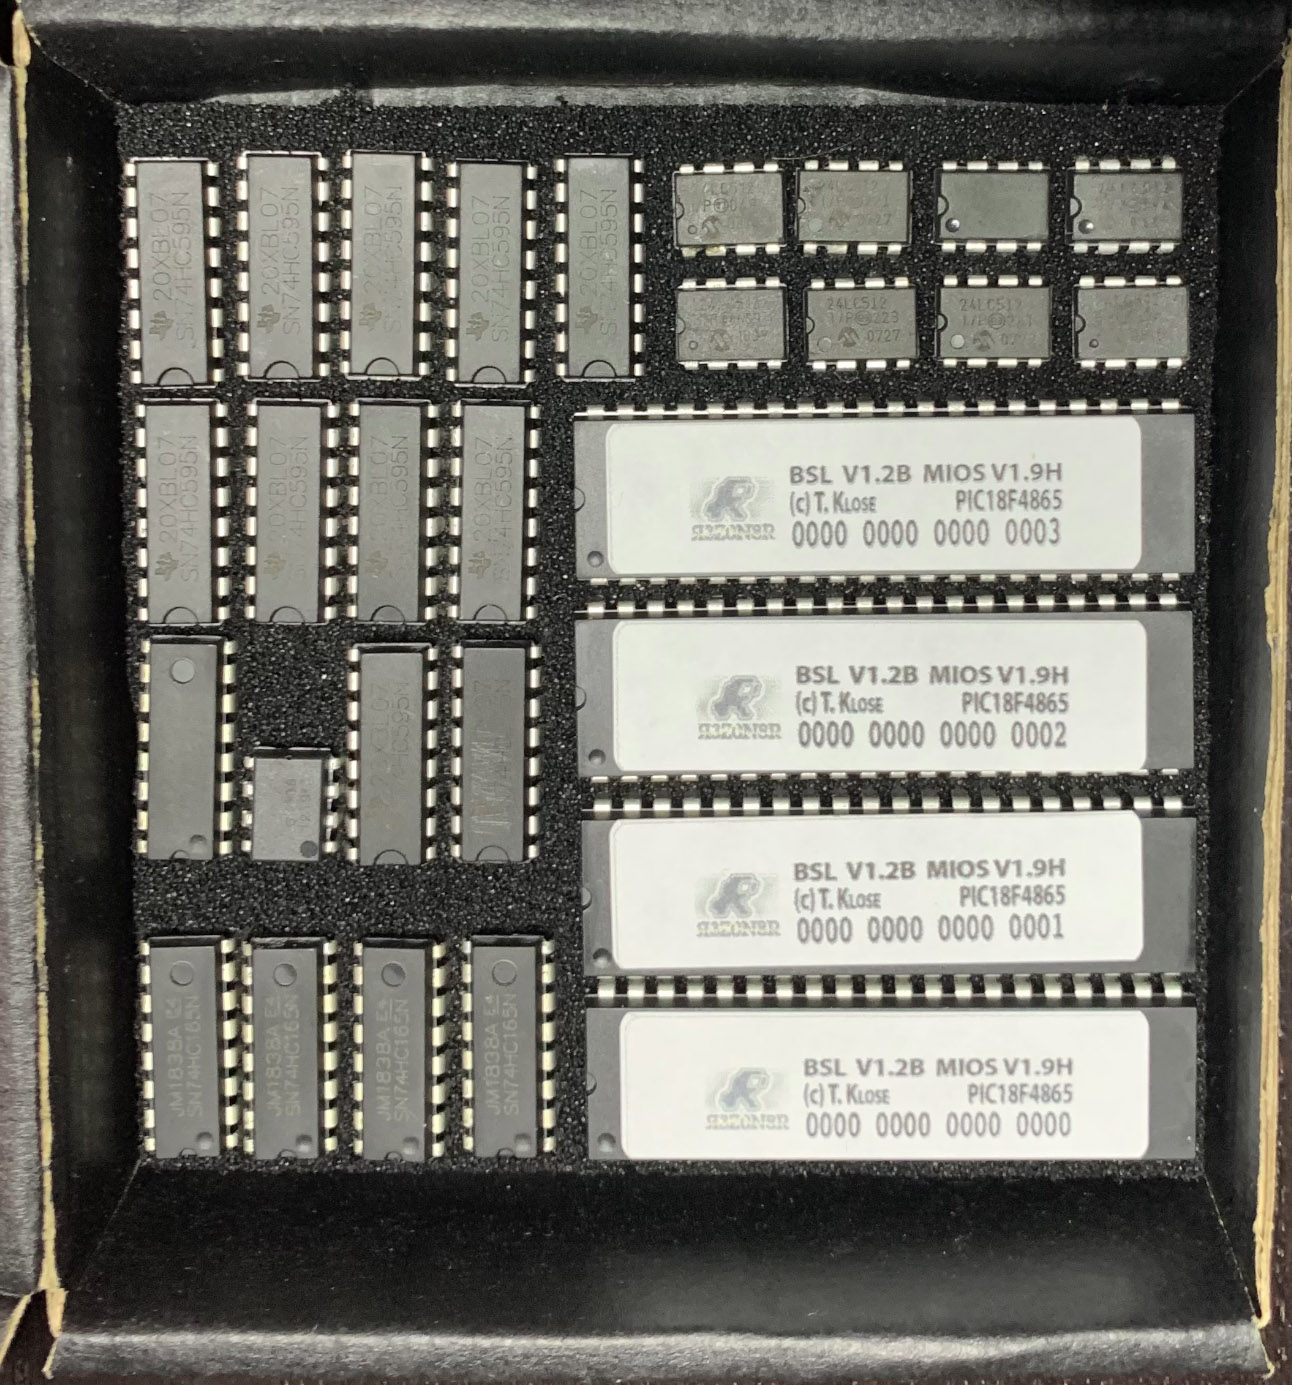
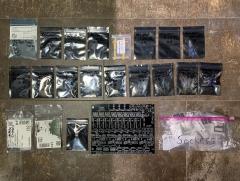
I can certainly help out with preprogrammed PICs. I also have left over inventory of all the other key ICs to make a MB6582 or sammichSID Send me a DM for details... -Darrell
- 14 replies
-
- 1
-

-
- mb6582
- midibox sid
- (and 1 more)
-
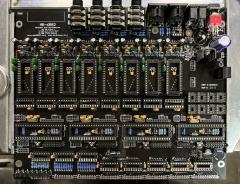
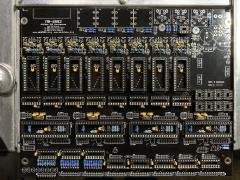
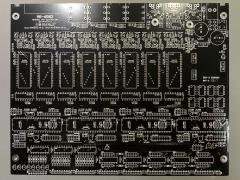
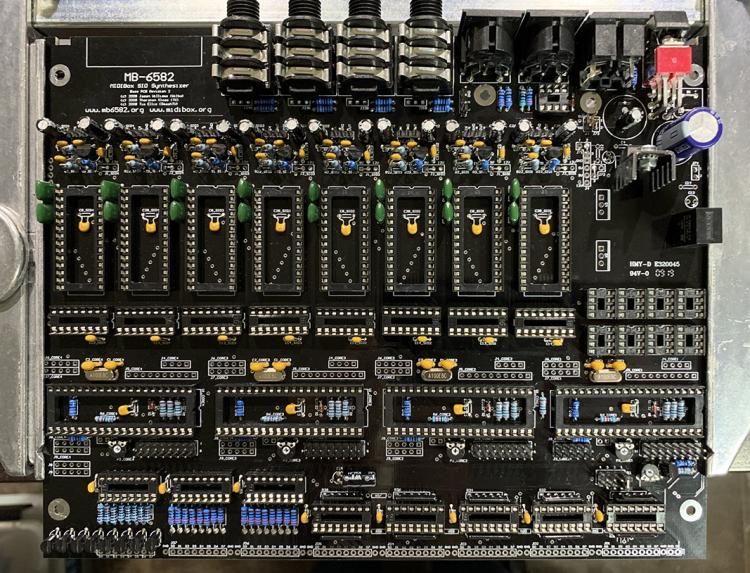
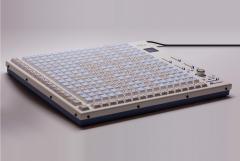
Yes, exactly. I had the headers in place as an interim step, while I waited for 7P circular DIN connectors to show up in the mail. The final Base PCB build looks like this:
-
This video shows you how to use a C64 to configure your ARM2SIDs for full stereo, using Socket mode. If you want to fast-forward through the “discovery, trial and error”, skip to ~28:00 Once your ARM2SID configuration is saved to the internal flash memory, you can move them into your MIDIbox for Stereo pleasure... Cheers
-

Where can I download modern pickit programming software fpr windows
dwestbury replied to Al99's topic in MIDIbox SID
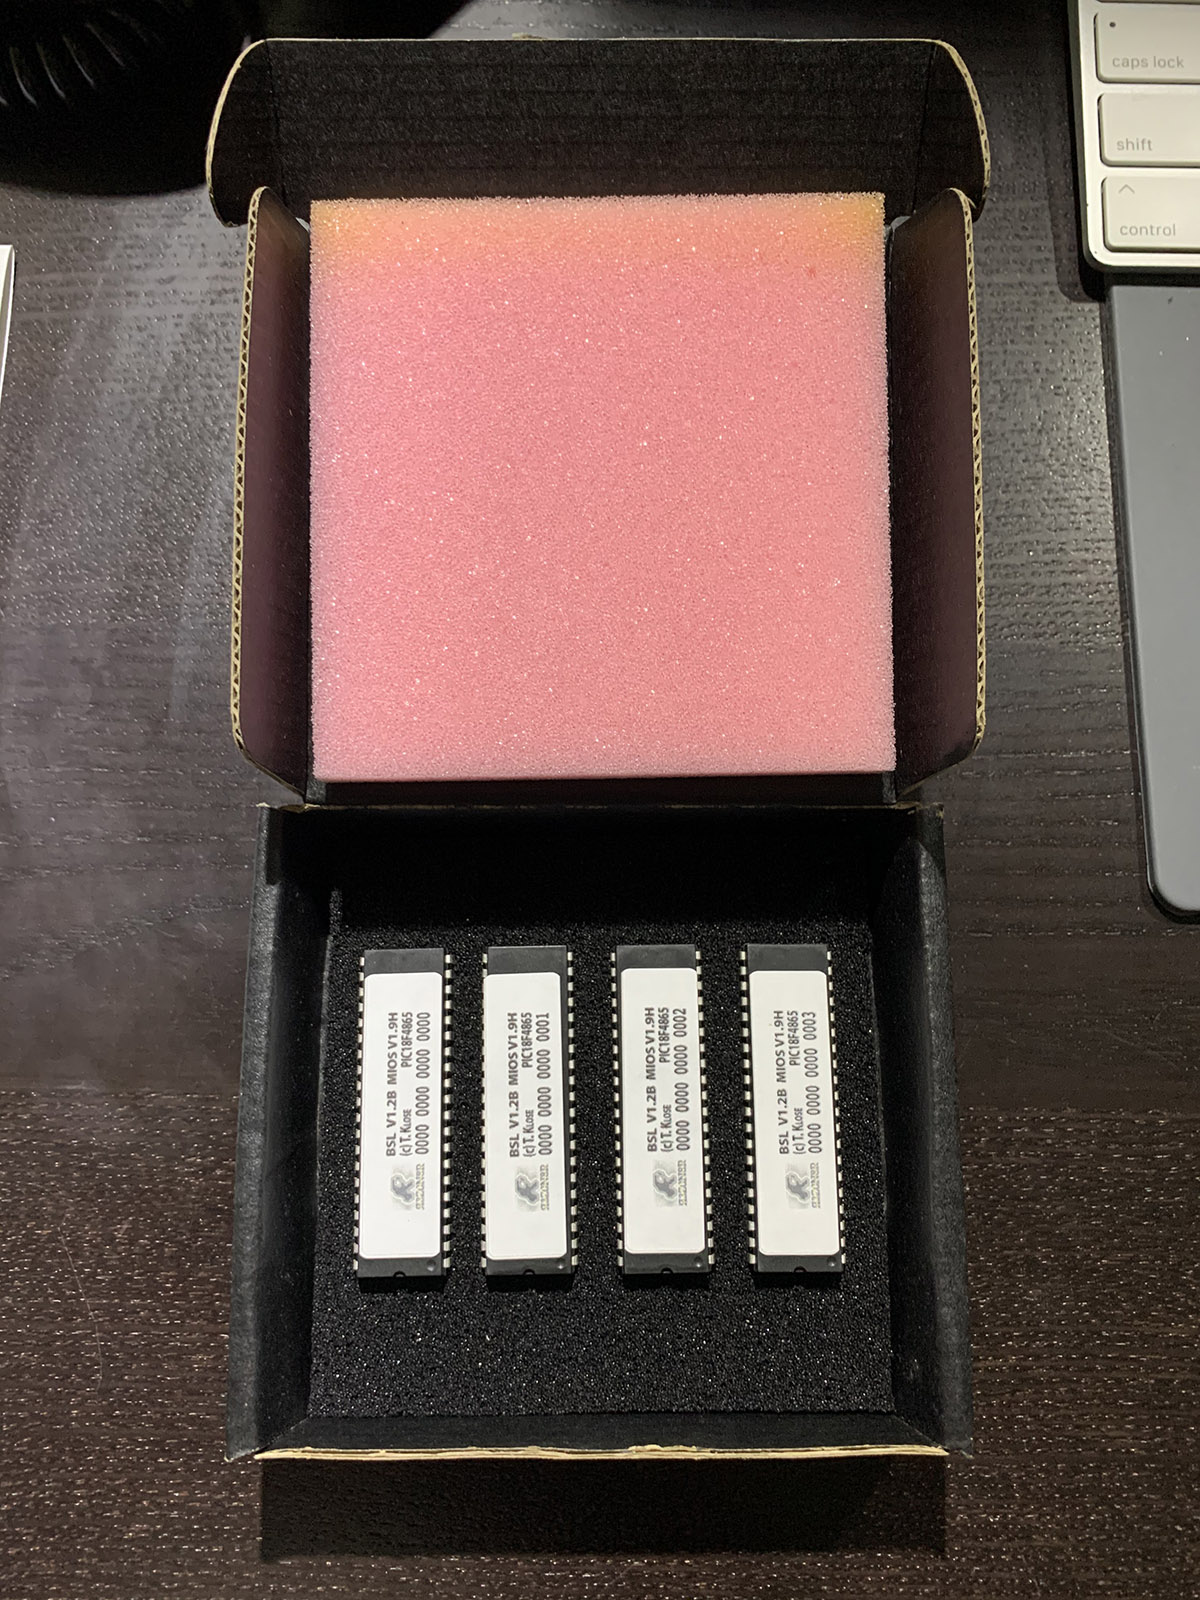
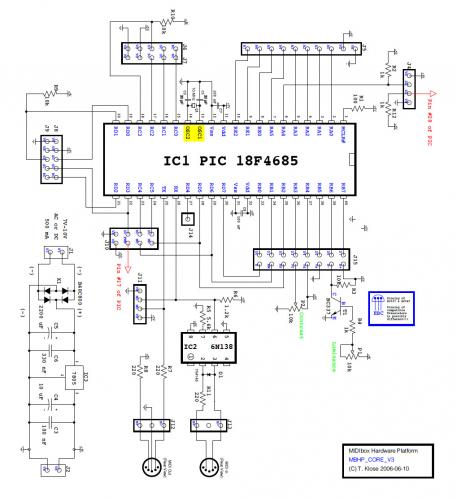
The PIC 18F4685 is an 8-Bit Microcontroller. The datasheet is here: https://ww1.microchip.com/downloads/en/DeviceDoc/39761c.pdf Generally speaking, you can program it in C / C++ using a supported IDE, but the firmware for MB6582 is actually programmed in Assembly language, for both performance and space efficiency on the limited chip memory. The MIOS-8 codebase is maintained on Github here: https://github.com/midibox/mios8 You download the MIDIbox SID v2 firmware here: http://www.ucapps.de/mios/midibox_sid_v2_044.zip Once downloaded, you can see the raw and uncompiled (but well commented) assembly code for MB-6582, here: .../midibox_sid_v2_044/setup_mb6582.asm (there are lots of .inc files to explore in the .../src folder as well) -
Where can I download modern pickit programming software fpr windows
dwestbury replied to Al99's topic in MIDIbox SID
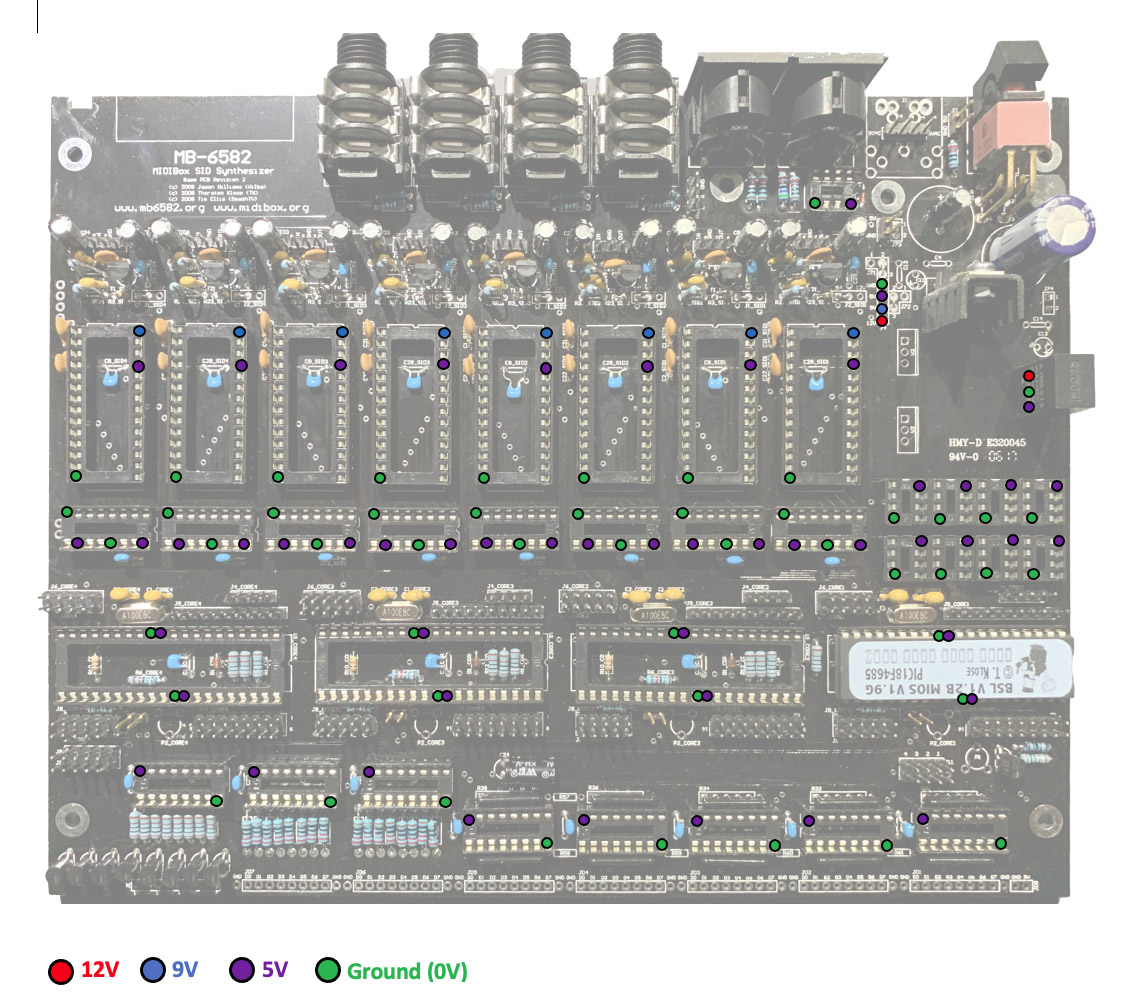
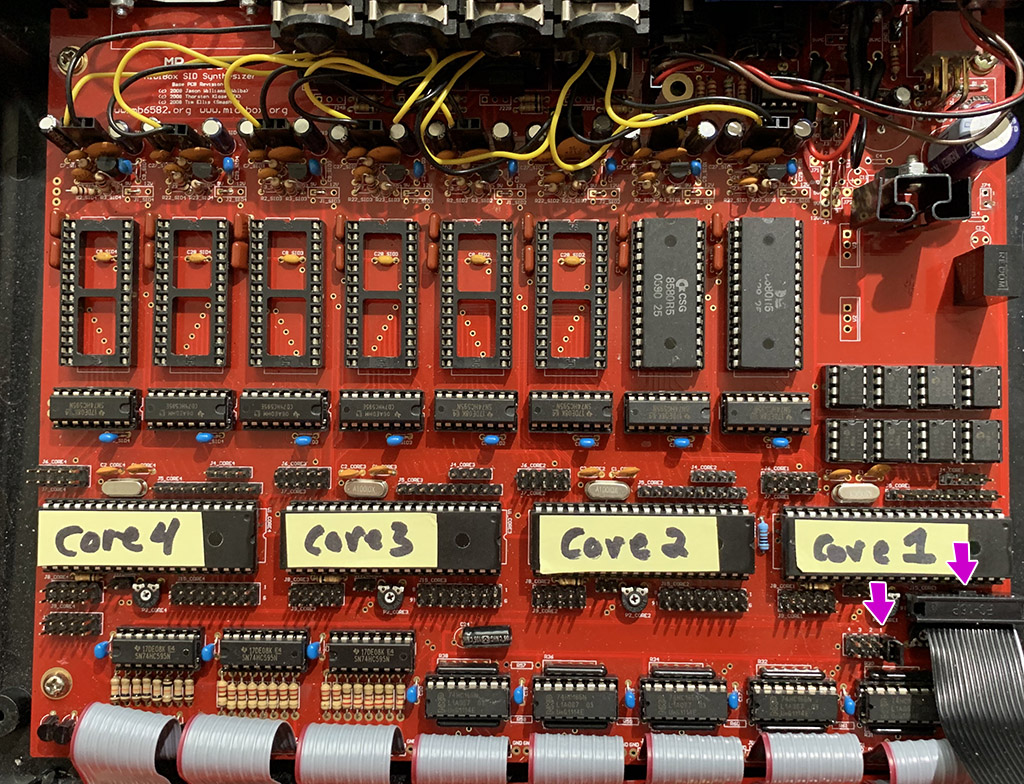
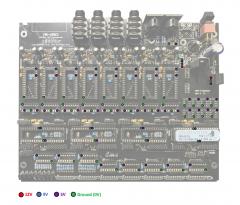
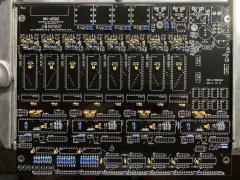
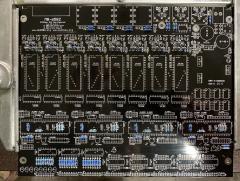
Some basic "sanity check" steps here... 1) Perform some voltage level tests for all the IC Sockets (This view assumes 8580 SIDS and Power Supply Option E) 2) Use an oscilloscope to ensure that your Oscillator frequency is reading ~10 Mhz, from both pins 13 and 14 on your PIC (highlighted by a yellow box below)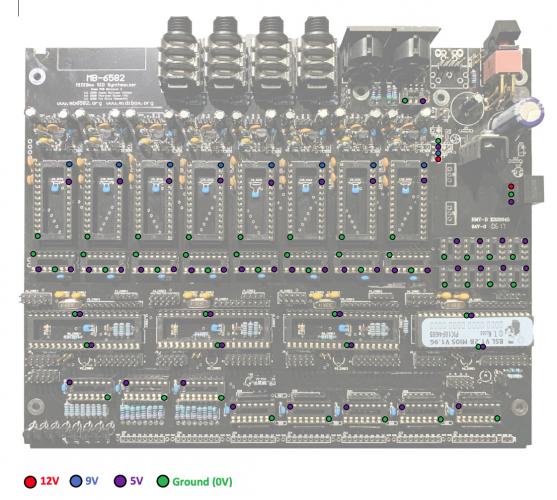
-
Where can I download modern pickit programming software fpr windows
dwestbury replied to Al99's topic in MIDIbox SID
I have to admit that I haven't experienced this particular issue, so I'm sure others will have some good suggestions here, but one other consideration that comes to mind is the timing crystal. In one of my builds I made the mistake of using the wrong capacitors, because I didn't check them properly before soldering. By outward appearances, they looked identical to the correct caps, but they had the wrong capacitance, which completely messed up the crystal oscillator timing being sent to the PIC. This took me quite a while to figure out... -
Where can I download modern pickit programming software fpr windows
dwestbury replied to Al99's topic in MIDIbox SID
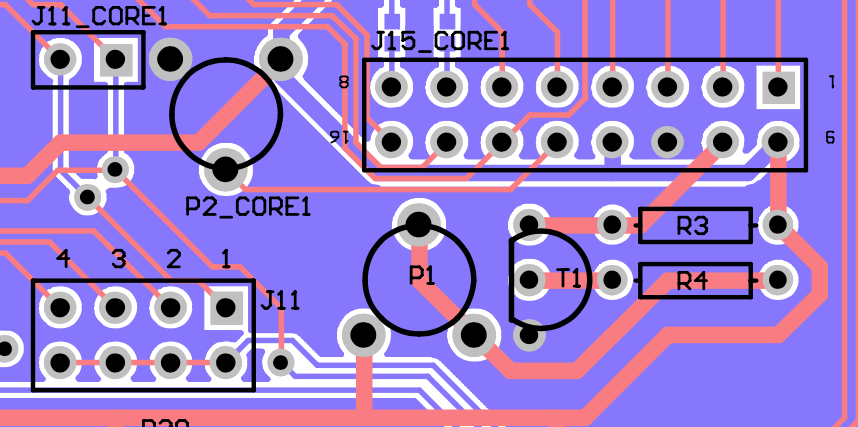
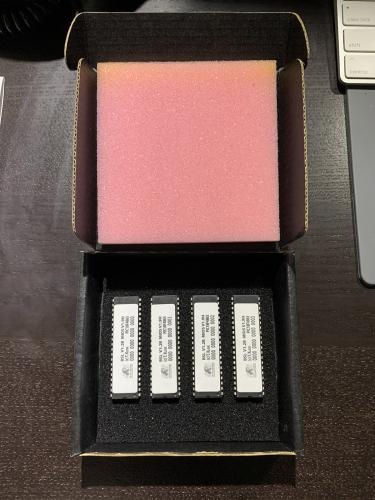
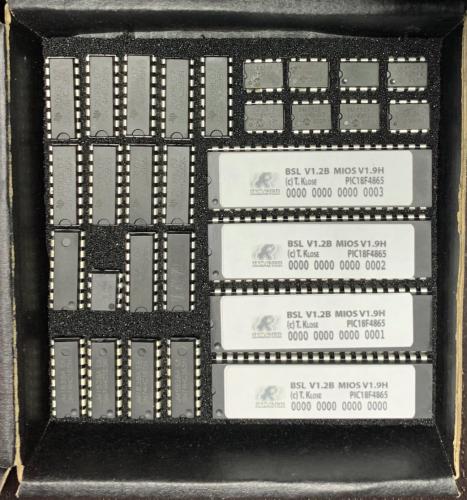
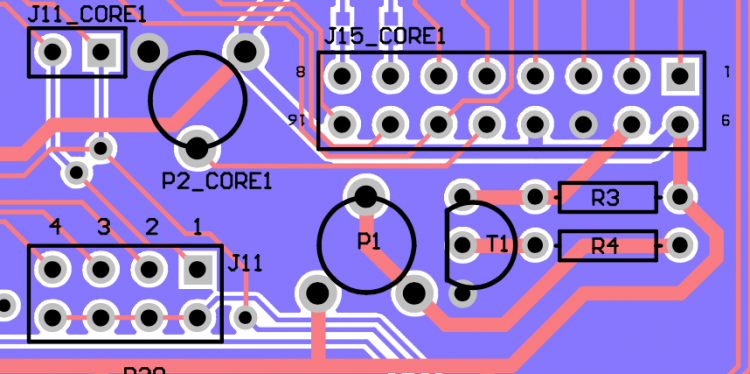
@Al99Great to hear that the PICs arrived across the ocean. I tested them extensively in my own MB-6582, including menu navigation, MIDI handling from my DAW, as well as successful handshaking with MIOS, etc. You shouldn't have to do any additional programming with them at all. Just plug-and-play. With regard to the jumpers you referenced (J11), this controls which PIC will be enabled to talk back to your MIDI interface. This is required for programming with MIOS. All of the PICs will receive a copy of the incoming MIDI signal, but the only the correctly numbered PIC will respond. For the most part, you should be able to leave J11 set to position 1 (right-hand-side), as this enables bi-directional communications with CORE 1 (using ID: 0). If a new MIOS or MB6582 firmware were to come out, you could simply program CORE1, then reboot your MB-6582, while holding the menu button to clone to the other PICs. So, really no need to ever move the jumper again once all PICs are programmed and have the correct device IDs. With regard to the issue you highlighted about your screen showing all blank squares. it could simply be a LCD brightness or backlighting issue. have you tried slowly turning the trimmer potentiometers in PI or P2_CORE1? Good luck! -Darrell
-
 This looks like a brilliant piece of hardware. Is the Matrix a modern derivative of the BLM 16x16? Assume the key use case is sequencing and scene launching? I wouldn't think those lovely keys could be used for finger drumming or velocity sensitive performance, etc. Irrespective, it looks gorgeous!
 -
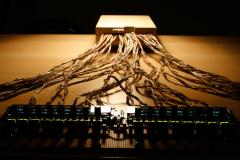 I love the C64 1571 cable management system ;-)
 -
Cheers @sbm good luck with your build!
-
Basically, yes.
-
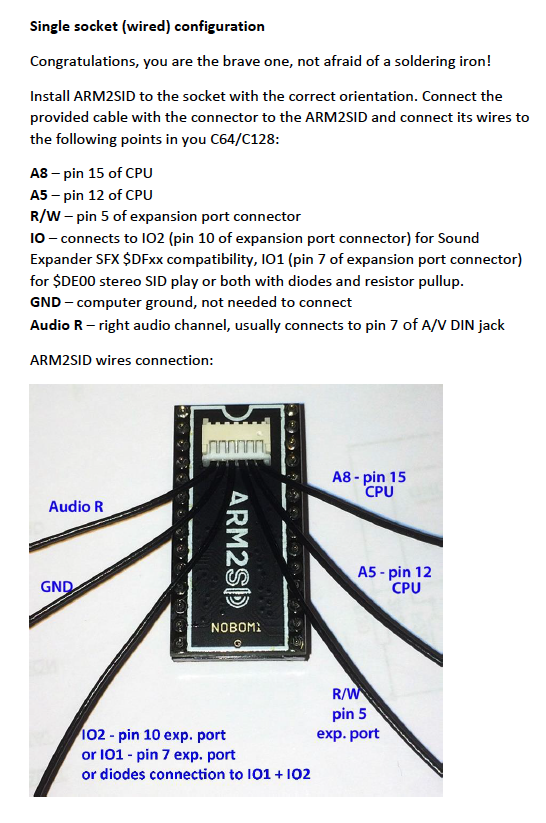
If you really wanted to, you could tap the primary Arm2SID and route the cables yourself to get into 2nd / 3rd SID capabilities. There's some fairly useful documentation on the site: https://www.retrocomp.cz/produkt?id=20 However, IMHO having the second (dummy) Arm2SID is a much more convenient choice for managing 2*SID stereo audio.

-
I guess I should also add that the Arm2SID is capable of emulating up to 3 SIDs and includes FM synthesis capabilities... These features won't matter much for a MIDIbox SID build, but hey, they're solid extra features for your C64 ;-)