Altitude
-
Posts
1,184 -
Joined
-
Last visited
-
Days Won
30
Content Type
Profiles
Forums
Blogs
Gallery
Everything posted by Altitude
-
This is 5x5x5 v1.0 board with all jumpers stuffed. The main LED is continuously lit when plugged in. Good to know that GM5s are hard to fry, though my SMD Kung-Fu was in peril there for a minute.. So this leaves the crystal?
-
So I have completed my 5th GM5 module and have an issue. When plugged in, I get a "USB device not recognized" error (win7 64bit) Here is what I have checked: Power on GM5x5x5 to all relevant pins on the GM5 chip connections via the 27 ohm resistors No shorts, all relevant components correct Any windows issues (midi device limits, various USB ports, etc to eliminate win issues) I suppose this leaves the crystal and the chip itself. For the crystal, I tried it initially with the 22 pF load caps and then switched to the manufacture recommended 18 pF with the same result. This is the same crystal that I used for my other 4 modules (2 5x5s and 2 1x1s) so I know it should work. When I probe the crystaks leads on my 20 MHz scope, I dont see anything that looks like a clock signal. Are bunk crystals even remotely possible? I soldered in the GM5 chip normally without any problems and everything was inspected with a high powered lupe, I do these size chips regularly (I build x0xb0xes on the side) so I am comfortable I did not fry it (or maybe i did?) Any thoughts appreciated..
-

MIDIbox of the Week: Station MIDI controller by Ander
Altitude replied to TK.'s topic in MIDIbox of the Week
Who's afraid of the big bad SMD parts? Gorgeous. Bravo!! *edit Ok, after watching the video, I quit. I am taking up wood working, anyone that needs an ash tray or cutting board, hit me up. -
I'm fond of the self adhesive ones..
-
[jedi]you know you wish to sell it to me [/jedi]
-
Nothing stands out as being a problem. Most of those are the same thing except in ROHS which only means they were certified ROHS
-
That is a simple half wave rectified PSU (it is linear, not switching). Nice thing is that you can use a standard AC/AC transformer wall wart to get +/- rails easily and you can also just slap a 5V vReg on the 12V line for the digital stuff. The thing about the half wave is that it needs more soothing since you ware just using half the waveforms (hence twice the hum)
-
Looks like T-Shirt fodder to me. Where did this come from?
-
MIDIbox of the Week (MIDIbox CV of Altitude)
Altitude replied to Altitude's topic in MIDIbox of the Week
Good idea. Kinkos around here (print/copy chain) has very nice laser printers that they will print on whatever you want. I did my 9090 like that on to lasertran but this would be a good option also.. -
MIDIbox of the Week (MIDIbox CV of Altitude)
Altitude replied to Altitude's topic in MIDIbox of the Week
Here is another example of the vinyl (done better): -
MIDIbox of the Week (MIDIbox CV of Altitude)
Altitude replied to Altitude's topic in MIDIbox of the Week
Those are the Deltron Din jacks (both the midi and power). They are available in black and silver also. The classic style is used for power (same DIN5 as midi, had to make this not confusing, dont want to accidentally plug my power into a midi port.) is Deltron 16HR635 The round ones are: Deltron 651 Neither of them are cheap but they are very high quality so for me it's worth it. The vinyl is this stuff. It is fairly thick but reasonably easy to cut. It sticks like CRAZY though. I used it on my WTPA sampler and made a mistake the first time around and had to remove the label. It was a nightmare to get off, acetone, MEK, heat, practically nothing even made a dent to it. I eventually used a grinder with a stainless steel brush to get it all off. Printing is just like photo paper but it will bleed if you give it too much ink. It comes in white so if you want black, you just have to print in black. A "normal paper" setting on my Canon worked well for me so it was not that hard on the ink. The thing I am not too crazy about is the fact that it is super matte when printed and I have not found a good way to gloss up the finish (tried semi gloss sprays with mediocre results). Also, the trick to applying this stuff since air bubbles are a big problem is to spray the adhesive side with some water with a couple of drops of dish soap. This allows you to slide it around your panel into position but more importantly, you can roll out all the air from underneath it with a roller or squeegee. White on black is simply print black and the white is what's left. Key caps should work fine, the paper is super durable and water proof but a clear coat probably would be a good idea. Just make sure that you cut it out before you apply it to anything, since it is so thick cutting it after you apply it is difficult and it is easy to make angled cuts into it that leave a torn appearance -
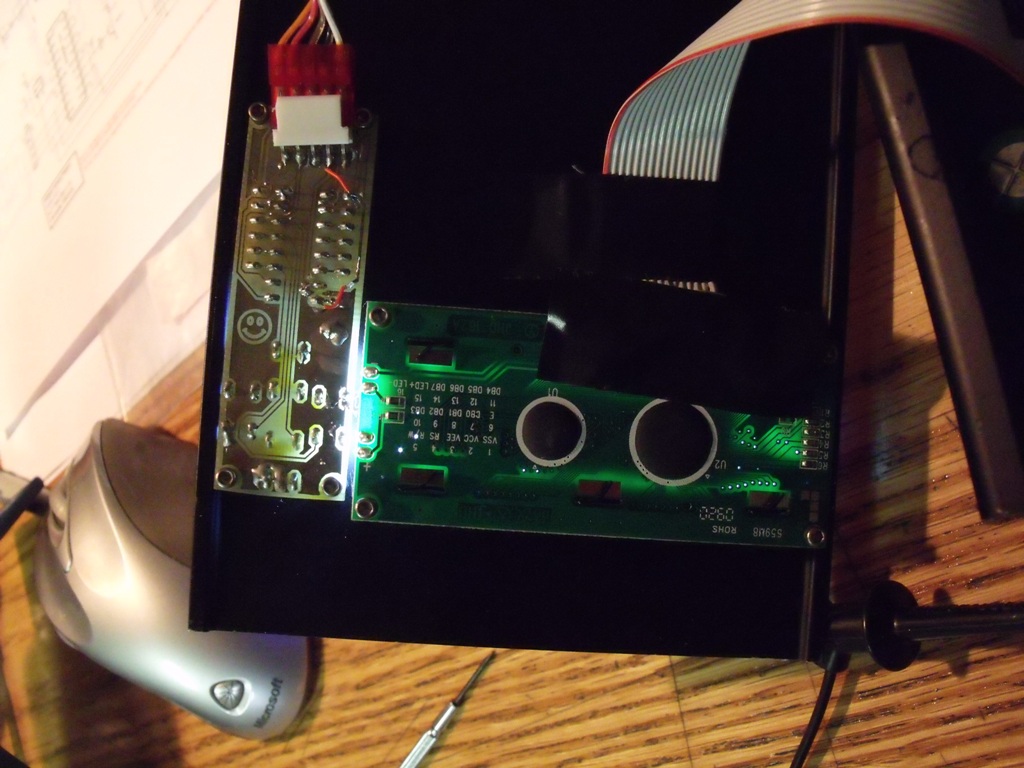
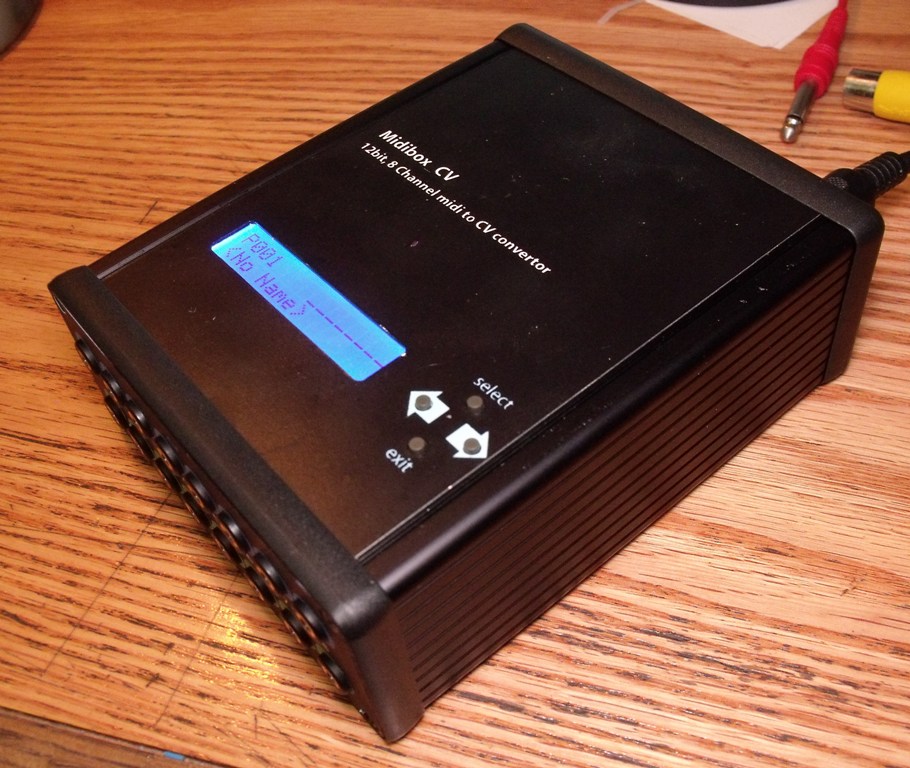
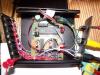
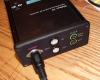
This was a side build that I was working for a long time and finally got motivated and finished this up. This is the MAX525 based CV. I etched a simple DIN1x with tact switches for the controls and packed everything into a chopped Hammond extruded enclosure. I had originally intended to put a bi-polar supply inside the case based on a PCB mount Amveco transformer but even with the original longer case, it was crazy tight for mains wiring so I opted for a regulated Elpac AC adapter which has a 0.6A +5 and 160 mA +/- 12 rails. This solved the space problem (at least in the case, the adapter is pretty big) and actually allowed me to cut the case down for a smaller package. The labeling is self done inkjet printable vinyl. The results are not to spectacular and this was my first go with the stuff. I have had much better results once I worked with it some more but did not feel like redoing this. Inside: My DIN1x board and LCD mounting: The Case: Thanks to TK & company for the great project!


-
Nope, didn't miss the page but did miss the relevant bit. Someone who does not quite have a handle on their MB808 functions gave me some not too accurate info about how it works. Thanks again, Raph
-
Thanks TK. That's the ticket. So it is save to pattern by hitting ALT/PATTERN and the 1-8 and 9-16 keys? Is there a primer outlines the MB808/SEQ basic functions? The documentation at the MB808 site doesn't exist and the one here although helpful does assume some familiarity with the SEQ in general..
-
So now that I am done with mine, I have noticed that it wont keep the patterns when powered off. I have tried both a 256 and 512 eeprom and the pic does go through format routine but it still wont hold the patterns. Any easy things I may be overlooking before I pull it out of the case?
-
You can use Illustrator, Correldraw, Freehand, or Inkscape (which is free) My file is available here: http://midiot.net/gm555a.eps and the general templates are here: http://www.ponoko.com/make-and-sell/downloads#templates
-
You can do them at ponoko reasonably cheap. I did mine in bambo but clear acrylic would not be any more expensive
-
Yep, this is the way to go. Search down Sasha's thread about making these, he posted templates on how to do it.
-
the HC49S is just the case, it can be parallel or series cut. You need to find out for sure which it is since series cut wont work
-
Dont need them to function.
-
Would the powers that be consider a pcb only group buy?
-
..
-
yeah, looking at your board. So i'll just call it at 20mm from the front panel and see if it will fit..
-
I'm more concerned about stuffing an ultracore or core32 in there and having it clear the mainboard. So does anything stick out past the 10mm spacer and PCB?